3. Configuration Walkthrough
3 Configuration Walkthrough
Activate the Plugin
Navigate to Plugins in your WordPress dashboard. Locate Registration Field Suite Lite and click Activate to enable the plugin. This step is crucial for incorporating custom fields into your WooCommerce registration form.
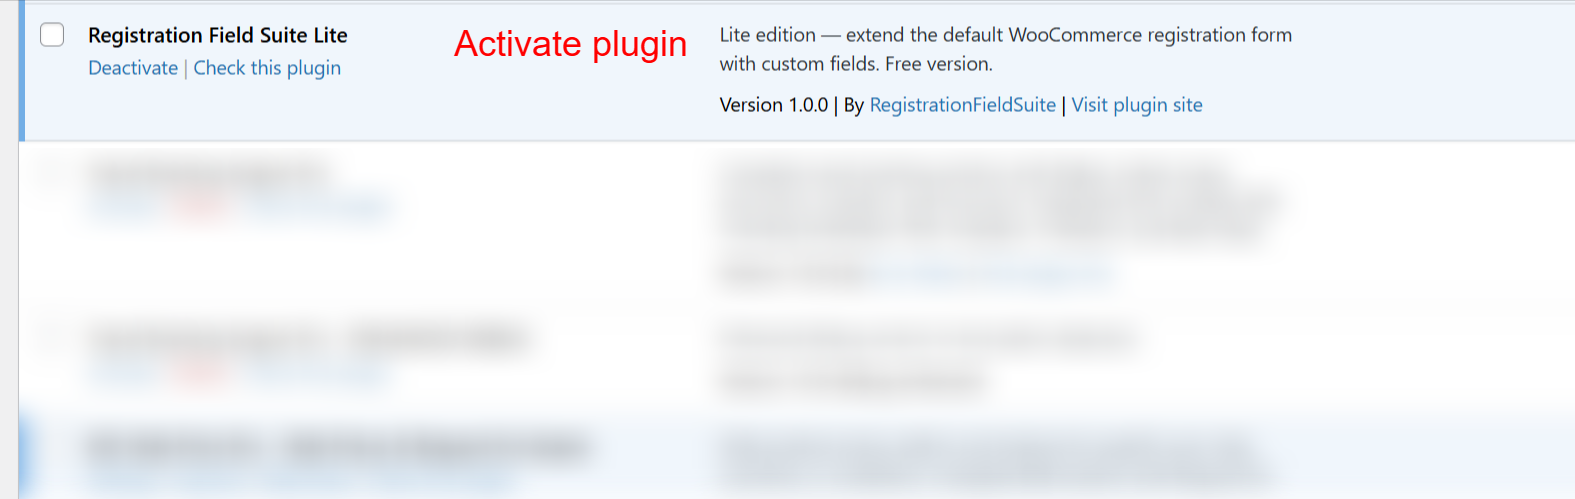
On this screen, you can activate the Registration Field Suite Lite plugin, which is essential for extending the functionality of WooCommerce registration forms. Activating the plugin enables you to add custom fields to the default WooCommerce registration form without needing additional customization.
Access Registration Field Suite
Once activated, find Registration Field Suite in the admin sidebar menu. Selecting this will open the form editor directly, ready for customization.
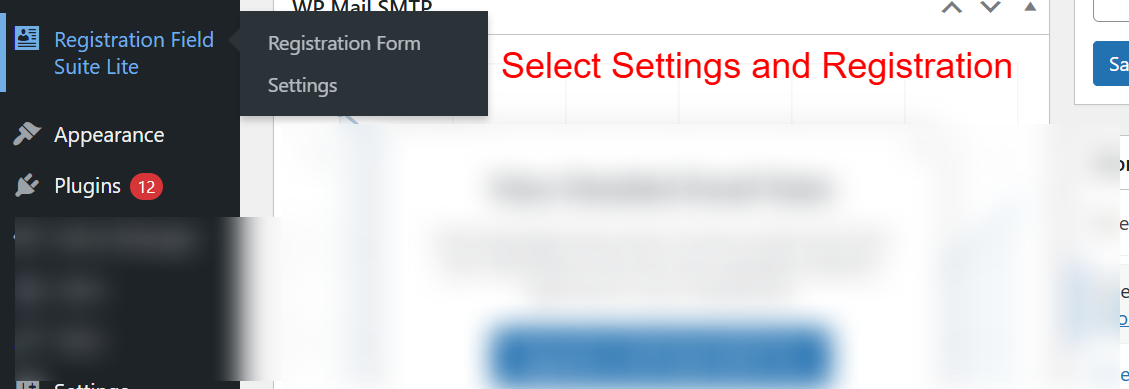
In this area of the WordPress admin dashboard, you can access the key features of the Registration Field Suite Lite plugin. You can navigate to ‘Registration Form’ to manage custom fields or to ‘Settings’ for configuring the plugin’s operational parameters.
Create or Edit Registration Form
Use the drag-and-drop builder to create or modify your registration form. Add fields by dragging them from the widget panel, then configure each one for the information you wish to collect from users.
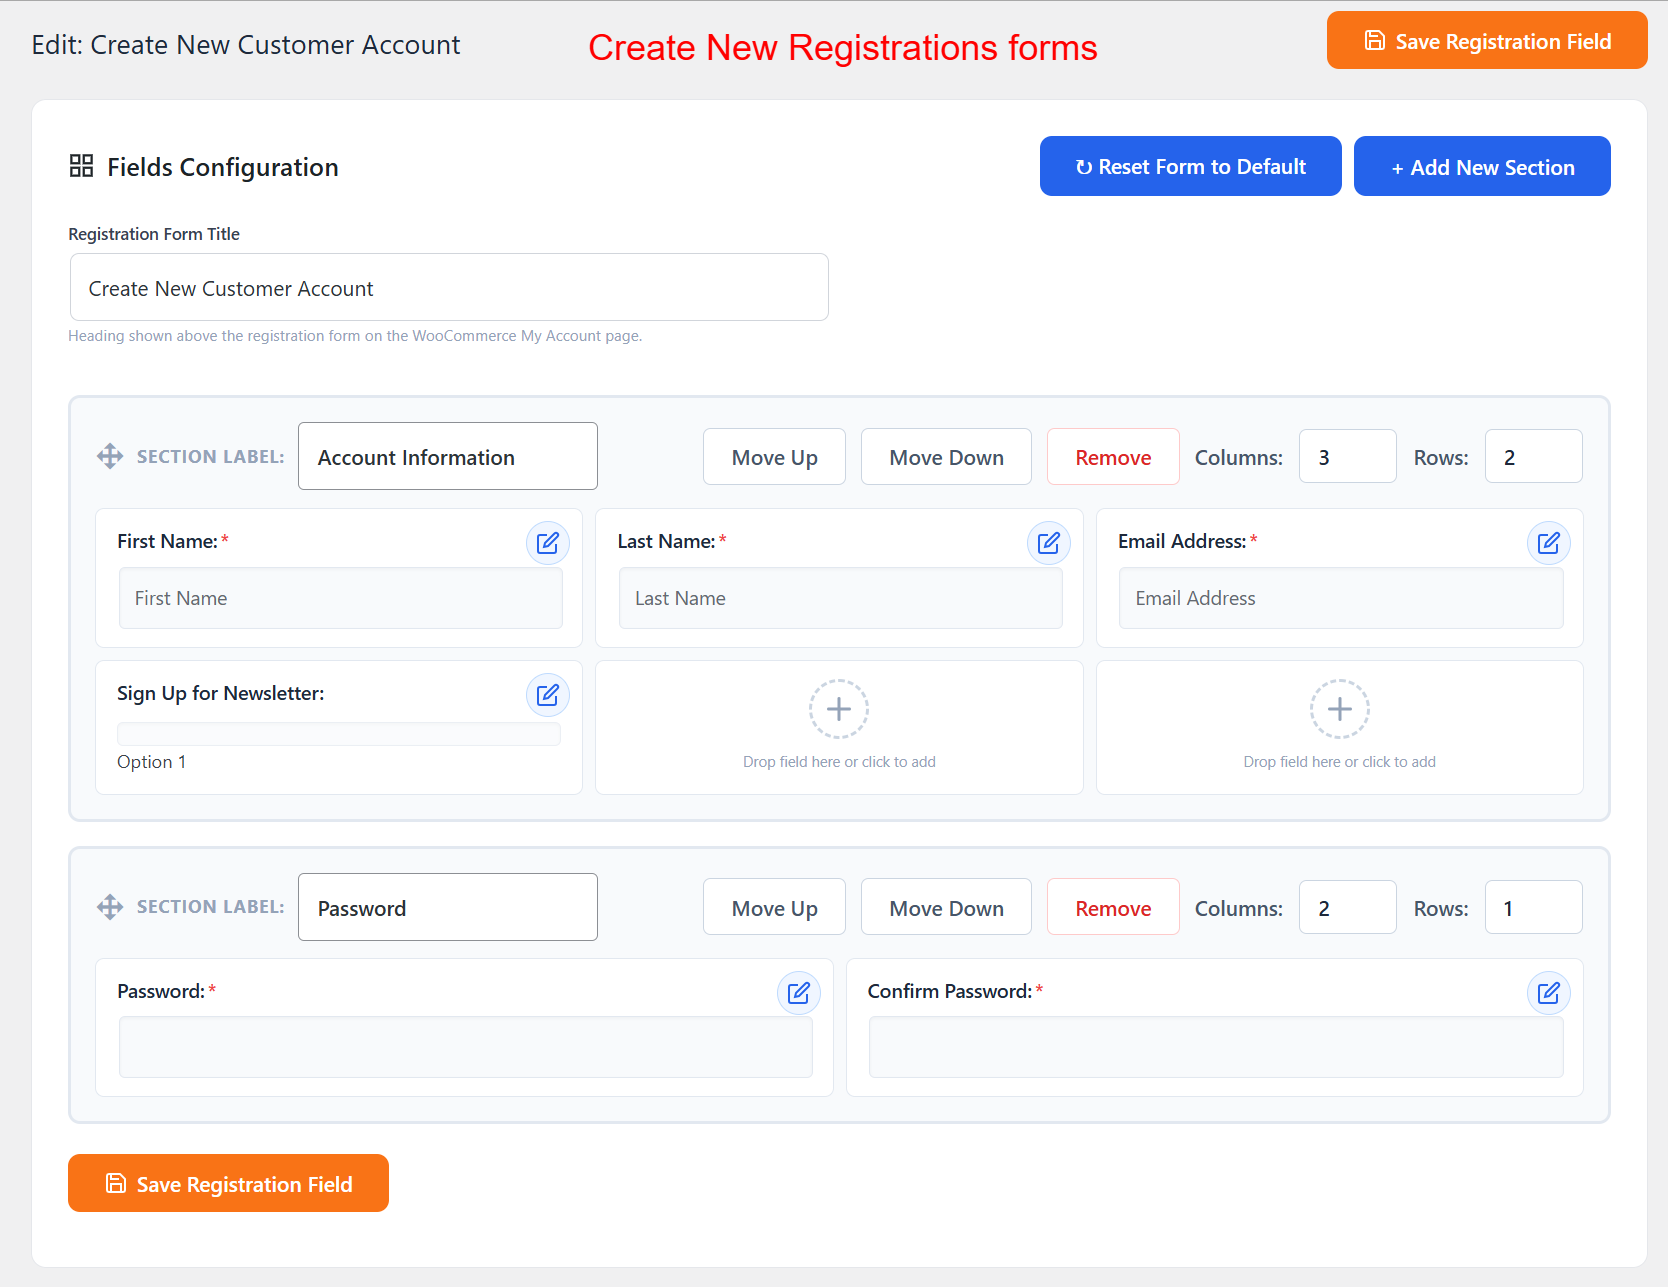
This screen is where you can design and customize the registration forms for your WooCommerce store. You can add new fields, arrange them in sections, and define how they display to users on the registration page, making it easier to collect necessary customer information.
Field Configuration
Select a field to configure its settings in the modal. Here you can set the Field Type, Label, Required status, and any Validation needed for the field, such as Email or Number.

On this screen, select the type of input field you want to add to your registration form. Options include input boxes, checkboxes, radio buttons, and more, allowing you to gather specific data types from registrants.
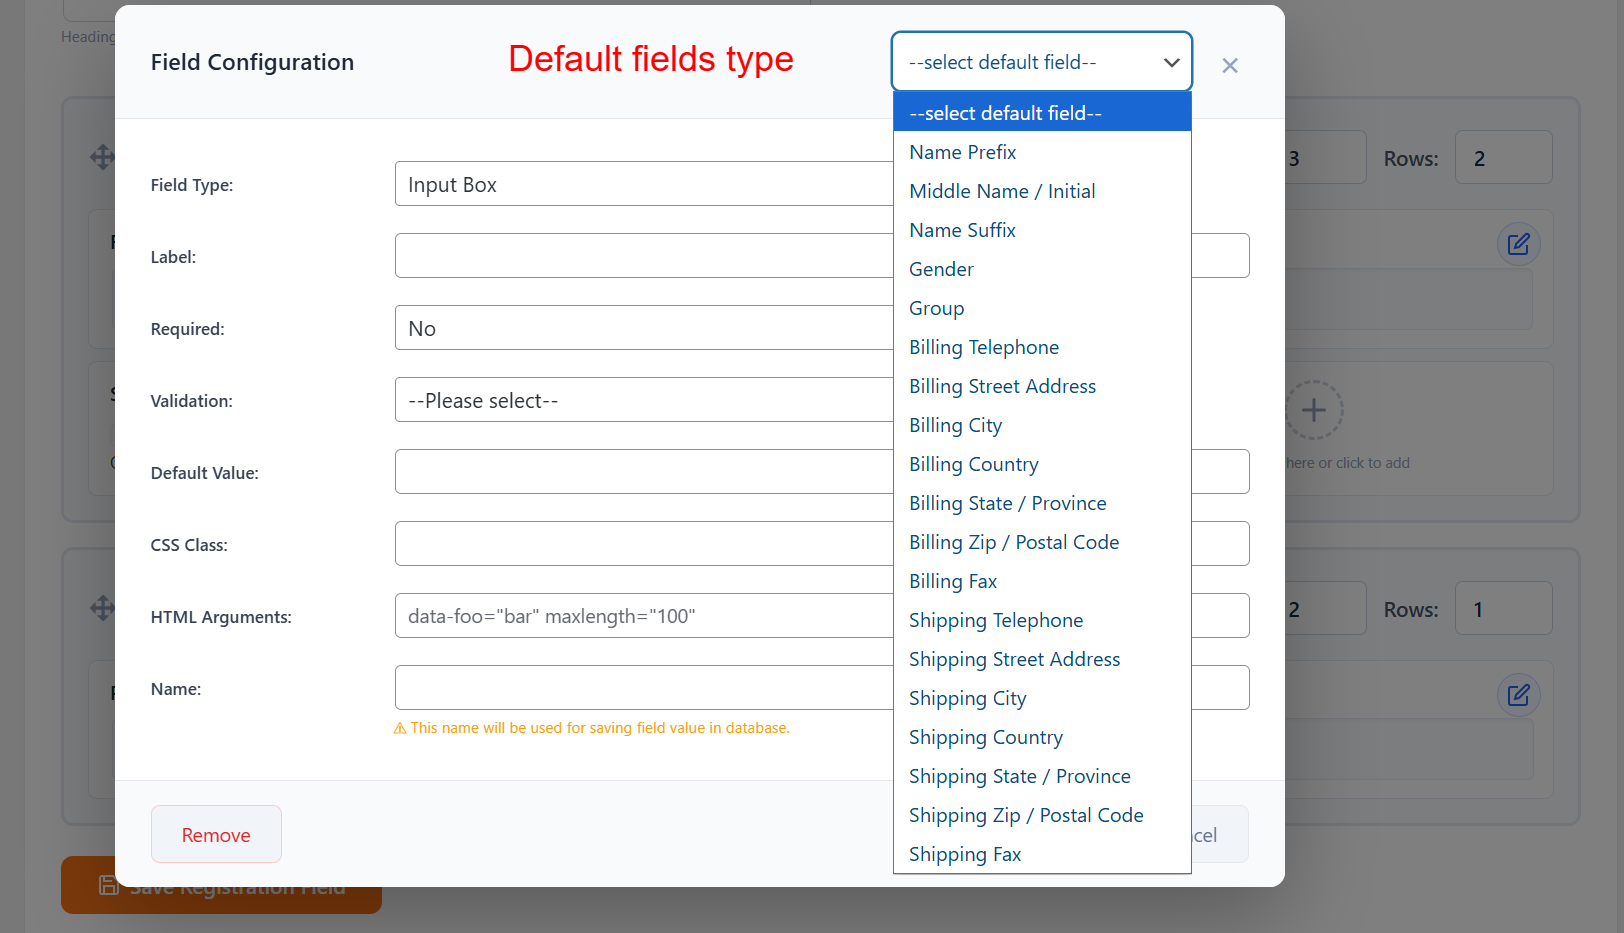
Here, choose from a list of default fields related to customer details, such as Name Prefix or Billing Information. This makes setting up comprehensive registration forms quick and straightforward.
Set Field Validations
Apply validations such as Required, Email, or Date to ensure accurate data entry. This reduces errors and improves data quality.
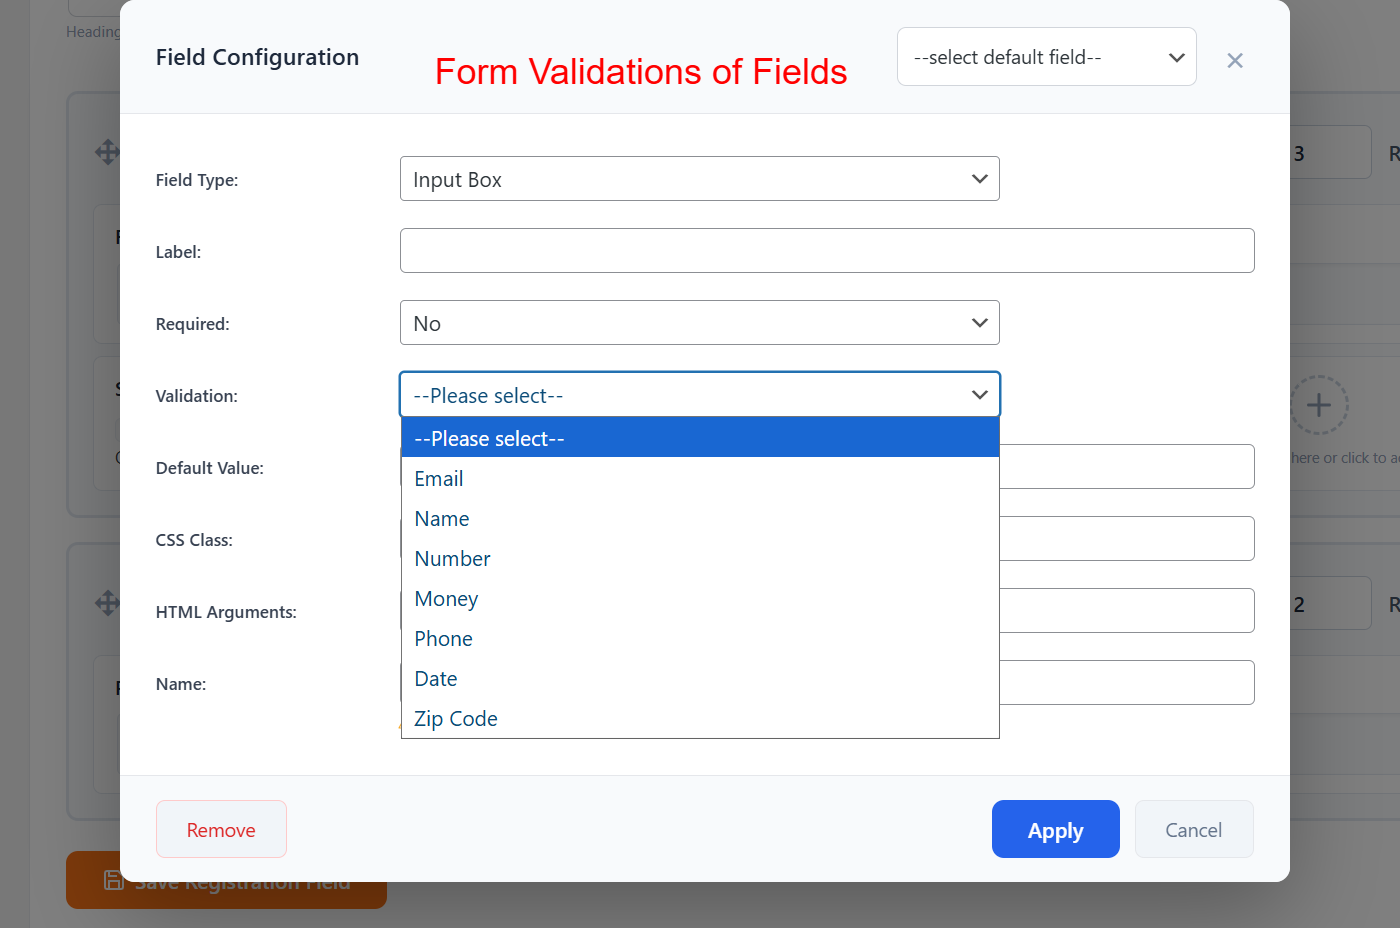
This part of the configuration allows you to apply validation rules to your form fields, ensuring that the data entered by users complies with specific criteria, such as format or type, enhancing form reliability and data accuracy.
Organize Form Layout
Use the drag-and-drop feature to organize fields into sections, arranging them using the grid options for visually clear layouts that fit your form’s design.
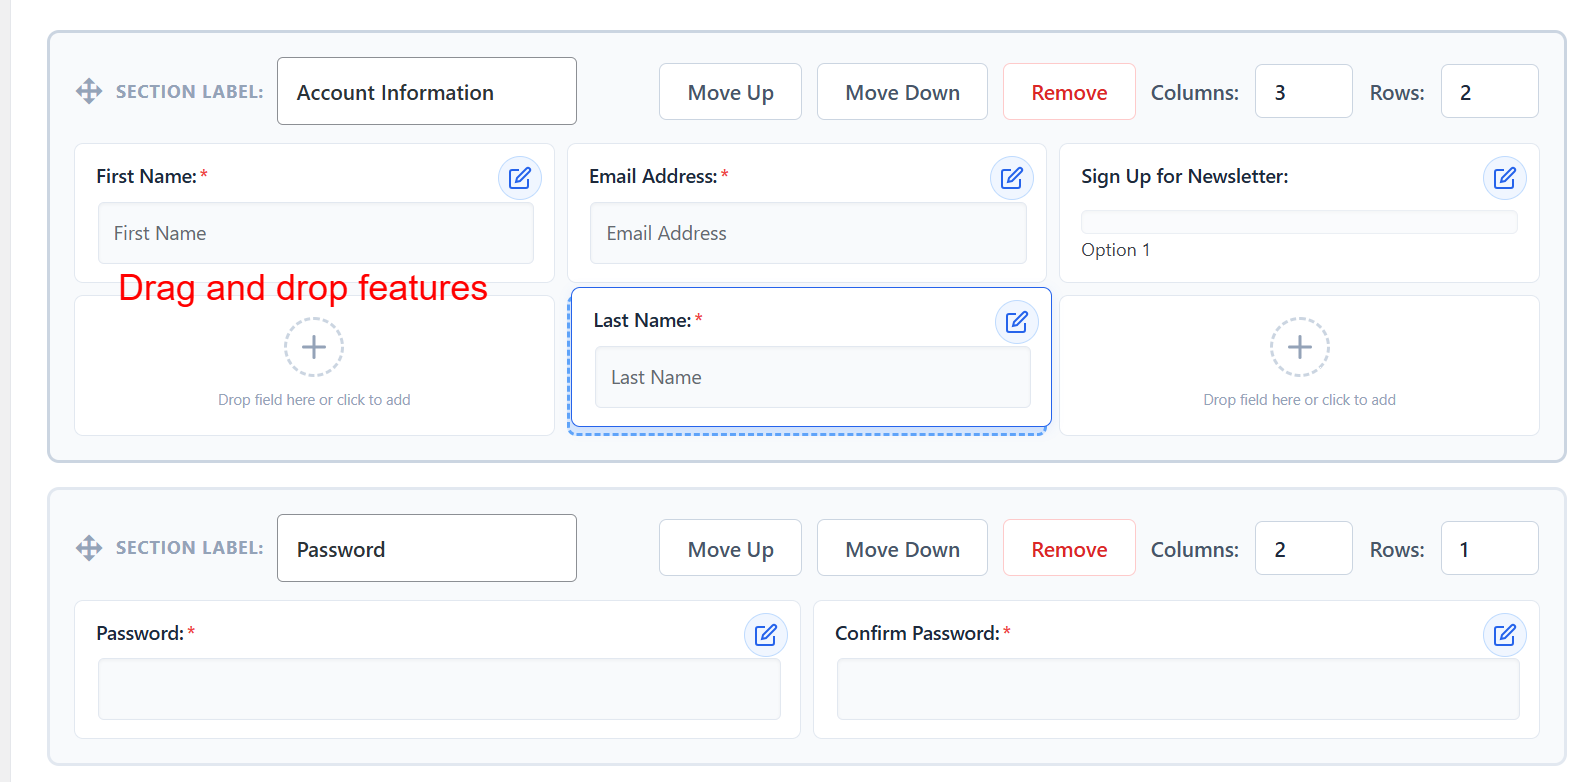
In this configuration screen, you can customize the WooCommerce registration form by dragging and dropping fields within sections. Each section features controls to move or delete fields, making it easy to tailor the form to your specific needs.
Save Changes
After configuring your fields, click Save Registration Field to update and publish your form changes, ensuring they reflect immediately on the frontend.
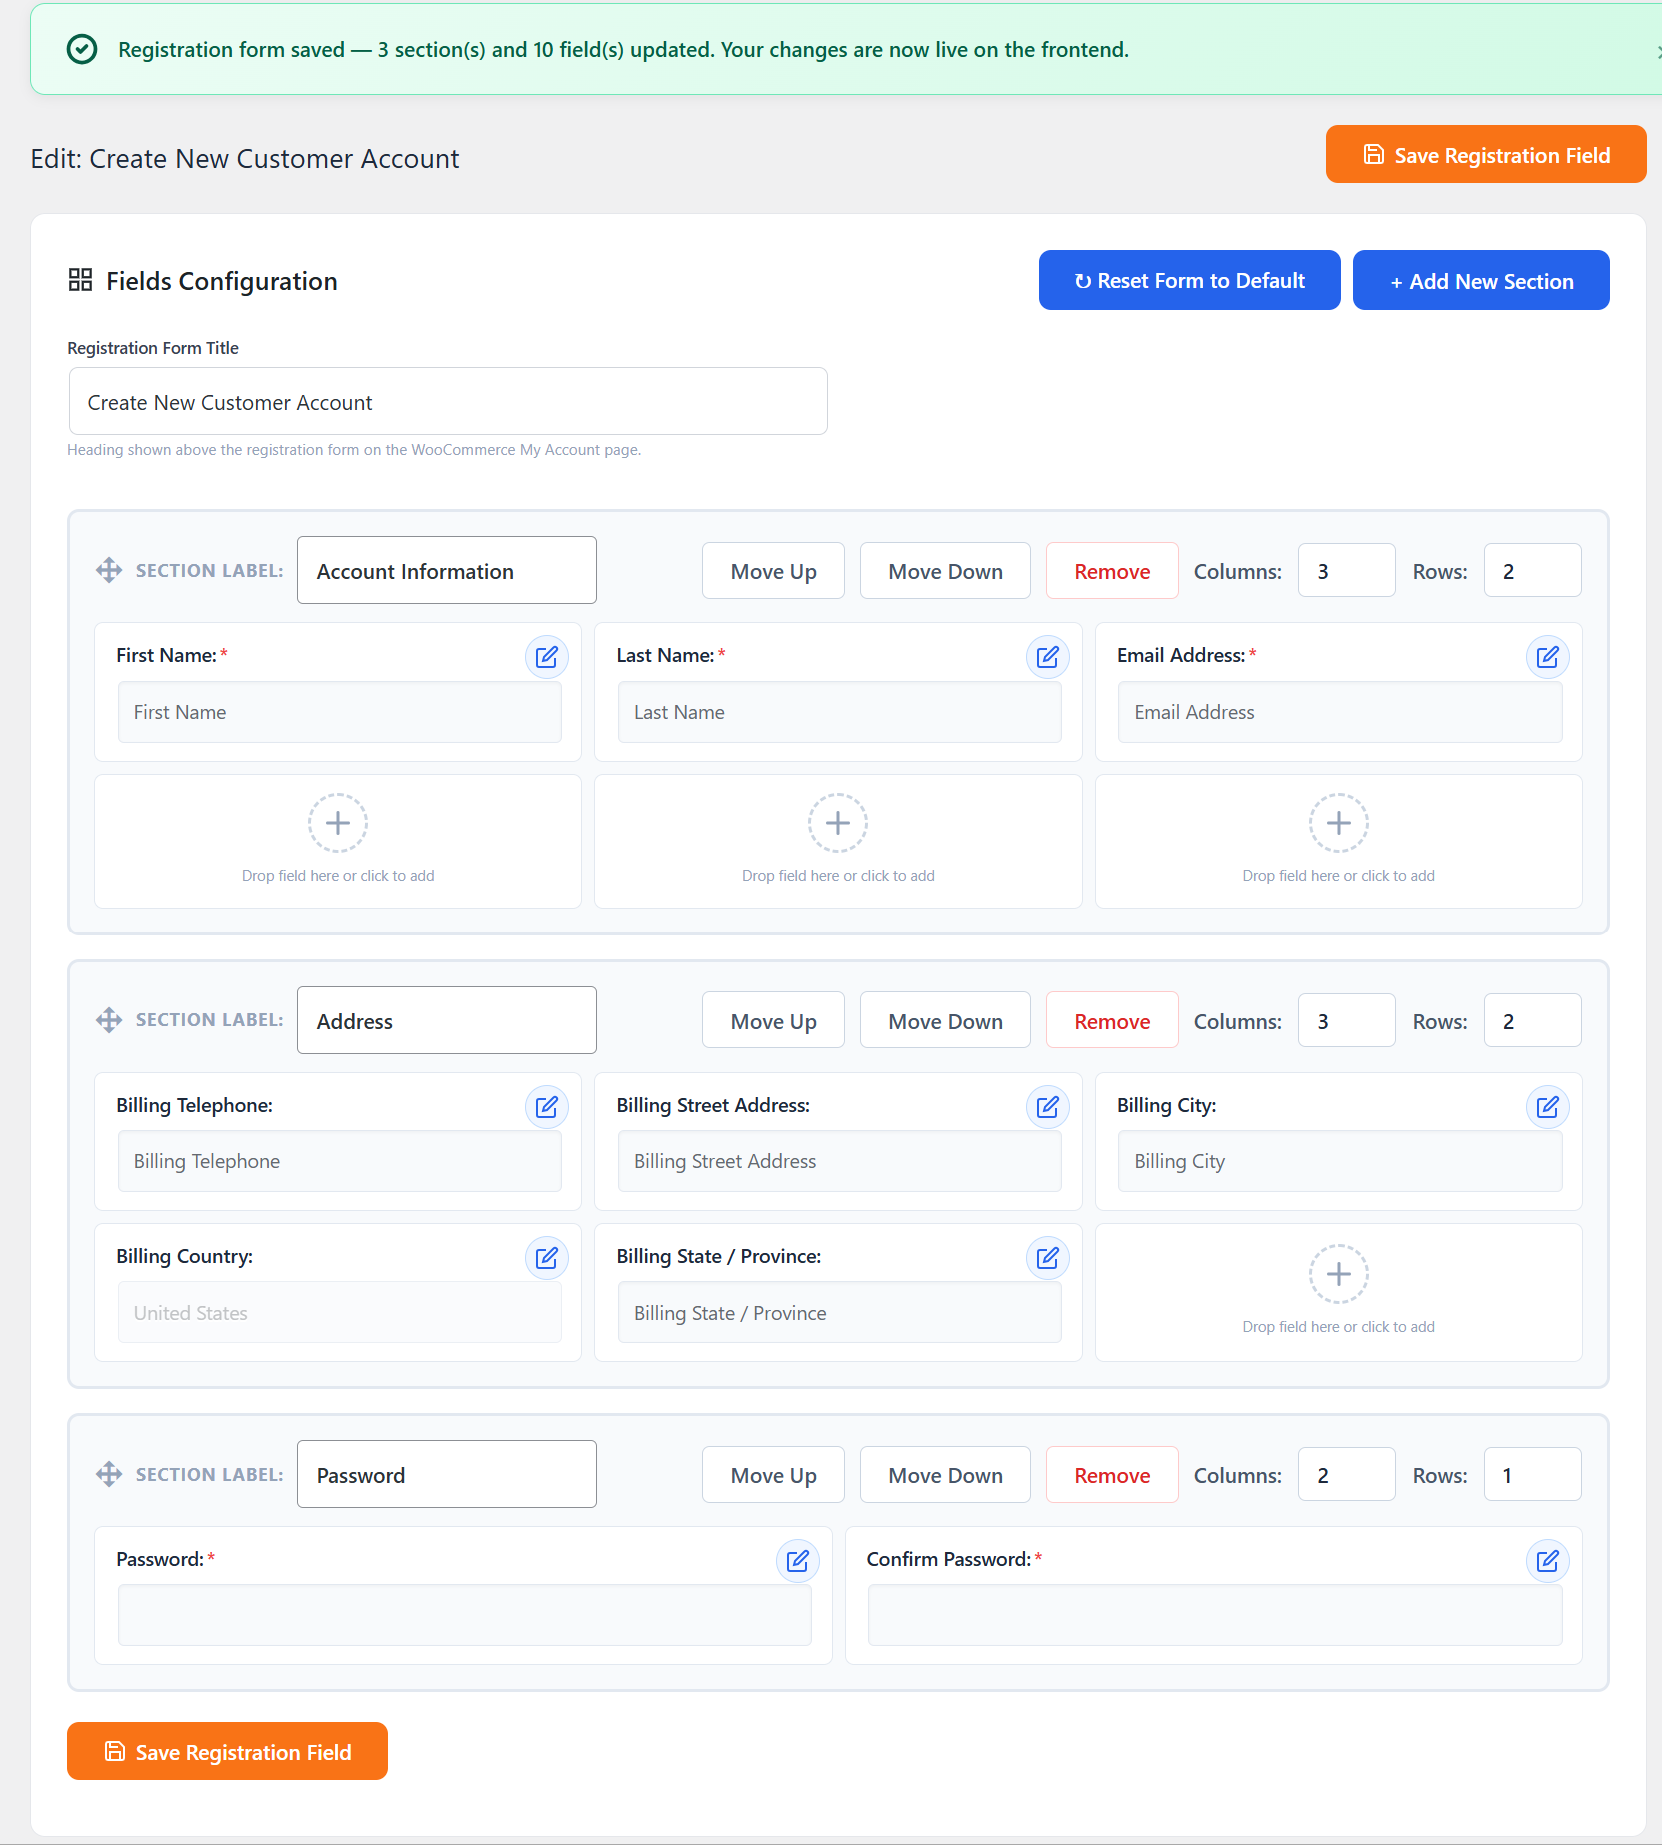
This screen confirms that the changes made to the registration form have been saved and are live on the frontend. It shows the entire form structure, including newly added sections and edited fields, ensuring users have full control over the form’s layout.
Create Additional Sections
For more detailed forms, create new sections by clicking Create New Section. Tailor these sections to specific kinds of information you wish to gather.
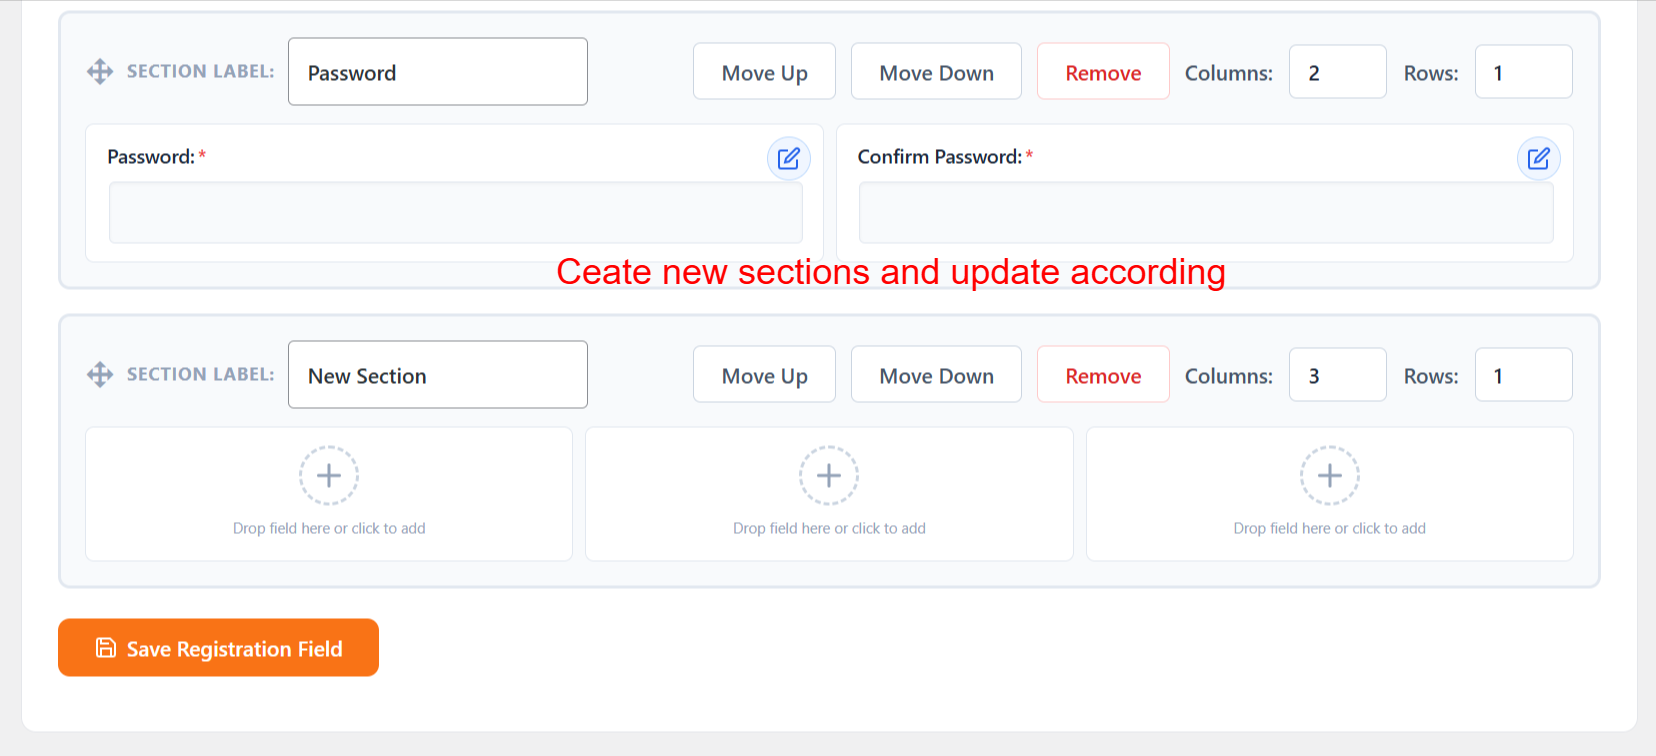
Here, users can add new sections to the registration form, allowing further customization. The interface supports moving sections, adding new fields, and deleting unwanted sections, creating a flexible registration form tailored to varying user requirements.
Review Settings
Go to Settings under the Registration Field Suite to manage overall plugin features, enabling or disabling fields site-wide as needed.
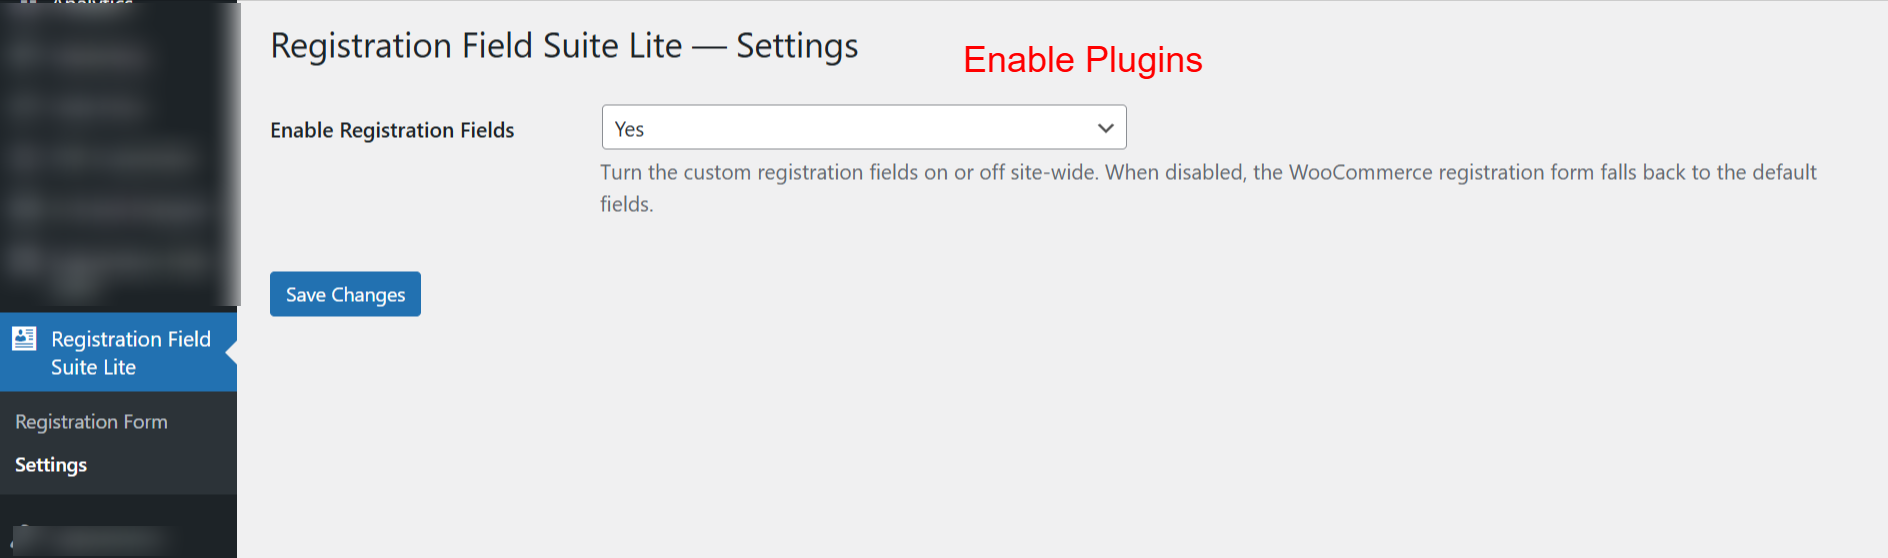
This settings page allows you to enable or disable the Registration Field Suite Lite plugin’s custom fields across your site. Choosing ‘Yes’ ensures that the custom fields are visible and functional on your WooCommerce registration forms.