Step-by-Step Screenshot Reference
Every captured screen in setup order. Click any image to open the full-size version in a new tab.
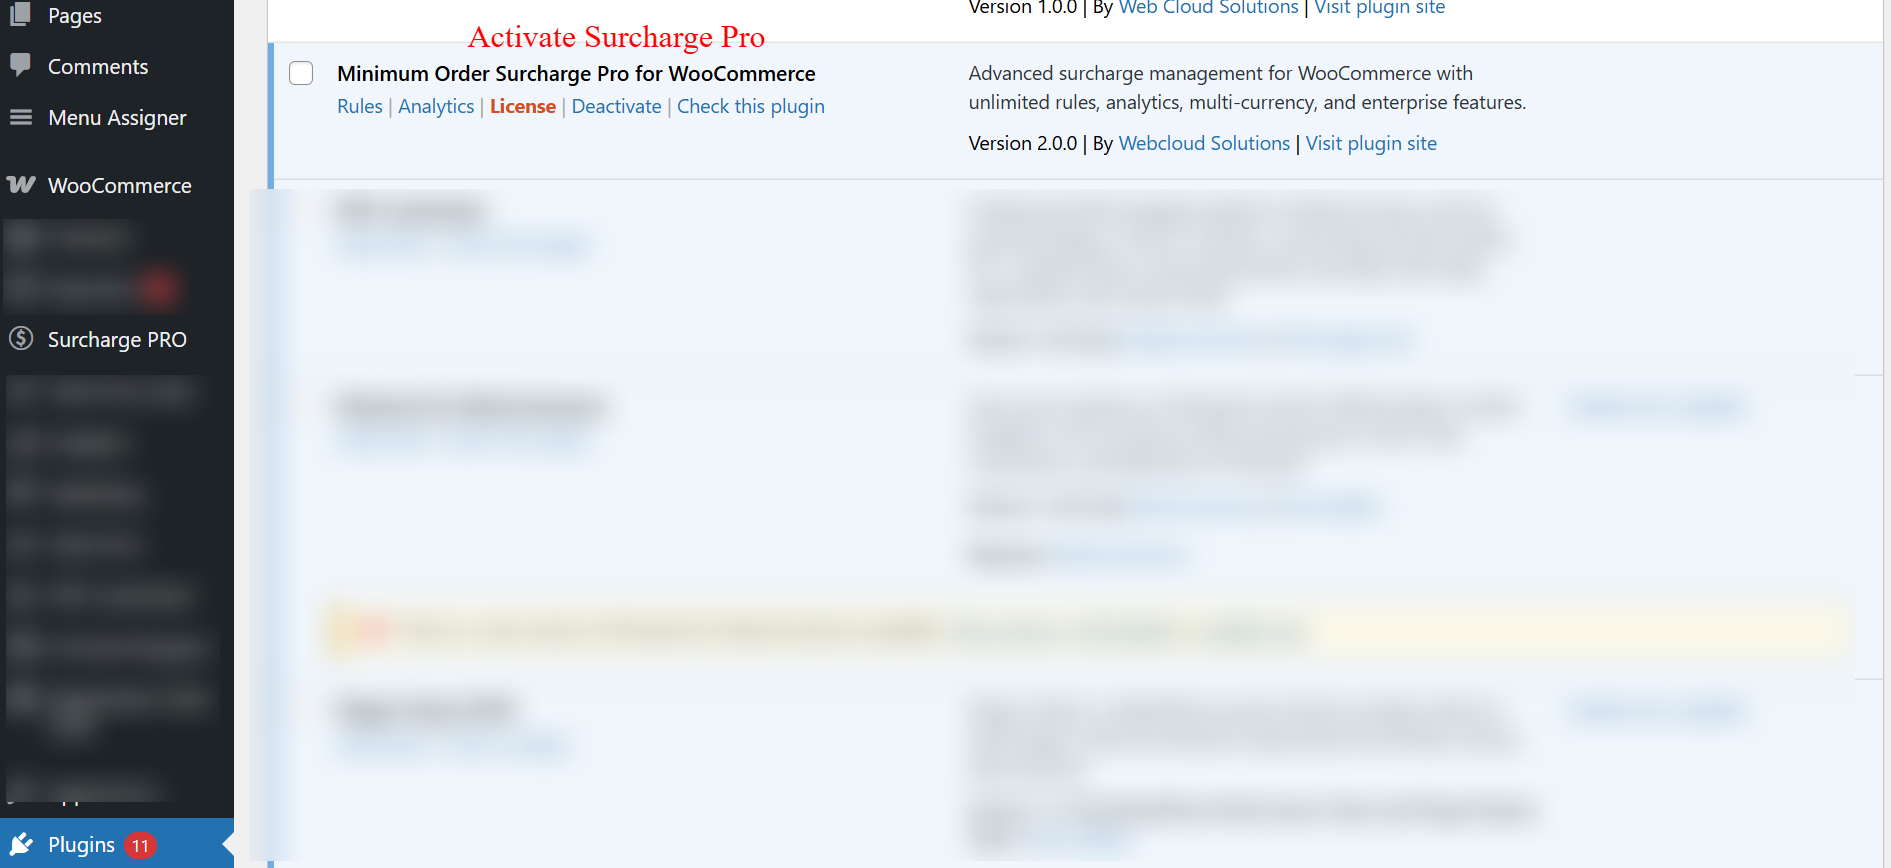
wp-admin: Plugin Activation Overview
What this shows: This screen shows the ‘Minimum Order Surcharge Pro for WooCommerce’ plugin entry. The entry includes activation status, version numbers, and links to ‘Rules’, ‘Analytics’, ‘License’, ‘Deactivate’, and ‘Check this plugin’.
On this screen, administrators can view the current status of the ‘Minimum Order Surcharge Pro for WooCommerce’ plugin. It highlights essential actions like activating the plugin to unlock its potential for managing advanced surcharges. Activating the plugin is crucial for access to unlimited rules, analytics, and other enterprise features.
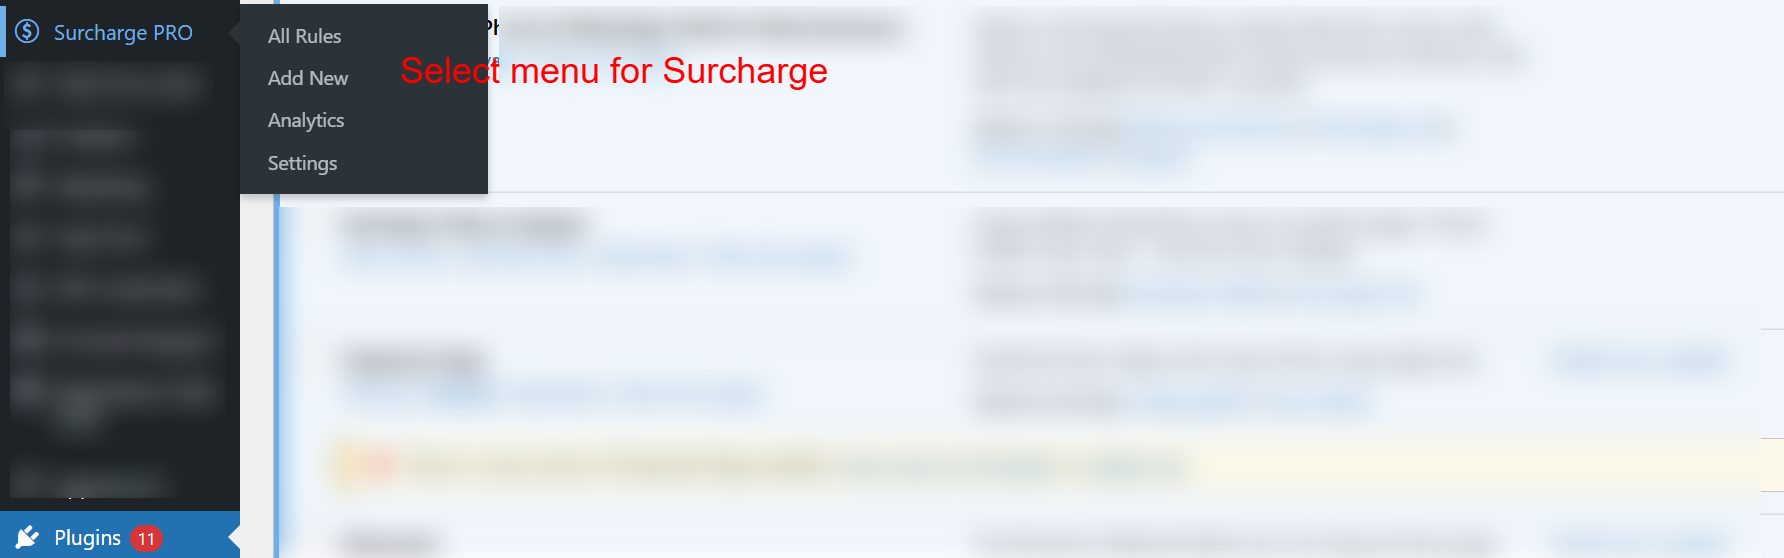
wp-admin: Surcharge PRO Menu Navigation
What this shows: The Surcharge PRO menu is expanded to show ‘All Rules’, ‘Add New’, ‘Analytics’, and ‘Settings’ options.
This navigation menu allows administrators to access various plugin features. ‘All Rules’ lists existing surcharge rules, ‘Add New’ lets you create a new rule, ‘Analytics’ provides insights, and ‘Settings’ allows configuration tweaks. Efficient navigation through these options is essential for setting up and managing surcharges effectively.
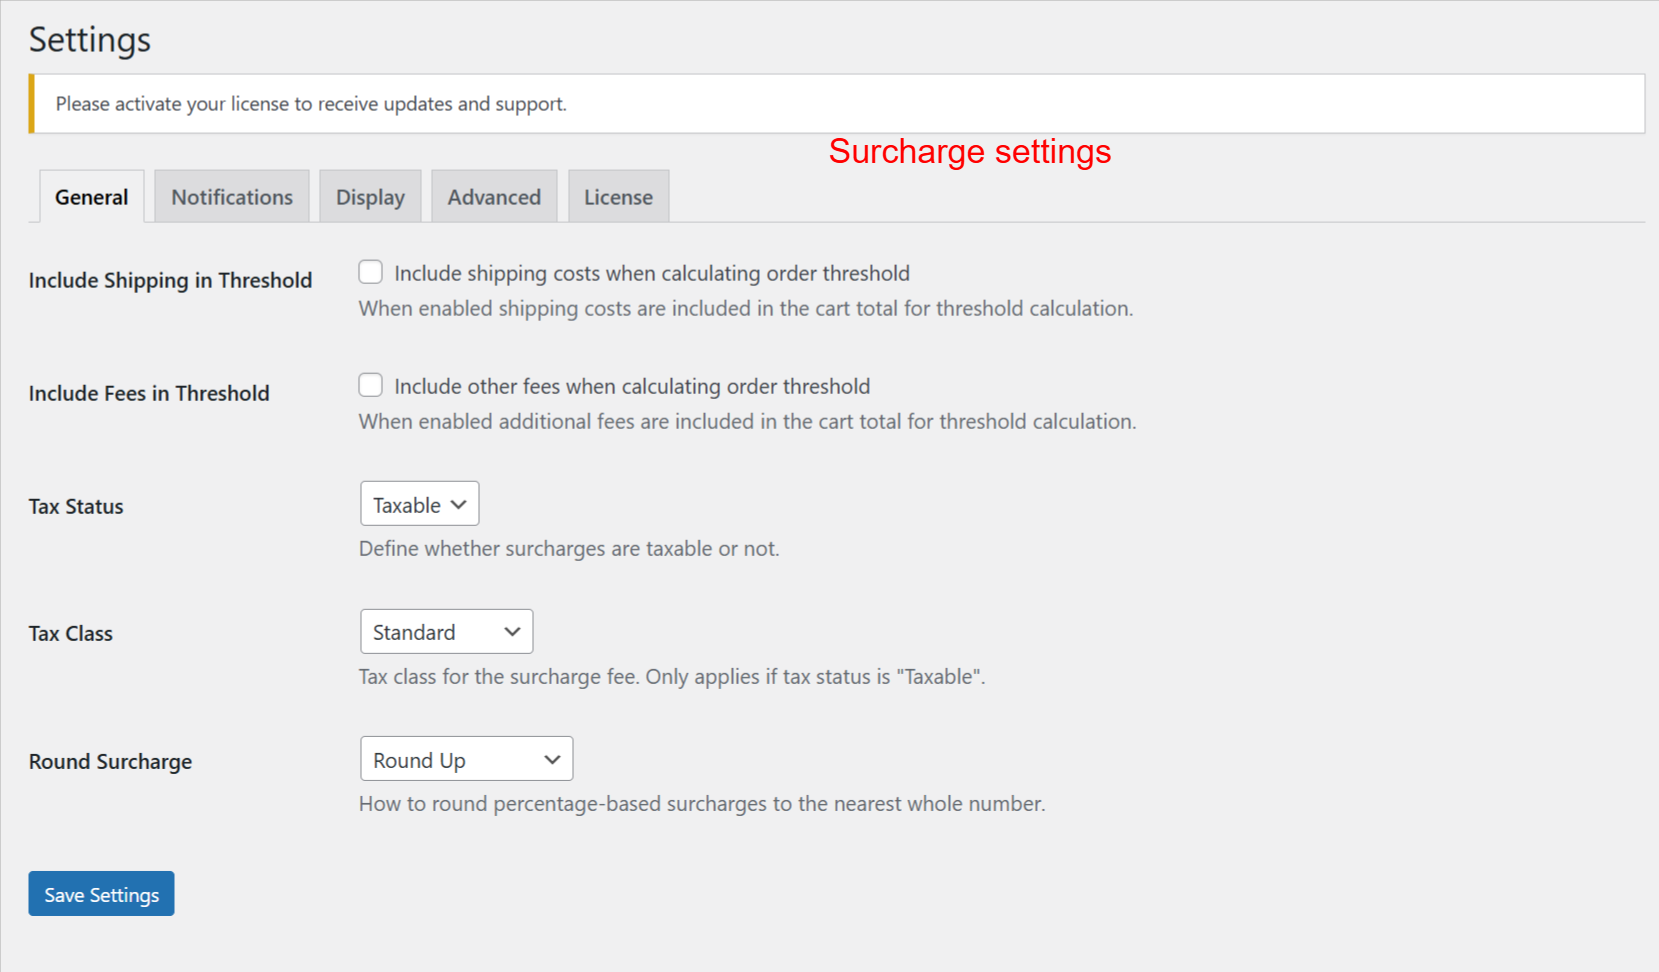
wp-admin: Surcharge General Settings
What this shows: This settings page includes options like ‘Include Shipping in Threshold’, ‘Include Fees in Threshold’, ‘Tax Status’, and ‘Round Surcharge’. There is a ‘Save Settings’ button at the bottom.
This settings screen allows administrators to configure general parameters for surcharges, including whether shipping or additional fees are considered in the threshold. Options for tax treatment and rounding also ensure that surcharges are applied correctly. Configuring these settings is critical for accurate surcharge calculations.
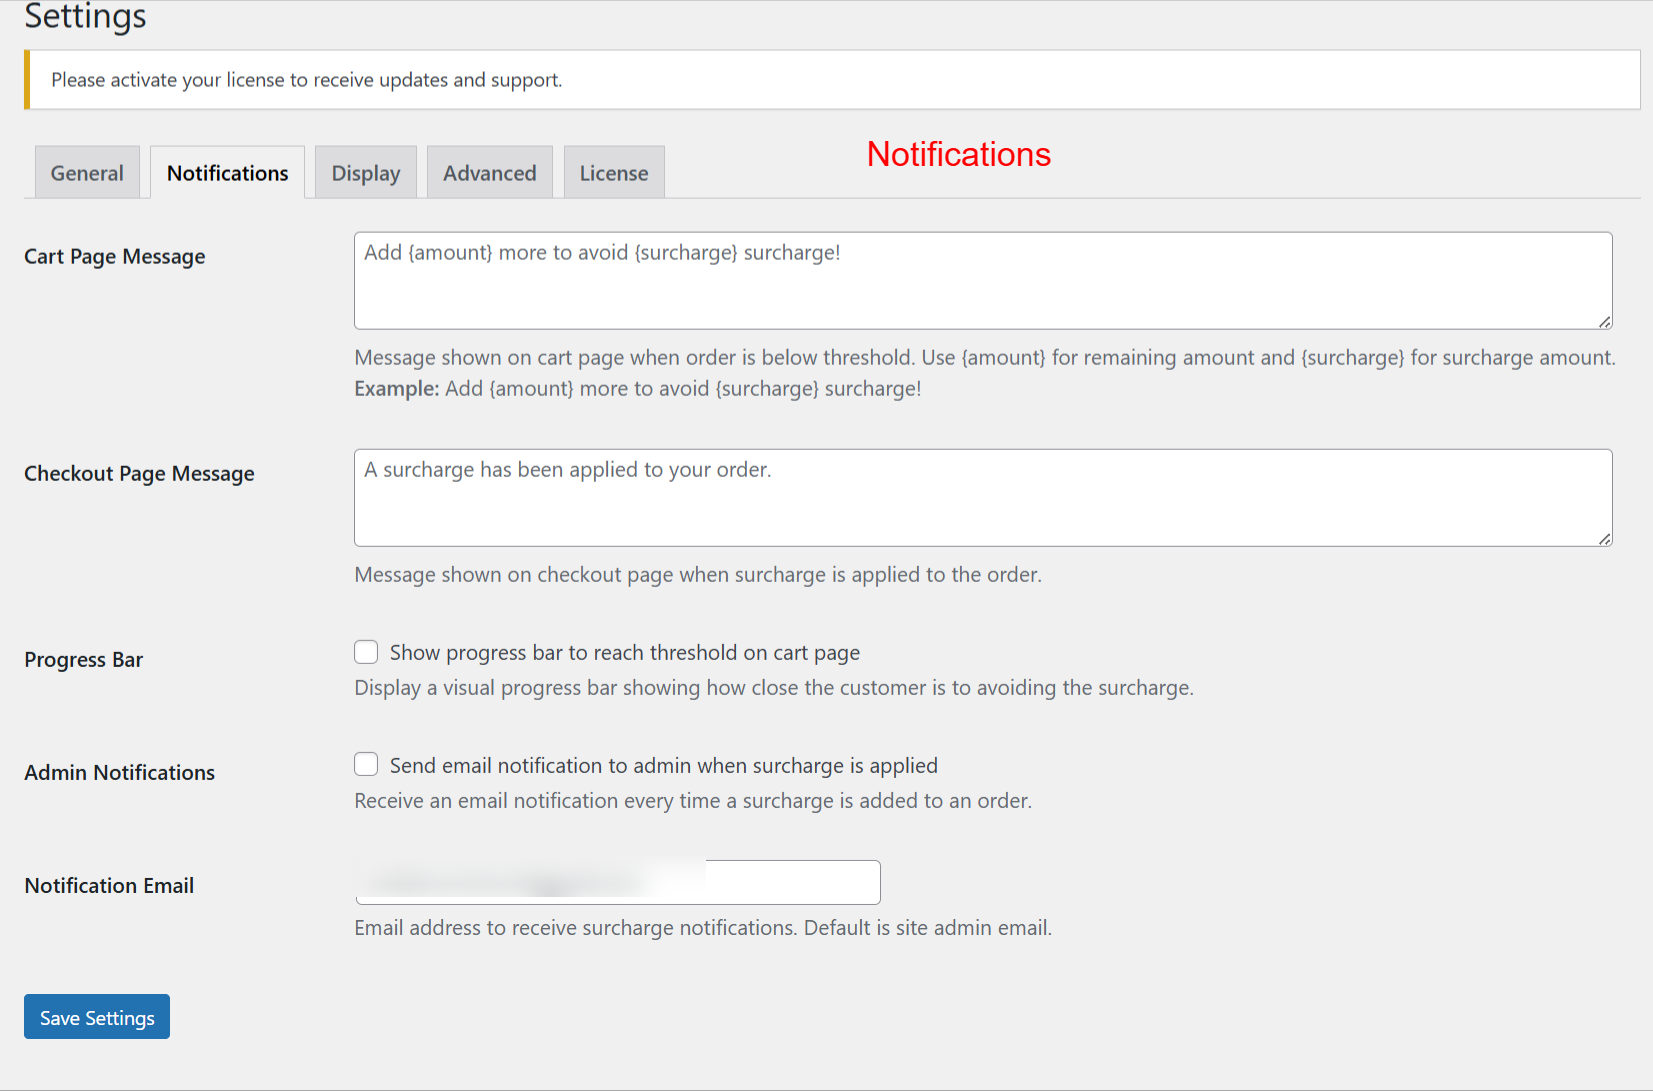
wp-admin: Surcharge Notification Settings
What this shows: Notification settings include text fields for ‘Cart Page Message’, ‘Checkout Page Message’, and options like ‘Progress Bar’ and ‘Admin Notifications’.
Administrators use this screen to customize messaging related to surcharges. Customizing the cart and checkout messages helps inform customers about surcharge conditions and adjustments. Enhanced communication through notifications can improve customer understanding of surcharges applied to their orders.
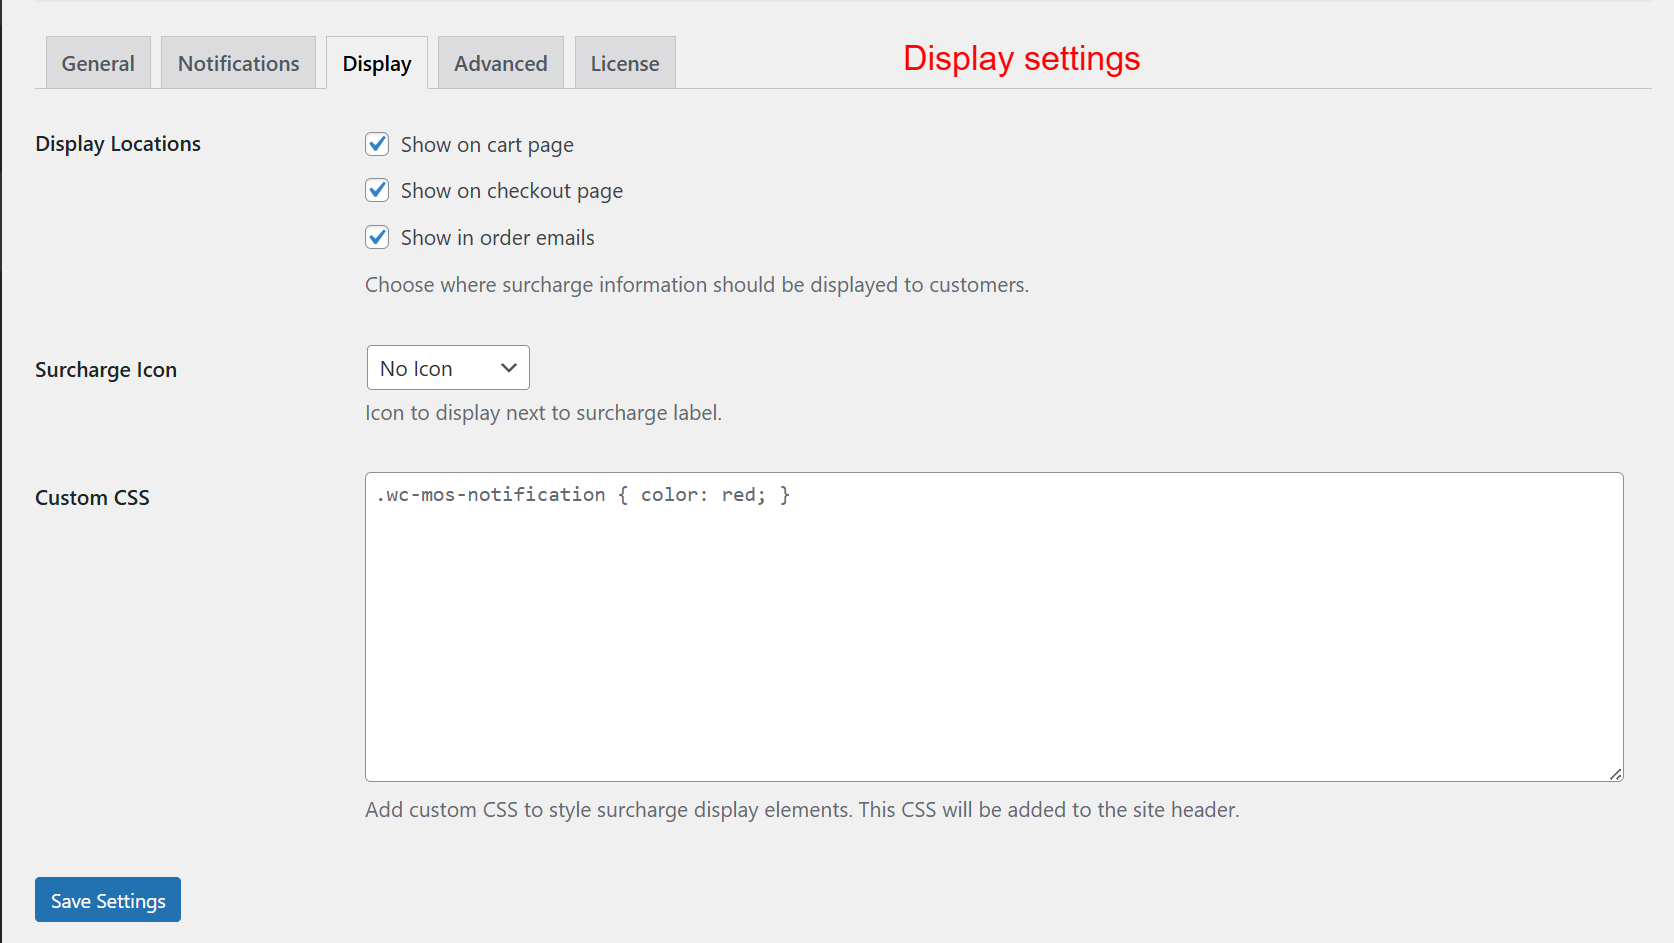
wp-admin: Surcharge Display Settings
What this shows: Display settings offer options for ‘Display Locations’, ‘Surcharge Icon’, and a ‘Custom CSS’ field. ‘Save Settings’ is available.
Adjust display parameters to dictate where surcharge information appears to customers—on the cart page, checkout, or through emails. Set custom CSS for styling purposes. These settings are vital for creating a seamless customer experience by ensuring surcharge information is accessible and visually consistent.
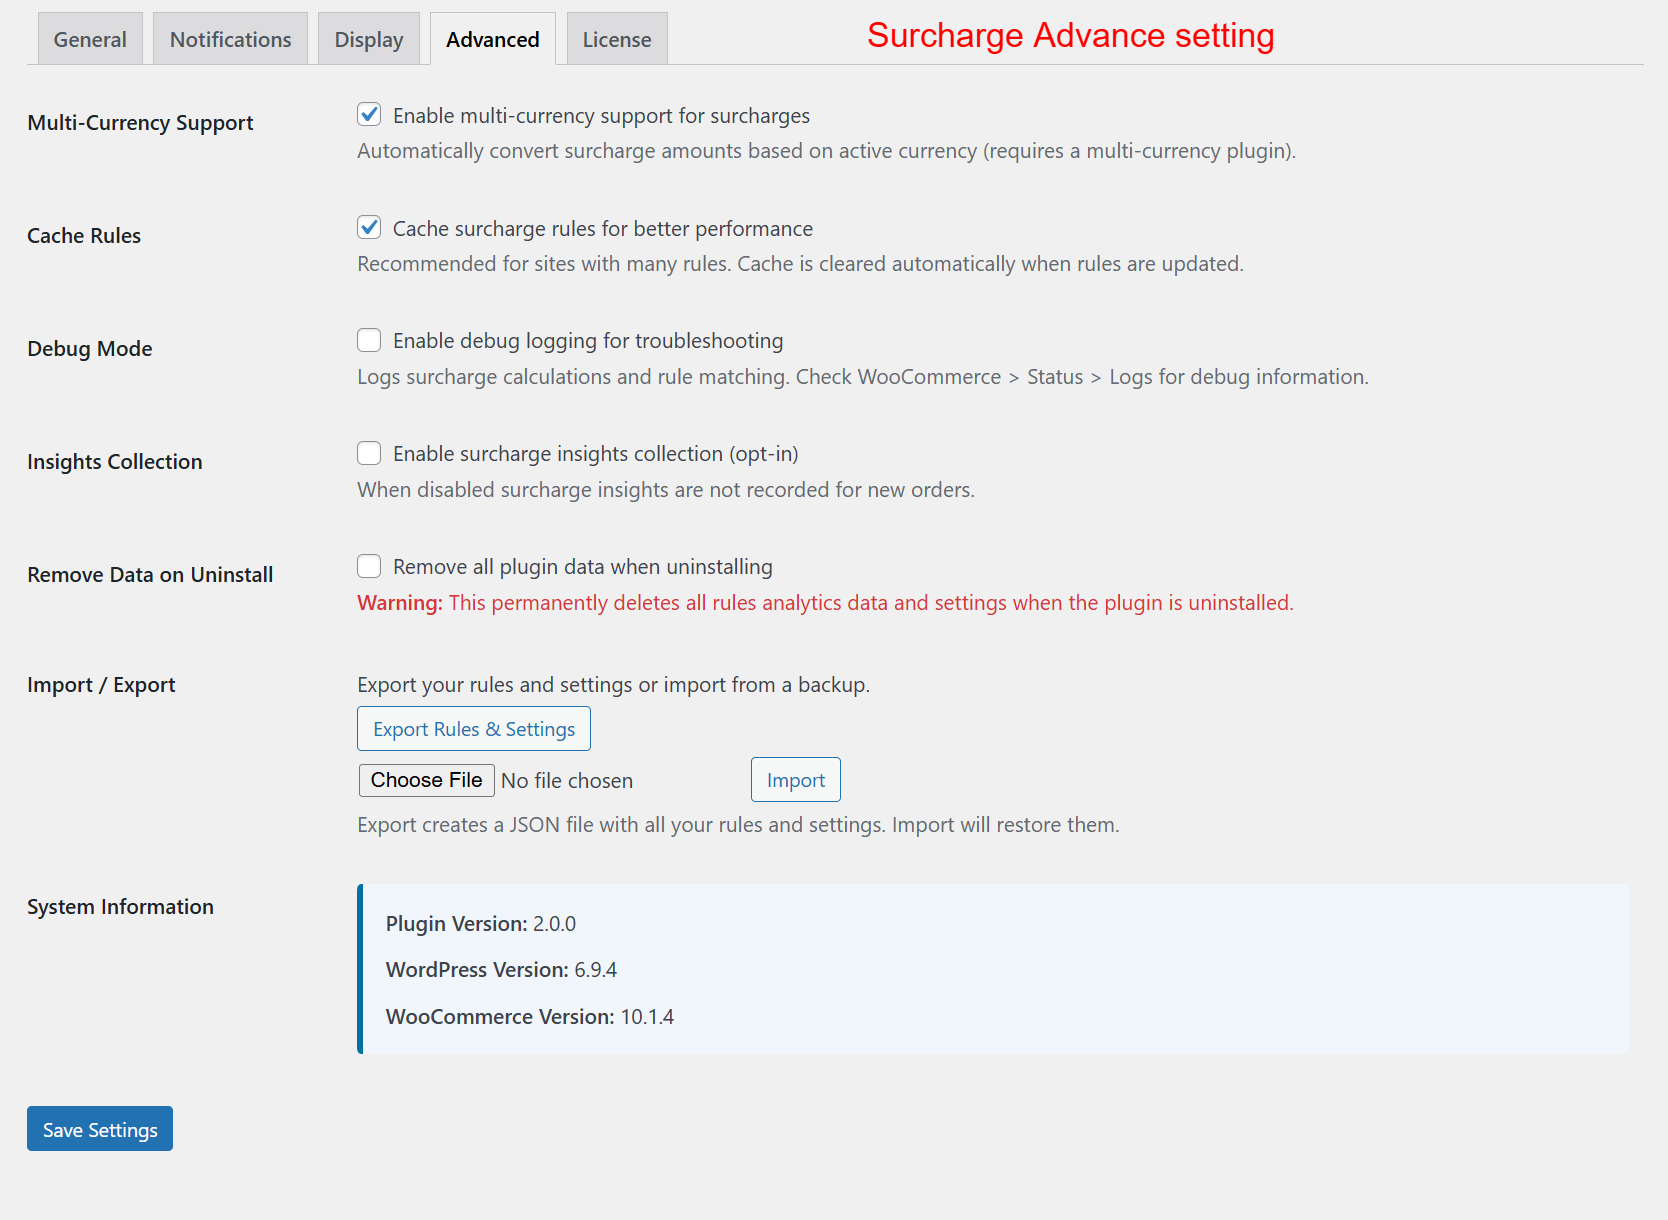
wp-admin: Surcharge Advanced Settings
What this shows: Advanced settings include ‘Multi-Currency Support’, ‘Cache Rules’, ‘Debug Mode’, and ‘Remove Data on Uninstall’. Import/export options are available, alongside system information.
Utilize these advanced settings to optimize the plugin’s performance. Enable multi-currency support, manage data efficiency with caching, and safeguard your installation’s integrity with import/export features. These settings help tailor the plugin’s capabilities to meet complex business needs.
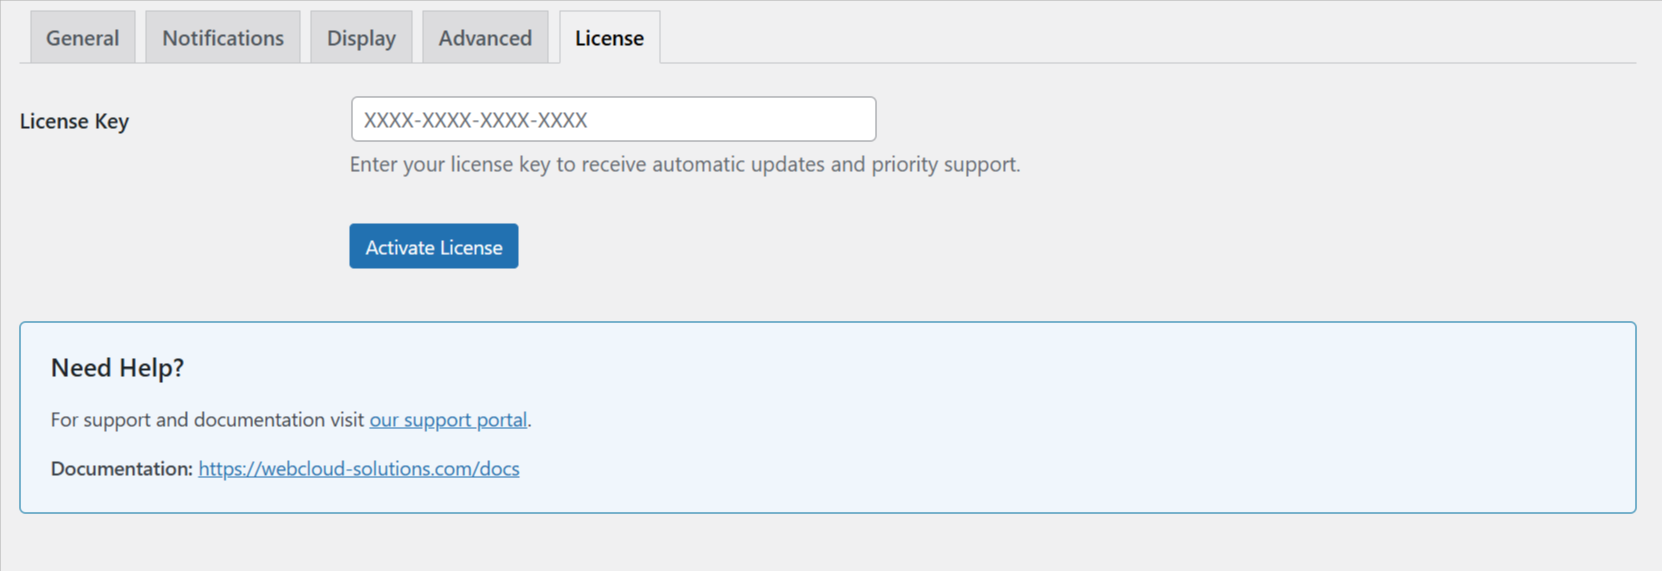
wp-admin: License Key Activation
What this shows: This screen includes a field for ‘License Key’ entry and an ‘Activate License’ button. Support and documentation links are provided.
Enter your license key here to activate full plugin functionality and access updates and support. Licensing ensures that users get the latest features and maintenance necessary for optimal plugin performance.
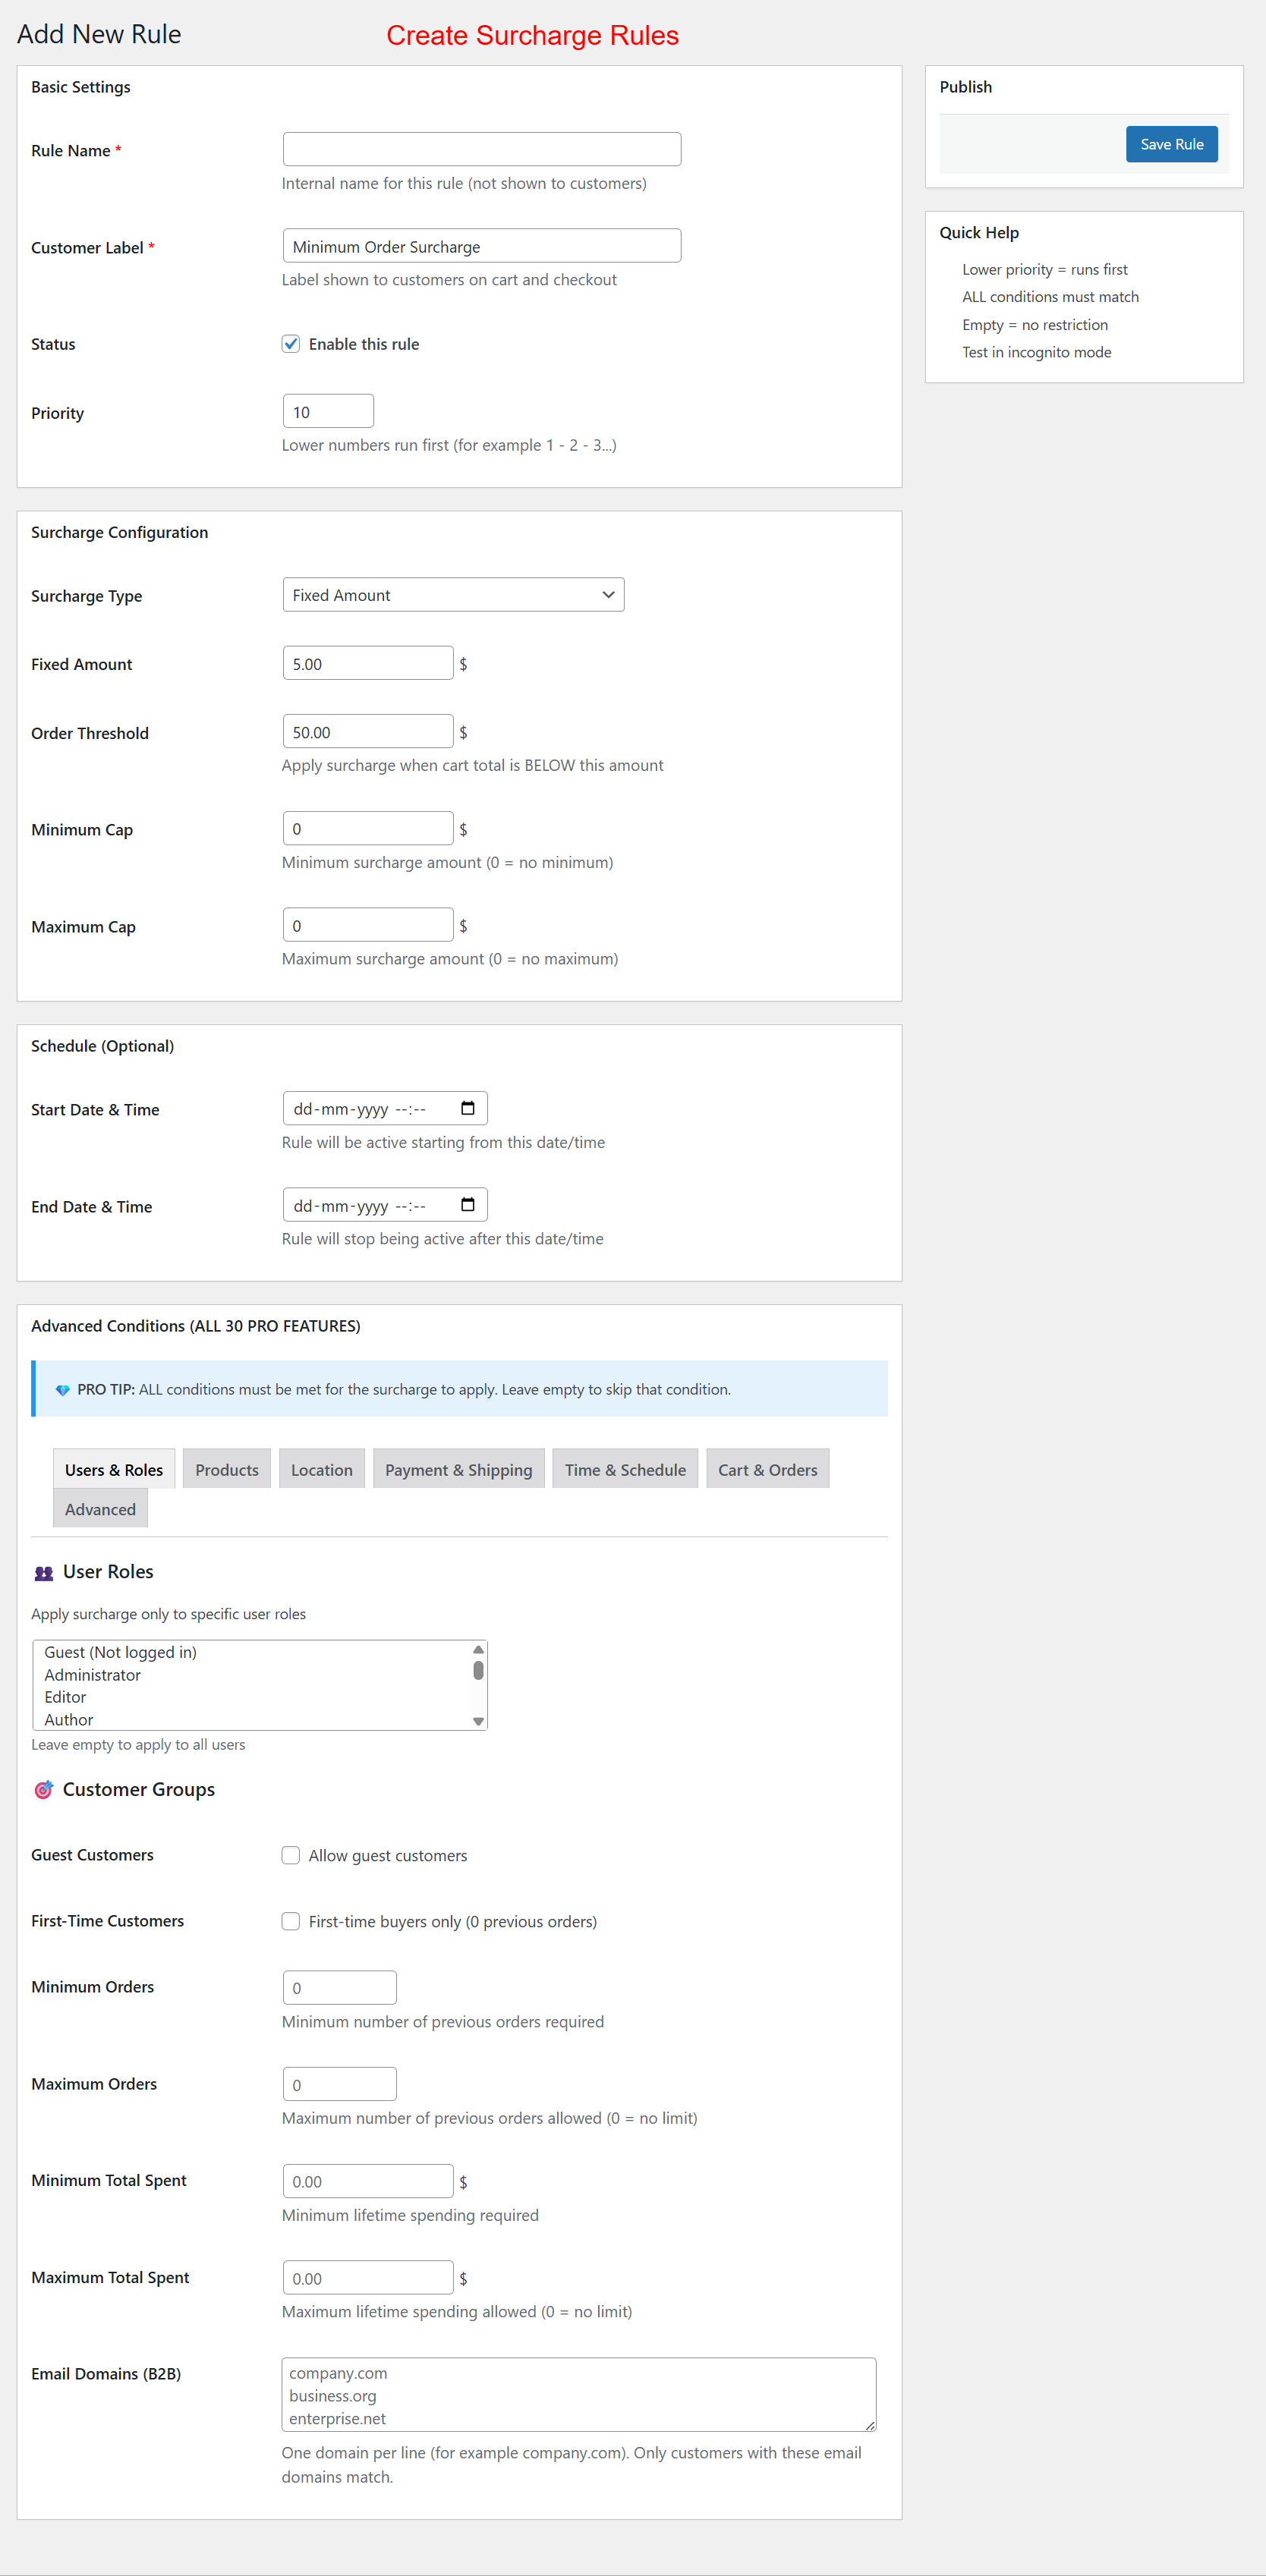
wp-admin: Create Surcharge Rule
What this shows: This screen includes fields for ‘Rule Name’, ‘Customer Label’, ‘Surcharge Type’, and advanced conditions like ‘User Roles’ and ‘Customer Groups’.
Create specific surcharge rules by defining conditions such as order threshold, surcharge type, and customer applicability. These rules allow for precise surcharge strategies tailored to business needs, ensuring compliance with sales goals and promotional campaigns. Set priorities and detailed conditions for refined surcharge management.
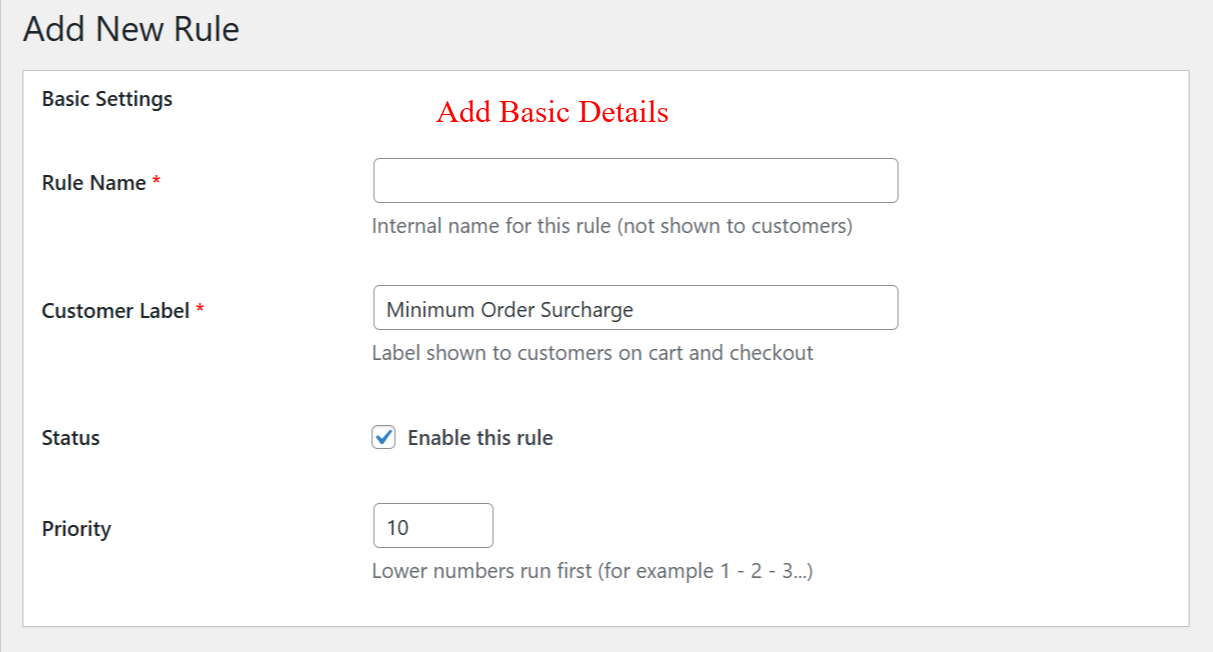
wp-admin: Add New Rule > Basic Details
What this shows: This screen displays fields for entering ‘Rule Name’, ‘Customer Label’, ‘Status’, and ‘Priority’. There is a checkbox to enable the rule and text boxes for input.
On this screen, you can define the basic details for a new surcharge rule in your WooCommerce store. The ‘Rule Name’ is used internally, while the ‘Customer Label’ appears on the cart and checkout pages. Enabling the rule is crucial as it activates the surcharge based on set parameters. The ‘Priority’ determines the order of execution if multiple surcharges are applied.
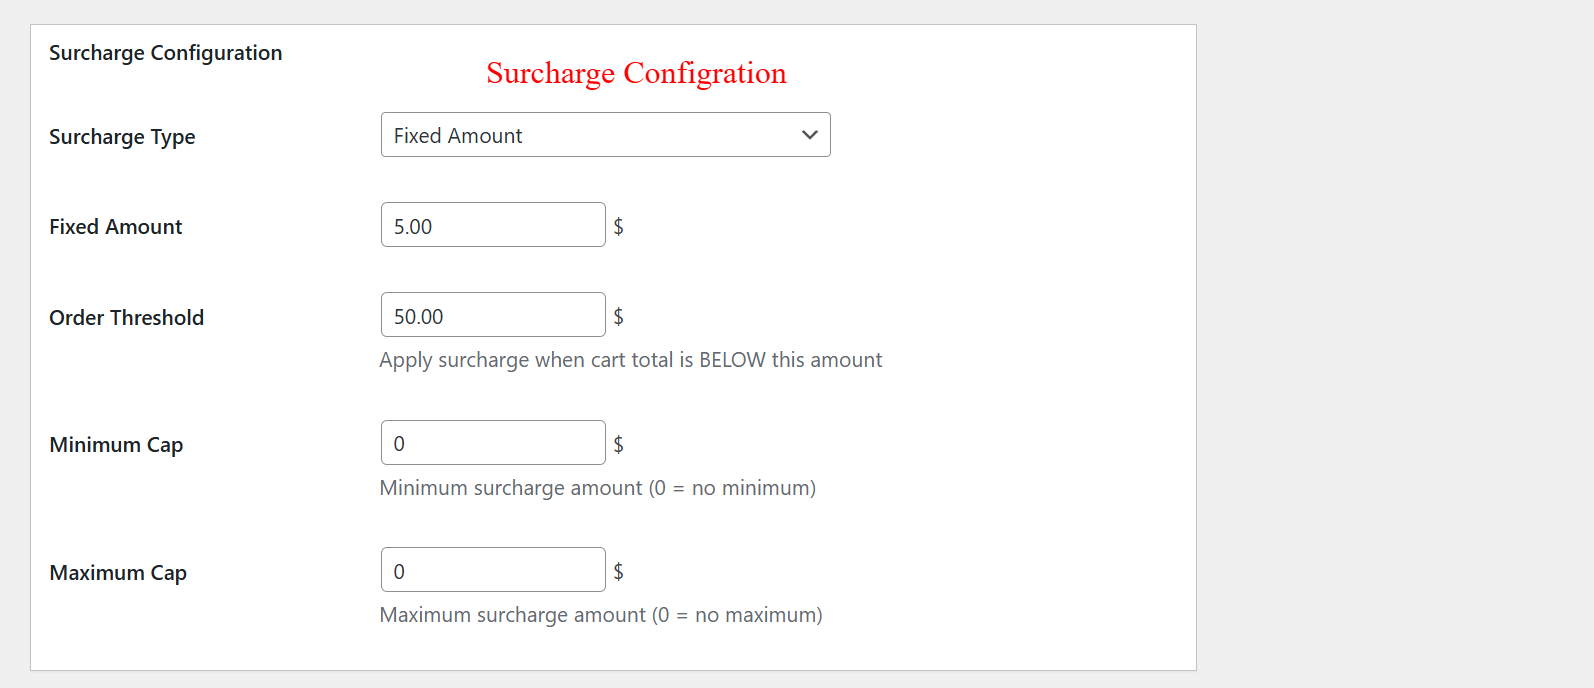
wp-admin: Add New Rule > Surcharge Configuration
What this shows: Displays configuration options including dropdown for ‘Surcharge Type’, and input fields for ‘Fixed Amount’, ‘Order Threshold’, ‘Minimum Cap’, and ‘Maximum Cap’.
This configuration screen allows you to set the type and amount of surcharge applied when certain conditions are met. You choose a ‘Surcharge Type’ and define the amount to be charged if the cart total falls below the defined ‘Order Threshold’. You can also specify minimum and maximum limits for the surcharge.
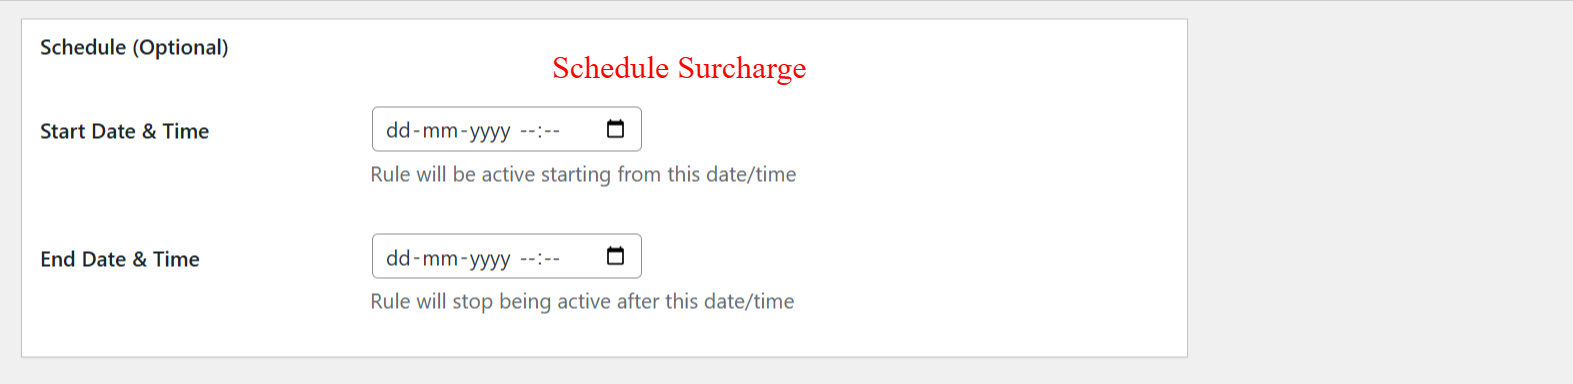
wp-admin: Add New Rule > Schedule Surcharge
What this shows: Contains fields for ‘Start Date & Time’ and ‘End Date & Time’, allowing schedules to be set optionally.
This schedule screen enables you to define when a surcharge rule becomes active and when it expires. By setting a ‘Start Date & Time’ and ‘End Date & Time’, you can automate the timing of your rules to match strategic business schedules, such as holiday promotions or special events.
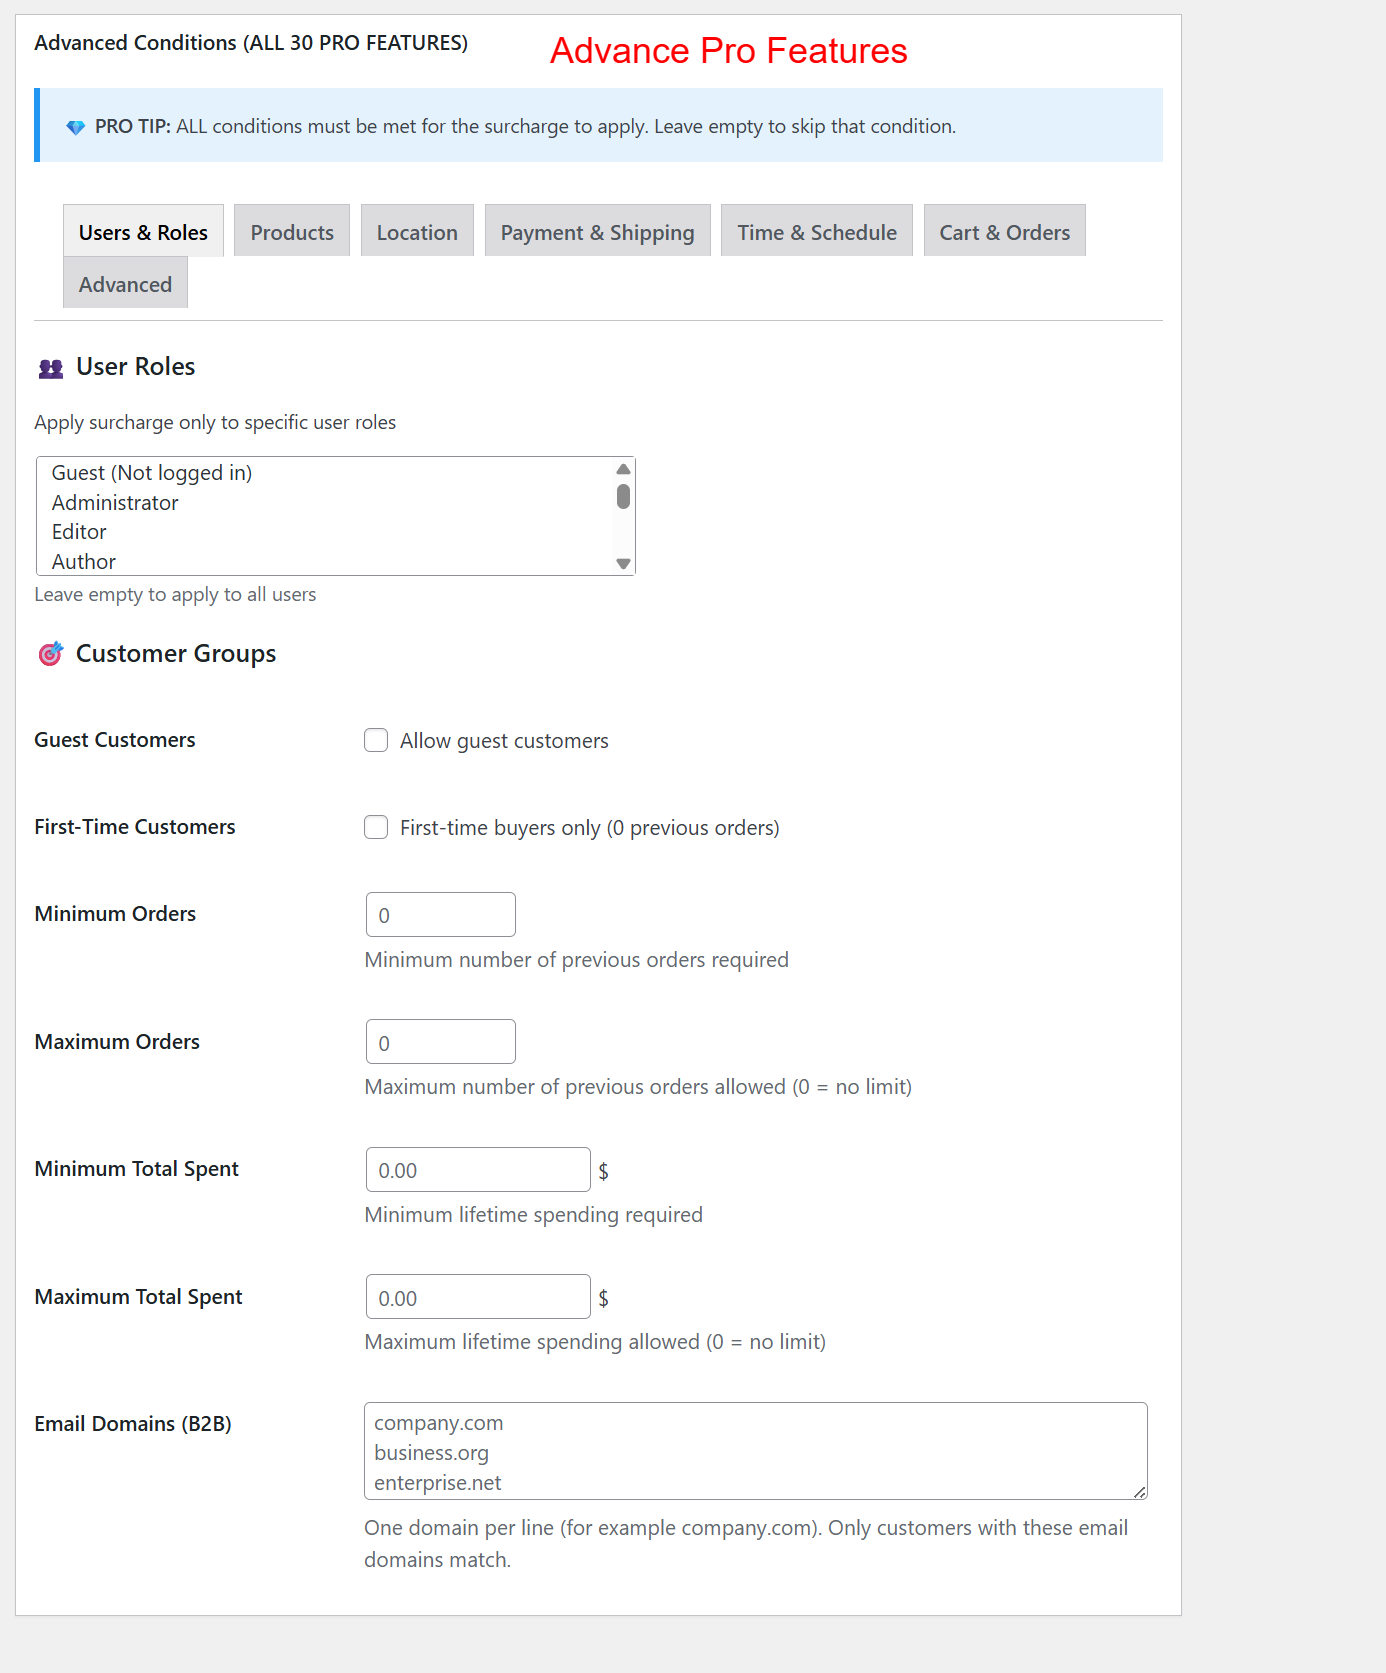
wp-admin: Advanced Pro Features > User Roles
What this shows: Shows a list box for selecting user roles, checkboxes for ‘Guest Customers’ and ‘First-Time Customers’, and input fields for ‘Minimum Orders’, ‘Maximum Orders’, among other conditions.
Here, you can customize surcharges for specific user roles and customer groups. By configuring these options, you can apply different surcharges based on user type, order history, or spending habits, allowing you to tailor pricing strategies to customer segments.
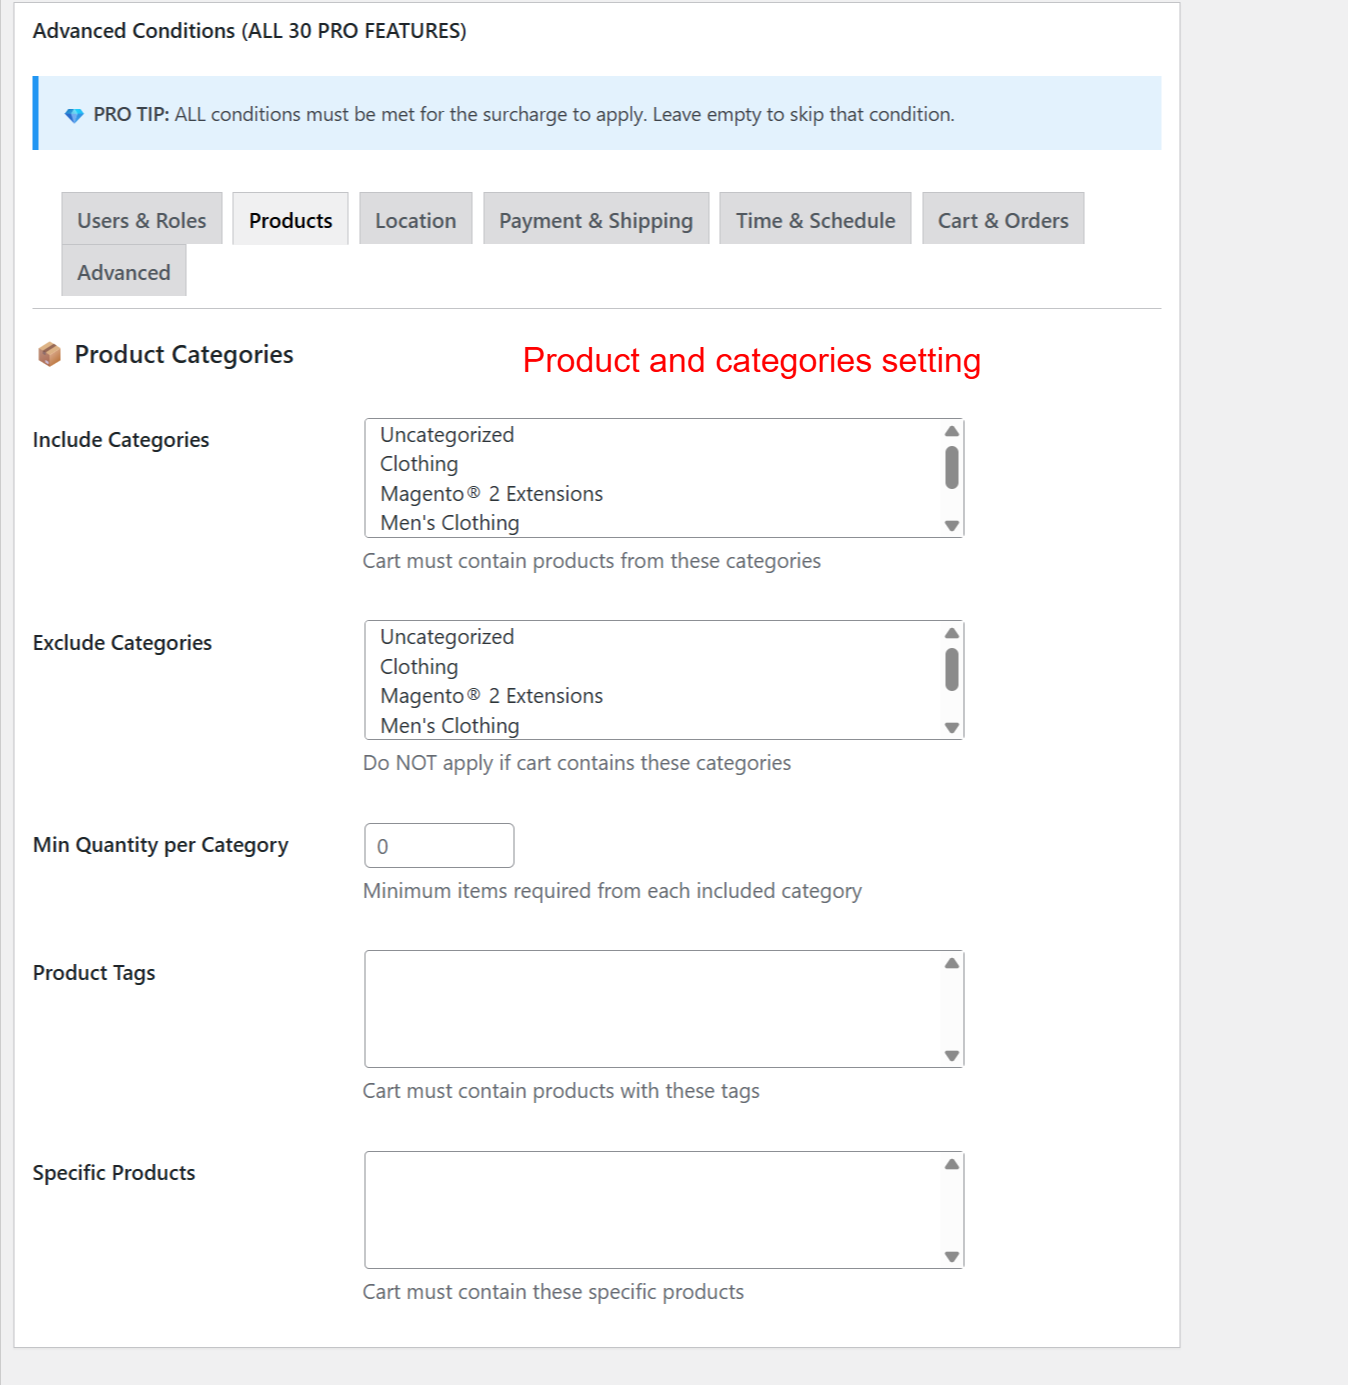
wp-admin: Advanced Conditions > Product Categories
What this shows: Includes options for ‘Include Categories’, ‘Exclude Categories’, ‘Min Quantity per Category’, ‘Product Tags’, and ‘Specific Products’.
This screen lets you apply surcharge rules based on product categories, tags, or specific products. By correctly setting these conditions, you ensure that the surcharge is applied only to certain product groups, providing a granular level of discount management.
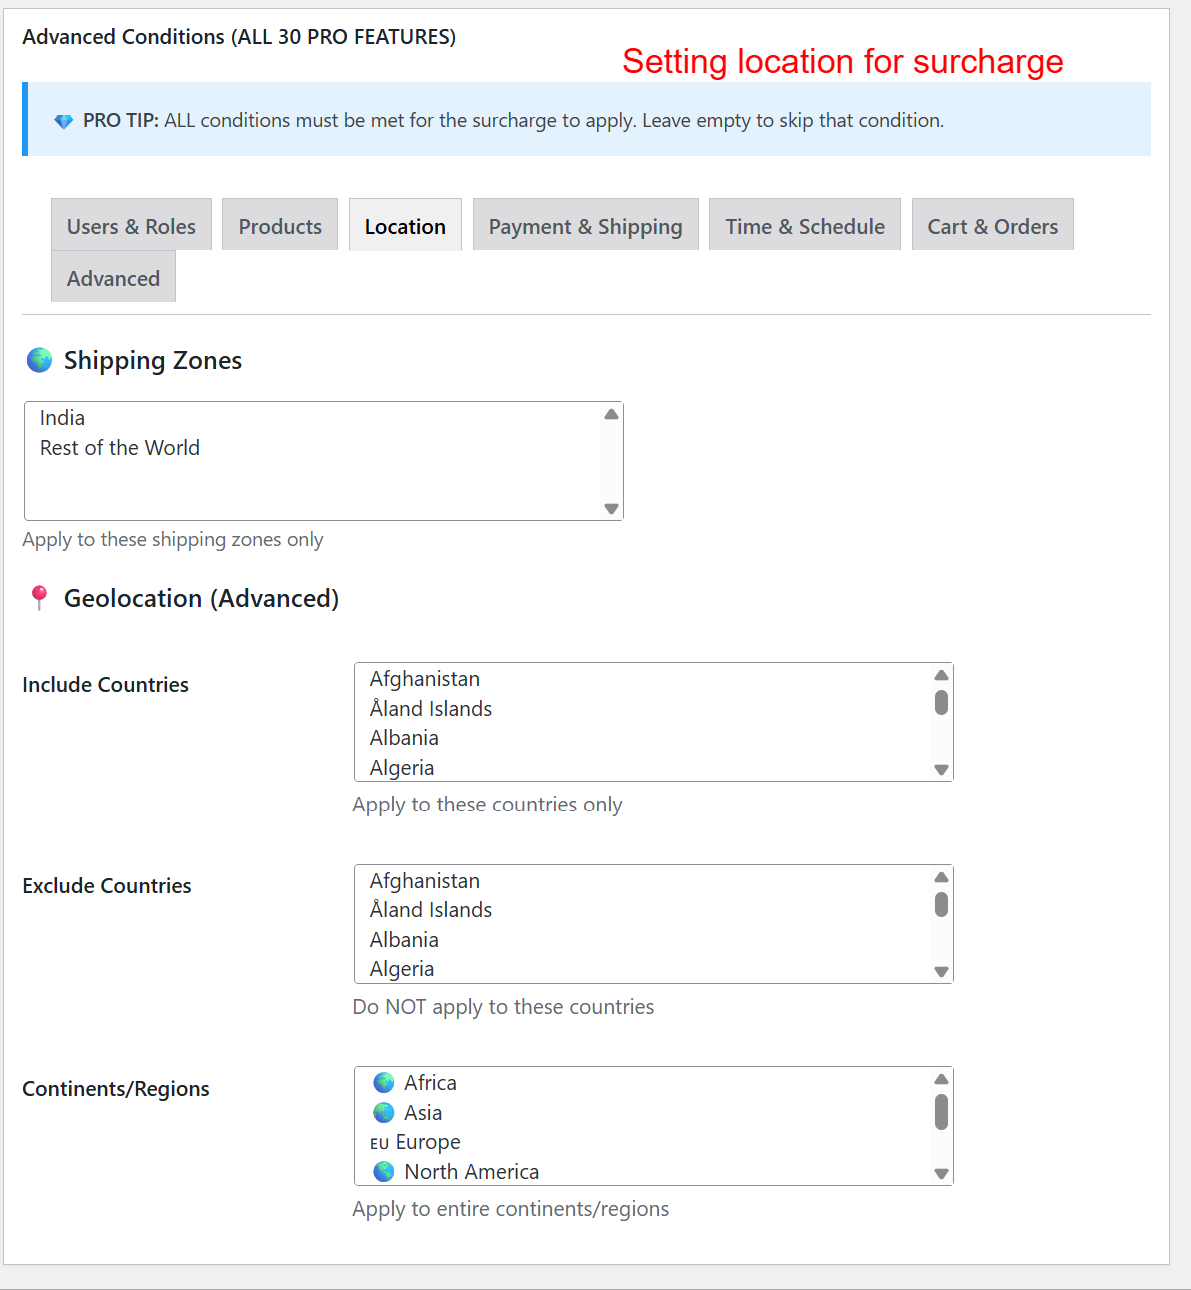
wp-admin: Advanced Conditions > Location Settings
What this shows: Displays settings for ‘Shipping Zones’, ‘Include Countries’, ‘Exclude Countries’, and ‘Continents/Regions’, with dropdown lists for selection.
Location-based settings allow you to enforce surcharges based on geographical areas. By selecting specific shipping zones or countries, you can strategize where surcharges are applied, helping manage shipping costs globally or locally as needed.
wp-admin: Advanced Conditions > Payment and Shipping
What this shows: Lists options for ‘Payment Methods’ and ‘Shipping Methods’, with associated use case notes beneath each section.
This section allows for adding surcharges based on selected payment and shipping methods. For instance, you might add a surcharge for cash on delivery but offer discounts for bank transfers, enabling flexible pricing models that can influence customer choice in payment method.