Step-by-Step Screenshot Reference
Every captured screen in setup order. Click any image to open the full-size version in a new tab.
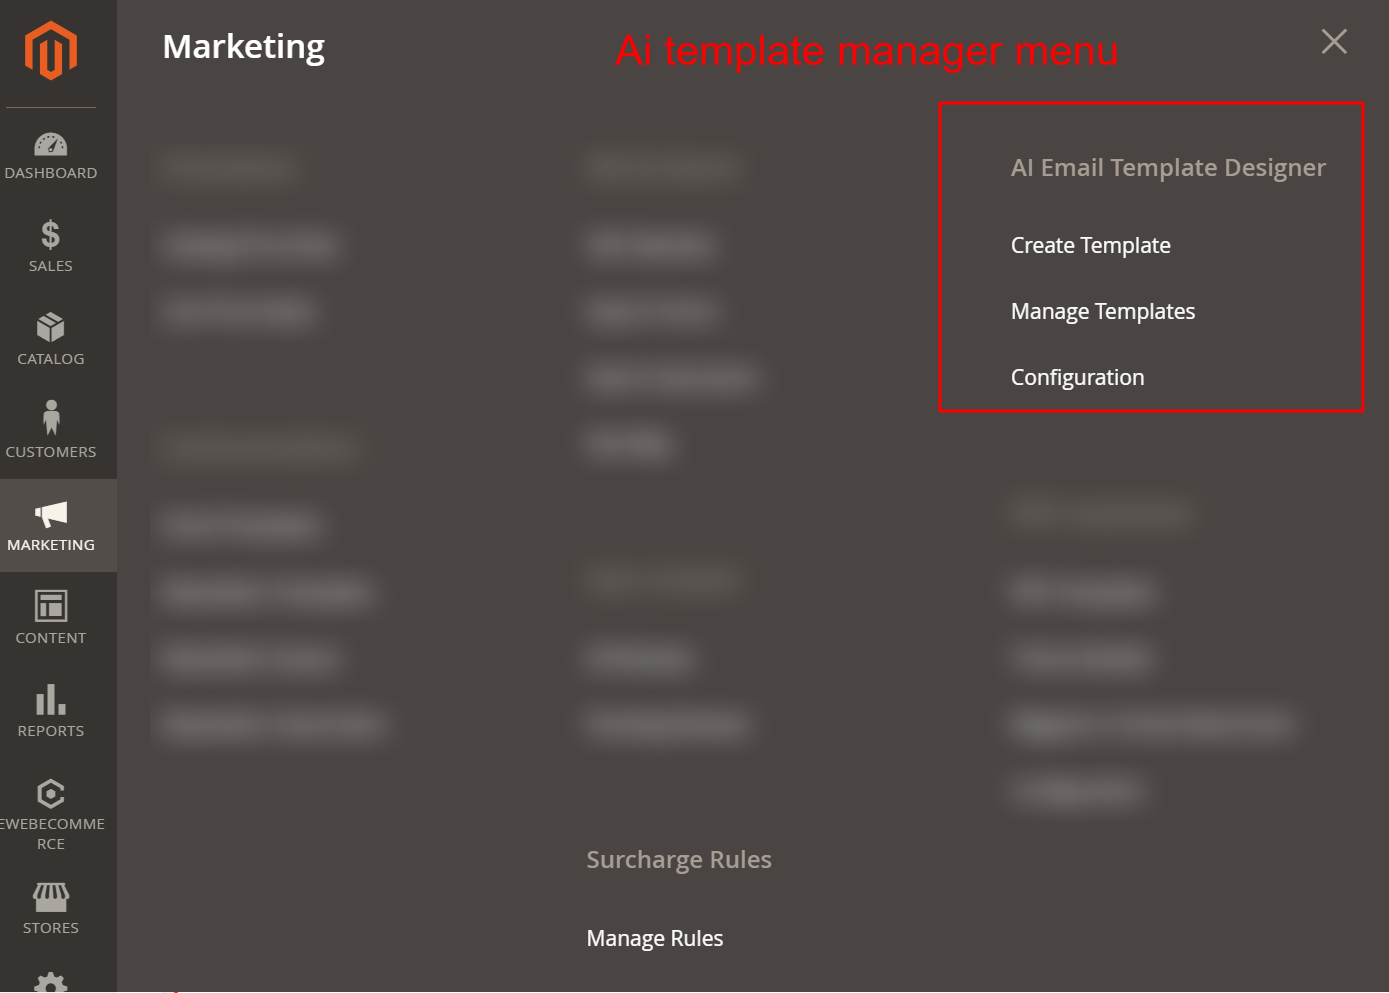
Admin: Marketing > AI Email Template Designer
What this shows: This screen shows the admin marketing menu with options for ‘AI Email Template Designer’ including ‘Create Template’, ‘Manage Templates’, and ‘Configuration’.
Access the AI Email Template Designer through the Marketing section, where you can create new email templates, manage existing ones, or configure global settings. This entry point is crucial for leveraging AI capabilities in email design.
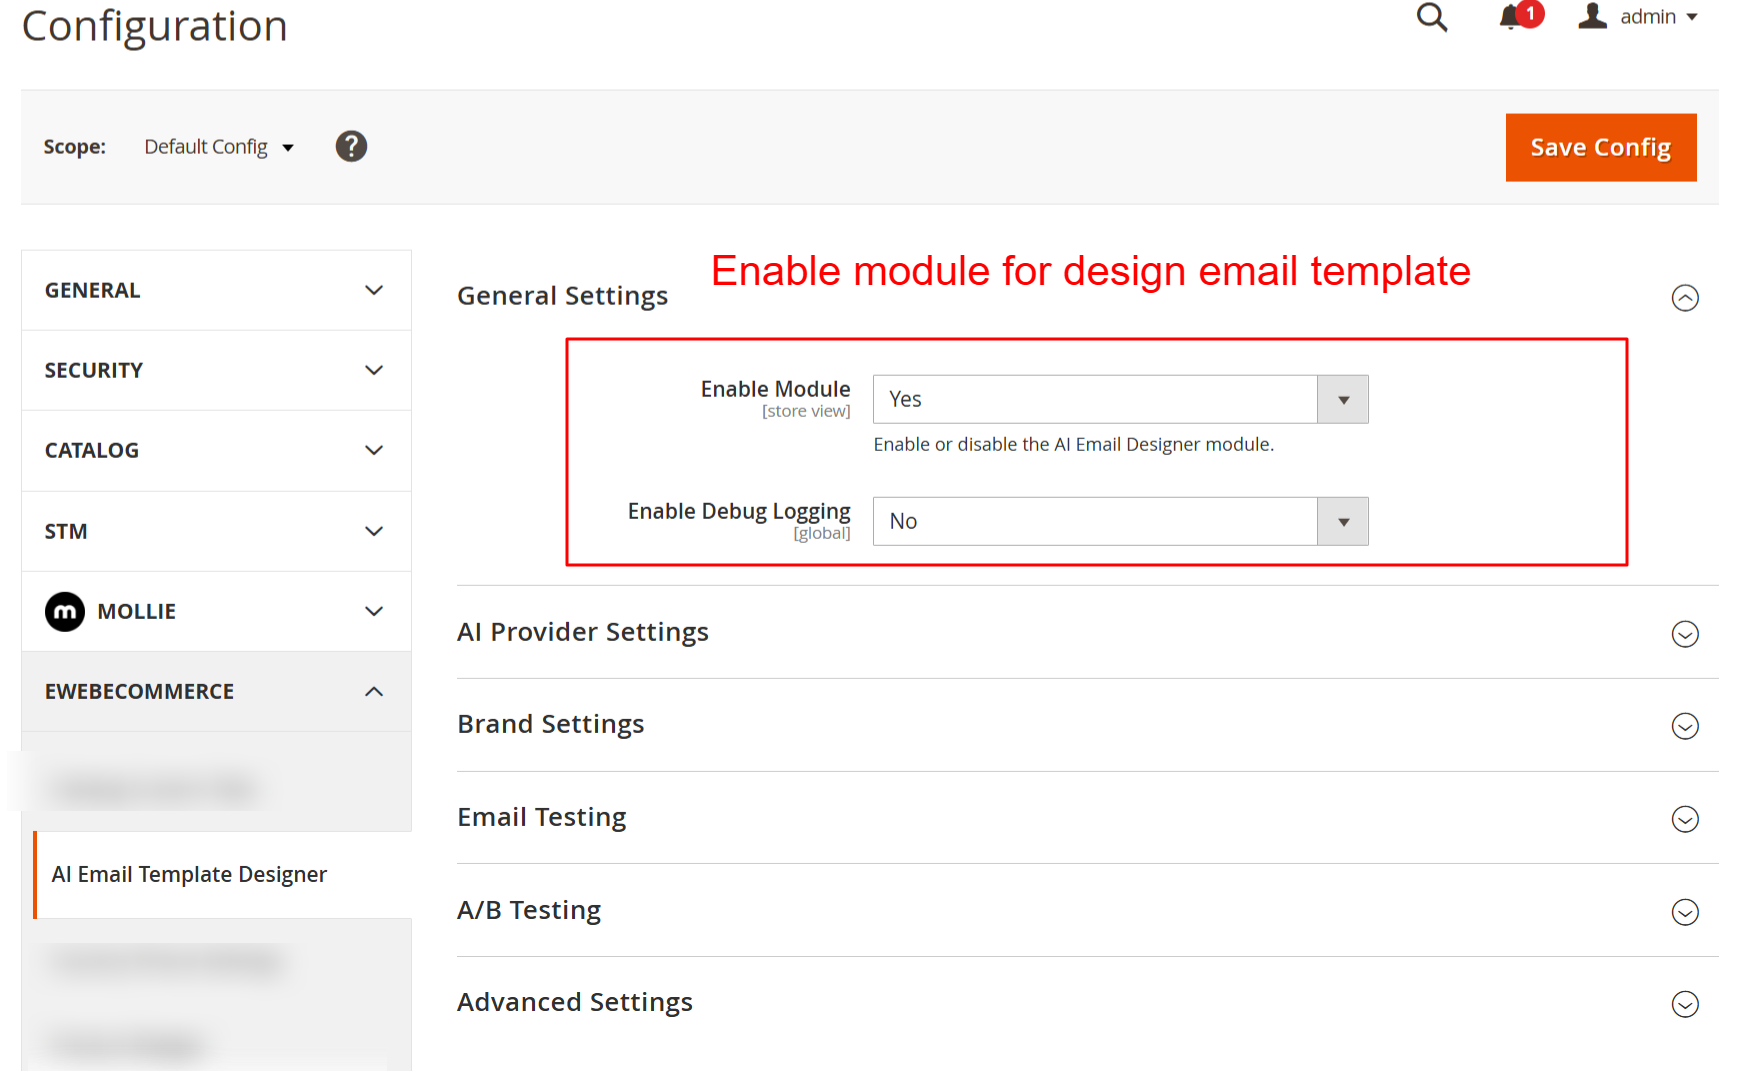
Configuration: Enable AI Email Designer Module
What this shows: This screen presents the ‘General Settings’ section, with toggles for ‘Enable Module’ and ‘Enable Debug Logging’, along with a ‘Save Config’ button.
Here, you enable or disable the AI Email Designer module, a necessary step to activate the plugin’s functionalities in your store. You can also toggle debug logging for troubleshooting purposes.
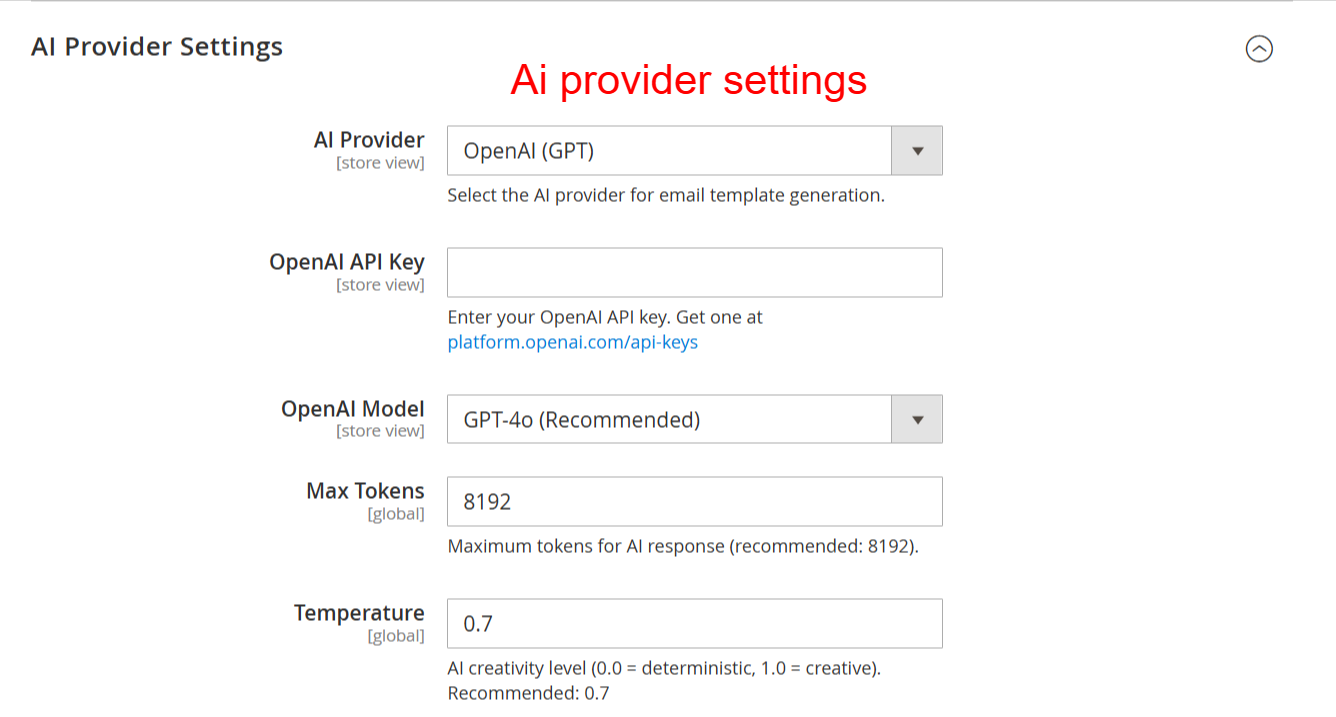
Configuration: AI Provider Settings
What this shows: Displays options for selecting the ‘AI Provider’, ‘OpenAI API Key’, the ‘OpenAI Model’, ‘Max Tokens’, and ‘Temperature’ settings.
Configure your AI provider settings to connect the email designer with the chosen AI model. Enter your API key and customize model parameters like tokens and temperature to optimize email generation outputs.
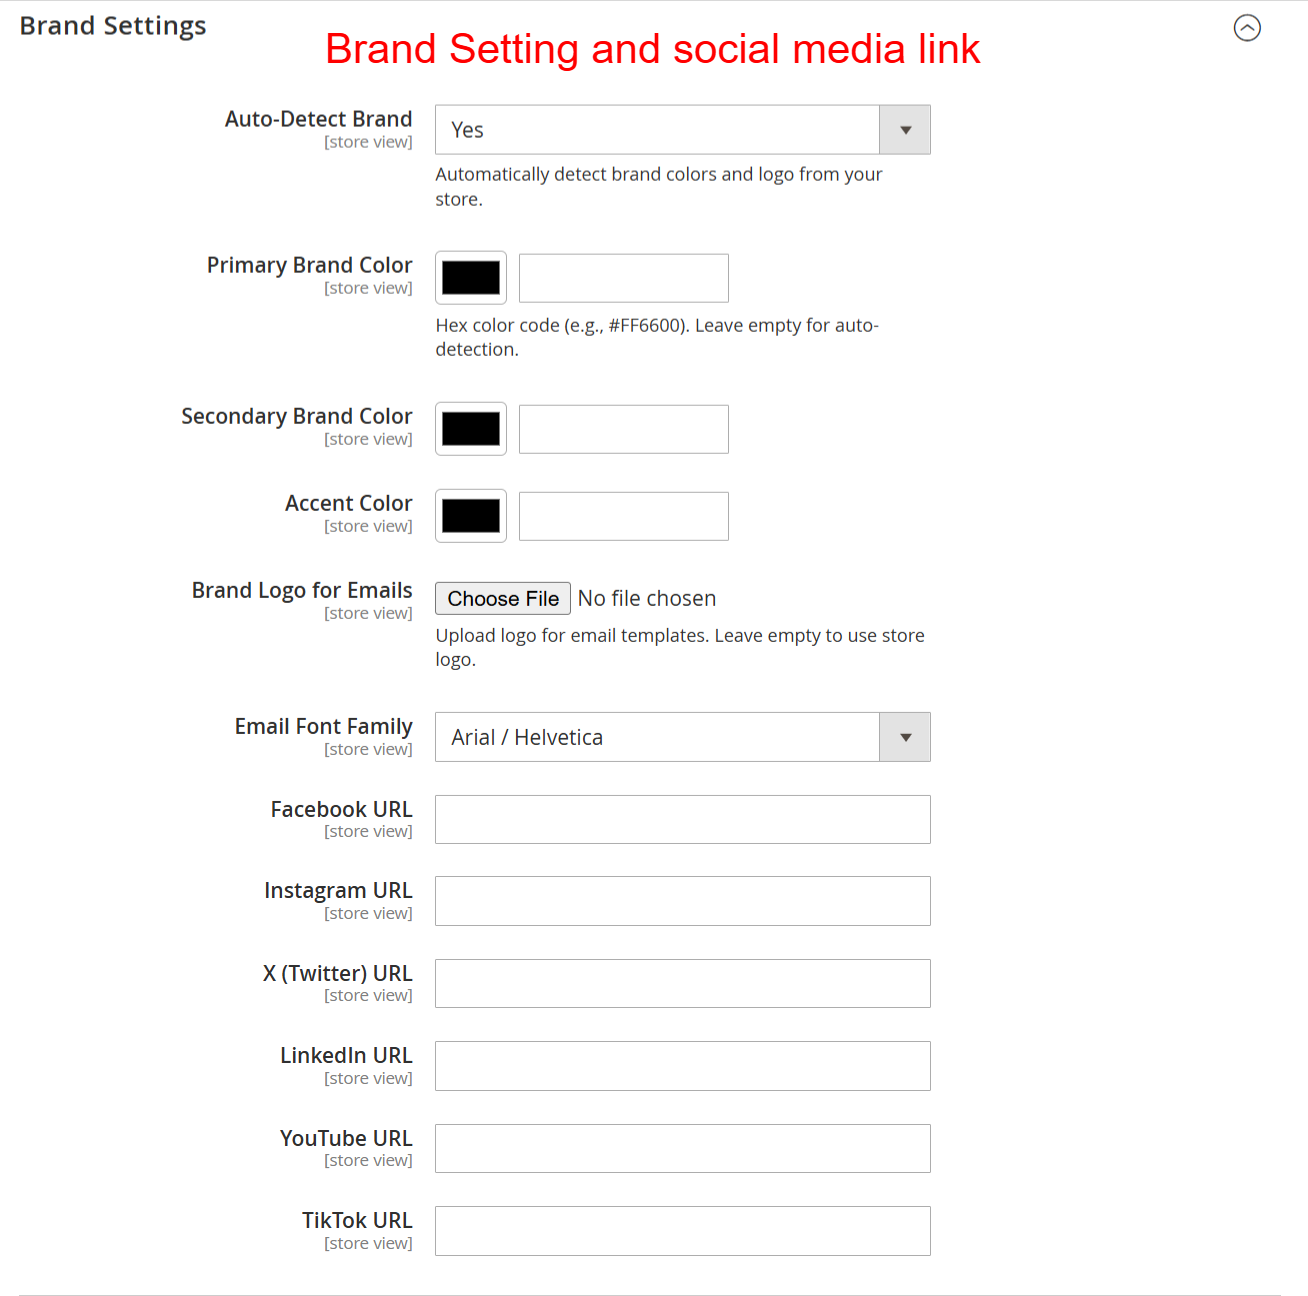
Configuration: Brand and Social Media Settings
What this shows: This form contains fields for ‘Auto-Detect Brand’, ‘Primary Brand Color’, ‘Secondary Brand Color’, ‘Accent Color’, ‘Brand Logo’, ‘Email Font Family’, and various social media links.
Set up your brand identity by specifying colors, fonts, and logos to ensure emails are consistently branded. Provide social media links to enhance connectivity and engagement through your email communications.
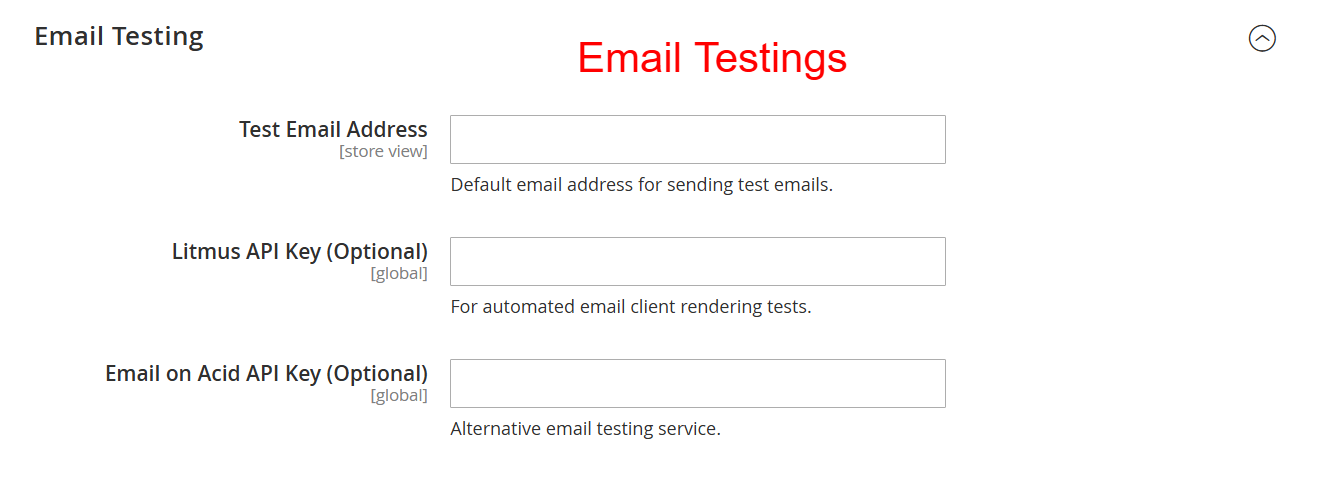
Configuration: Email Testing Settings
What this shows: Contains fields for ‘Test Email Address’, ‘Litmus API Key’, and ‘Email on Acid API Key’ for testing purposes.
Define a default email address for sending test emails and integrate external testing services like Litmus and Email on Acid for evaluating email appearance across various clients. Ensures high quality of email renders before public distribution.
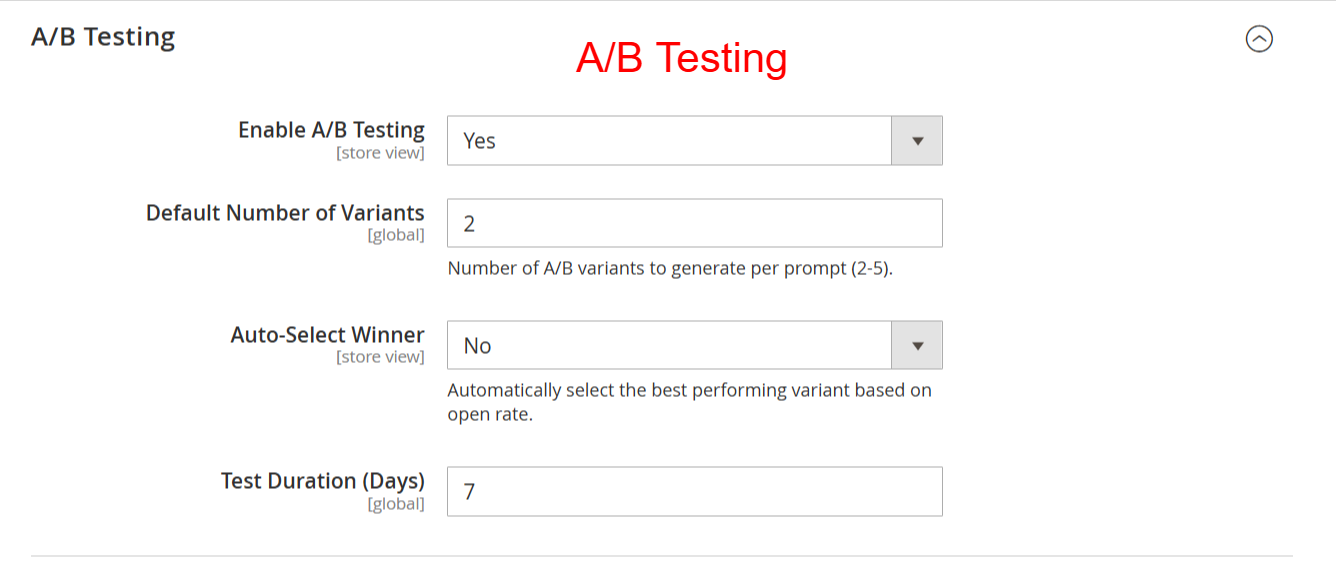
Configuration: A/B Testing Settings
What this shows: Includes settings for ‘Enable A/B Testing’, ‘Default Number of Variants’, ‘Auto-Select Winner’, and ‘Test Duration’.
Enable A/B testing to compare different email variants. Control the number of variants and set testing parameters to automatically select the best-performing email, thereby optimizing email engagement and effectiveness.
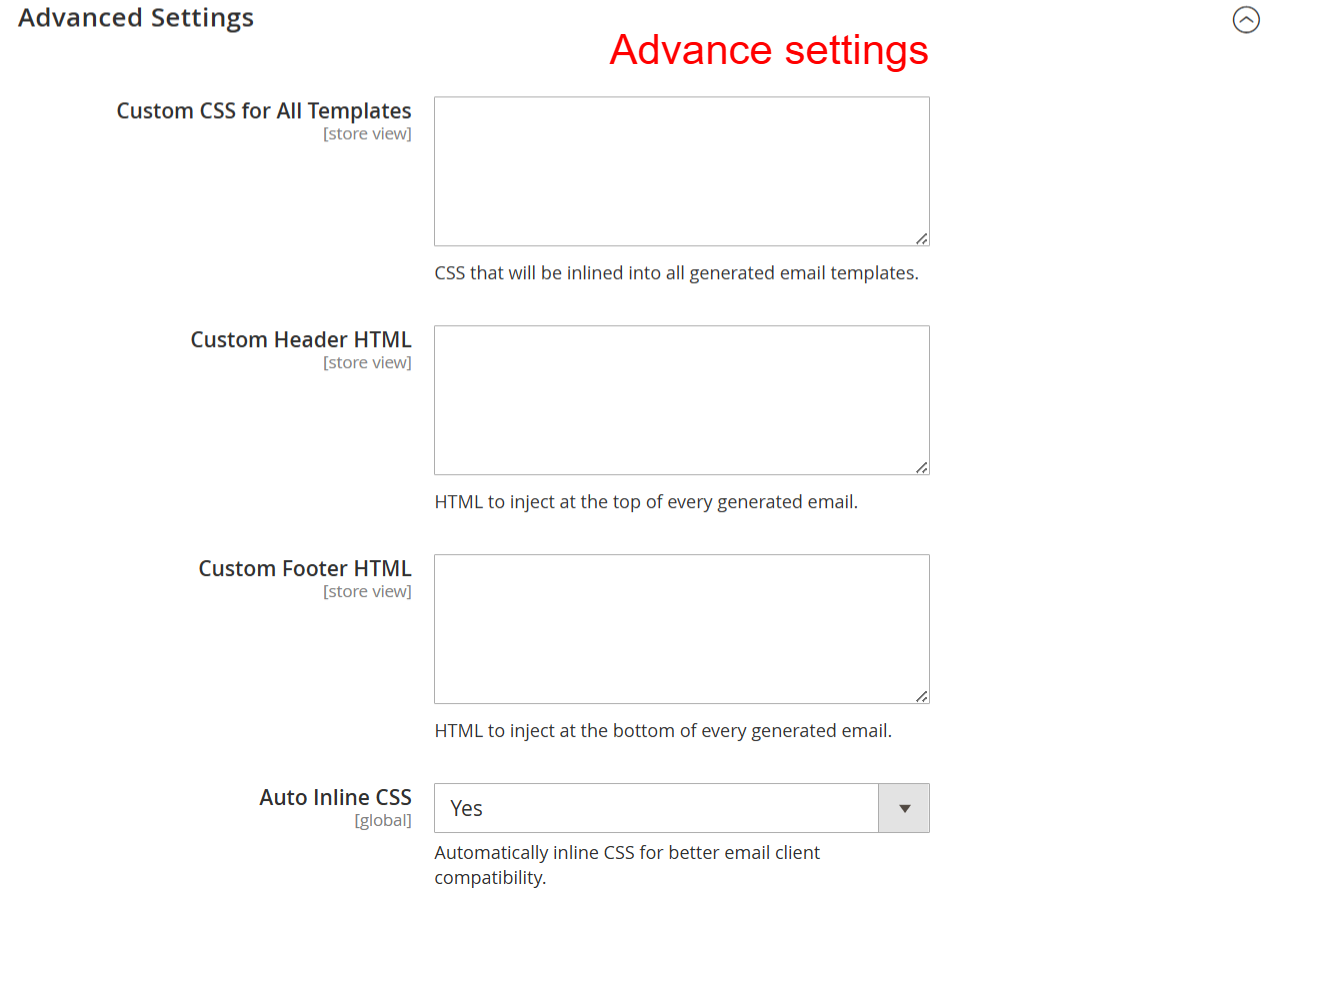
Configuration: Advanced Email Settings
What this shows: Fields include ‘Custom CSS for All Templates’, ‘Custom Header HTML’, ‘Custom Footer HTML’, and ‘Auto Inline CSS’.
Here you can enhance email designs by applying custom CSS and HTML to templates. Manage inline CSS for better compatibility across email clients, refining overall presentation and consistency.
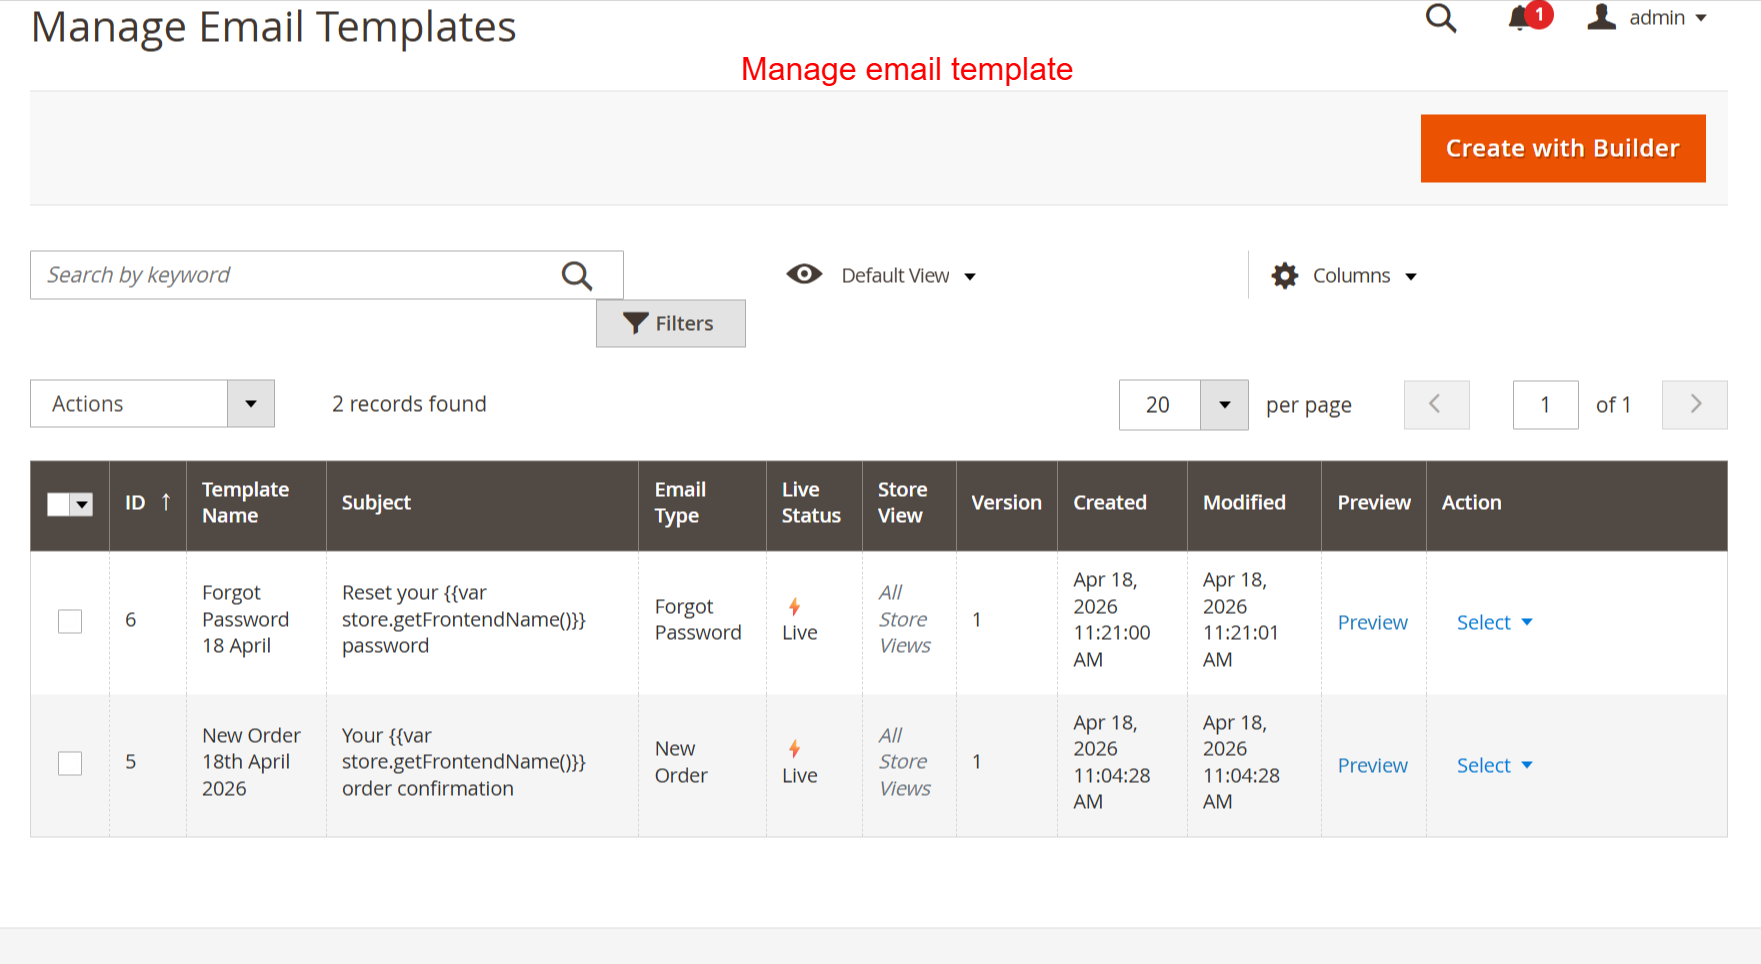
Admin: Manage Email Templates
What this shows: Displays a table with columns for ID, Template Name, Subject, Email Type, Live Status, Store View, Version, Created, and Modified, plus ‘Create with Builder’ button.
In this view, manage your email templates, review details, or create new ones using the builder tool. It’s essential for organizing and maintaining control over active email campaigns to ensure strategic communication output.
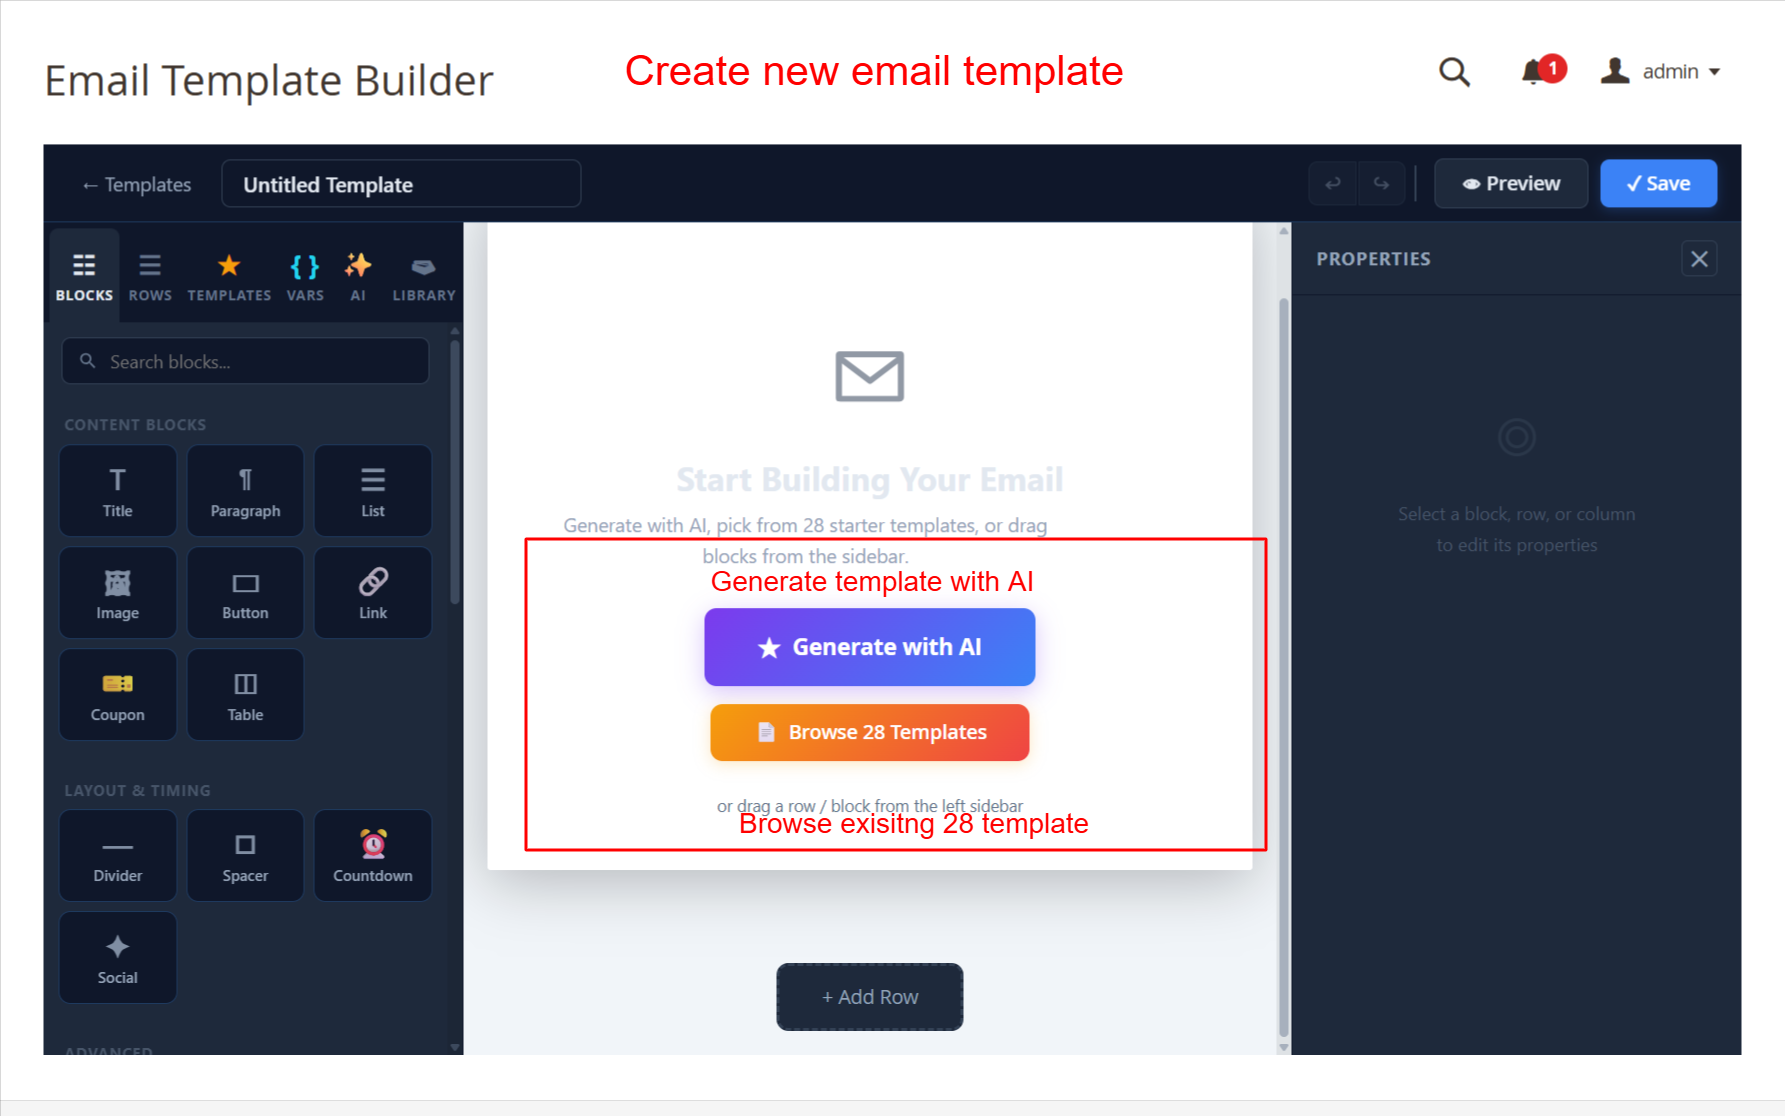
Email Template Builder: Create New Email Template
What this shows: The screen displays the Email Template Builder with options to ‘Generate with AI’ or ‘Browse 28 Templates’. Content blocks like Title, Paragraph, and Image are on the left panel.
This screen allows admins to start building a new email template using the AI-powered generator or by choosing from 28 prebuilt templates. The drag-and-drop interface makes it simple to add various content blocks such as images and buttons, allowing for a highly customizable and responsive email design. This functionality is key for creating visually appealing emails that can enhance customer engagement.
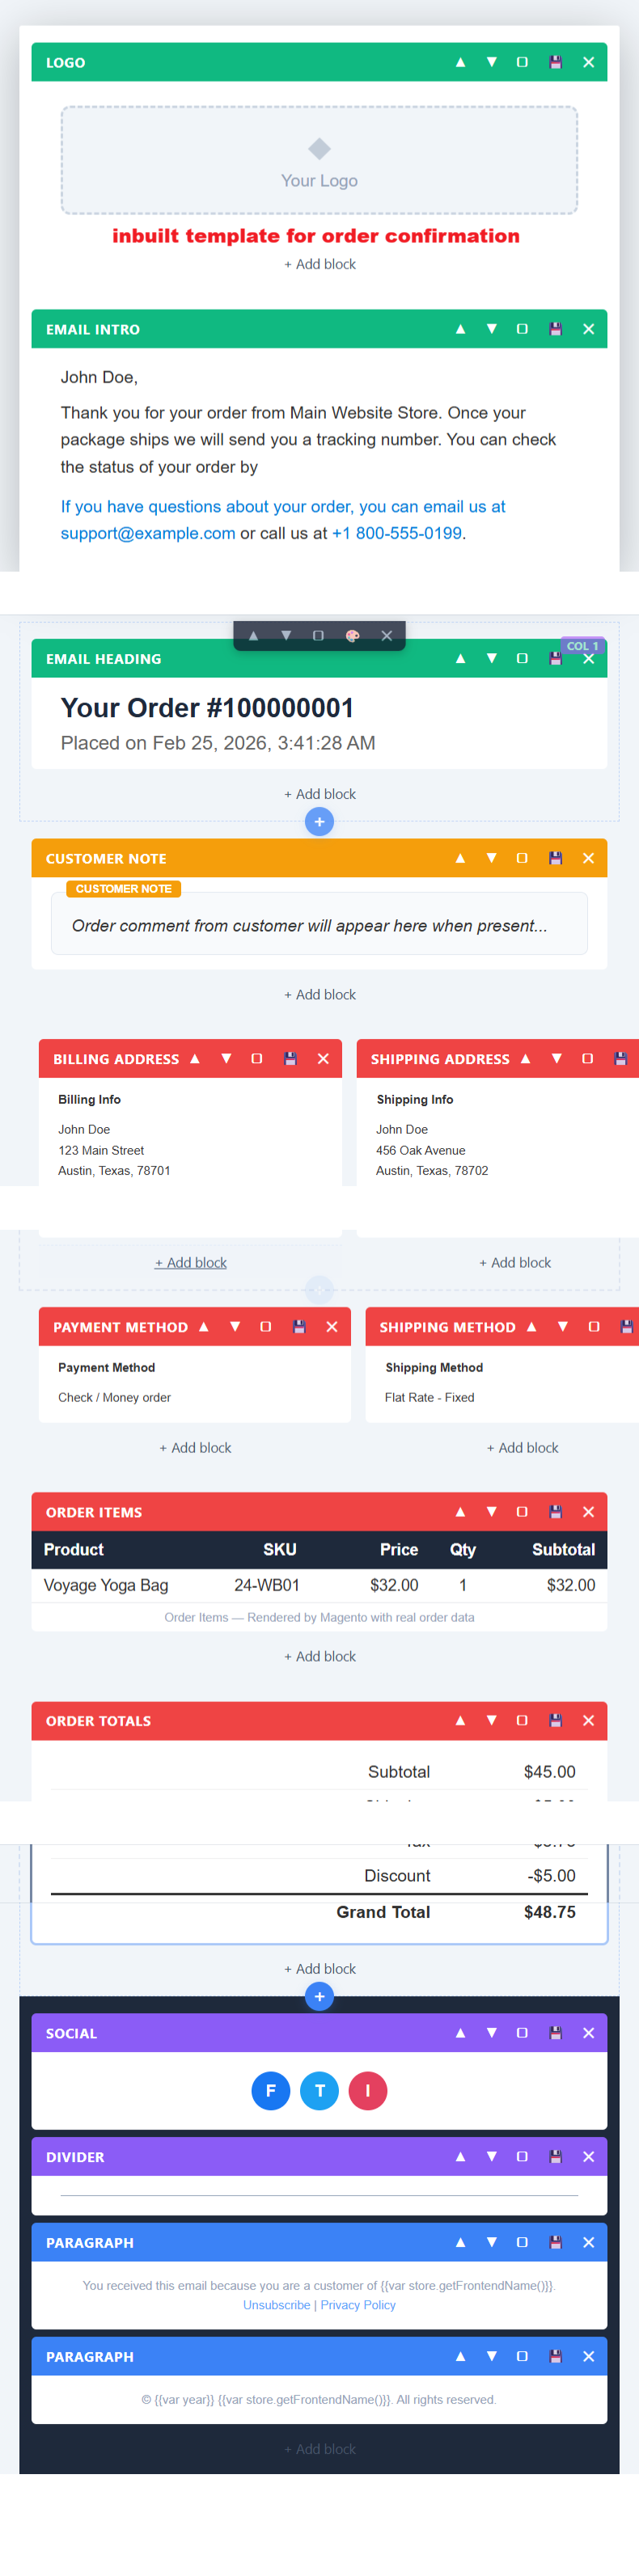
Prebuilt Order Confirmation Email Template
What this shows: A prebuilt order confirmation template is displayed, showing blocks like Logo, Email Intro, and Customer Note. It includes example customer information and order details.
This screen presents an example of an order confirmation email template. The template includes structured content blocks for logo, customer notes, and order information, which can be edited to suit specific transactional needs. Admins can add, remove, or modify blocks to better fit their brand’s messaging. Such templates are essential for efficient communication with customers regarding their orders.
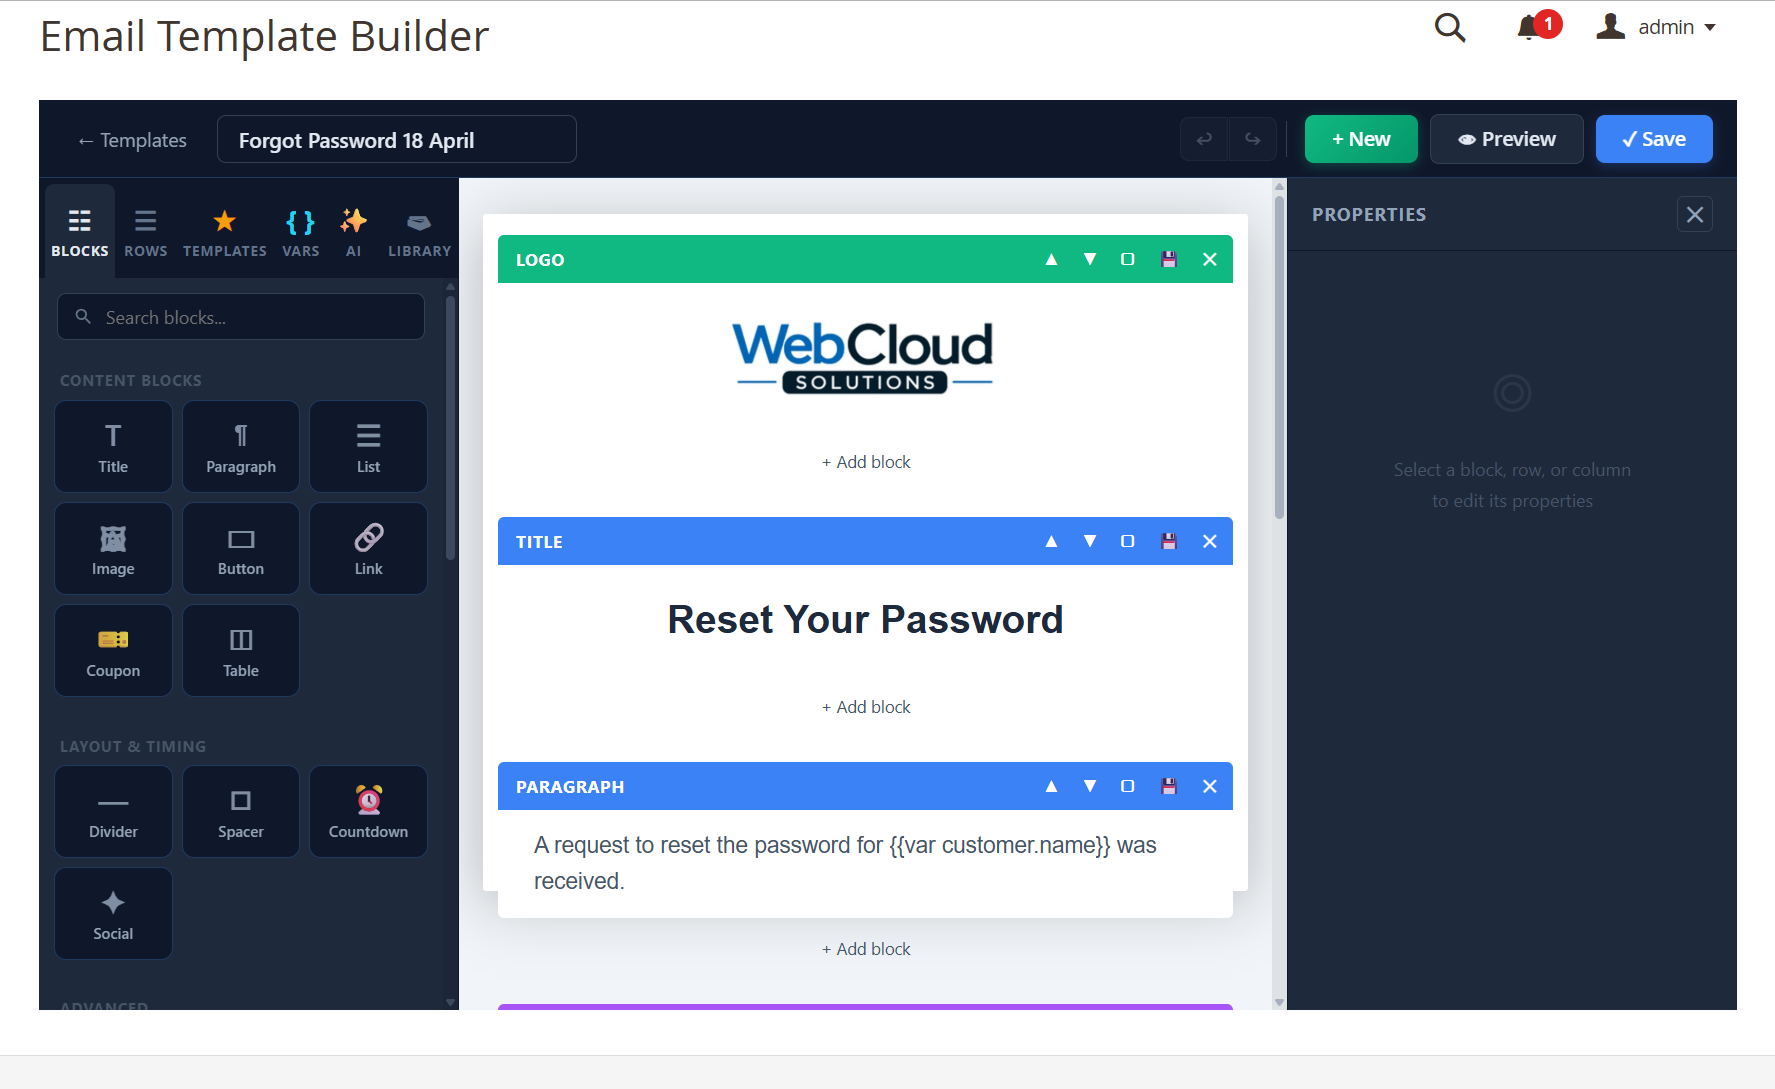
Email Template Builder: Edit Forgot Password Template
What this shows: The builder screen shows a template called ‘Forgot Password 18 April’ with blocks for logo and title. The content is editable within the visual builder interface.
This functionality allows admins to customize the forget password email template, ensuring it aligns with their brand’s voice and compliance requirements. Users can change text and images easily, which is critical for maintaining consistency in communication and branding. This feature helps in providing a secure and branded password recovery process for users.
Email Template Builder: Forgot Password with Properties
What this shows: Shows editing options for the ‘Forgot Password 18 April’ template including content blocks and properties for paragraphs. A properties pane on the right allows text and style adjustments.
Admins can personalize the forgot password template efficiently using the properties panel. Here, users can adjust variables, font size, color, and alignment, enhancing the message’s clarity and visual appeal. This flexibility is important in crafting emails that cater to user needs while maintaining brand integrity.
