Step-by-Step Screenshot Reference
Every captured screen in setup order. Click any image to open the full-size version in a new tab.
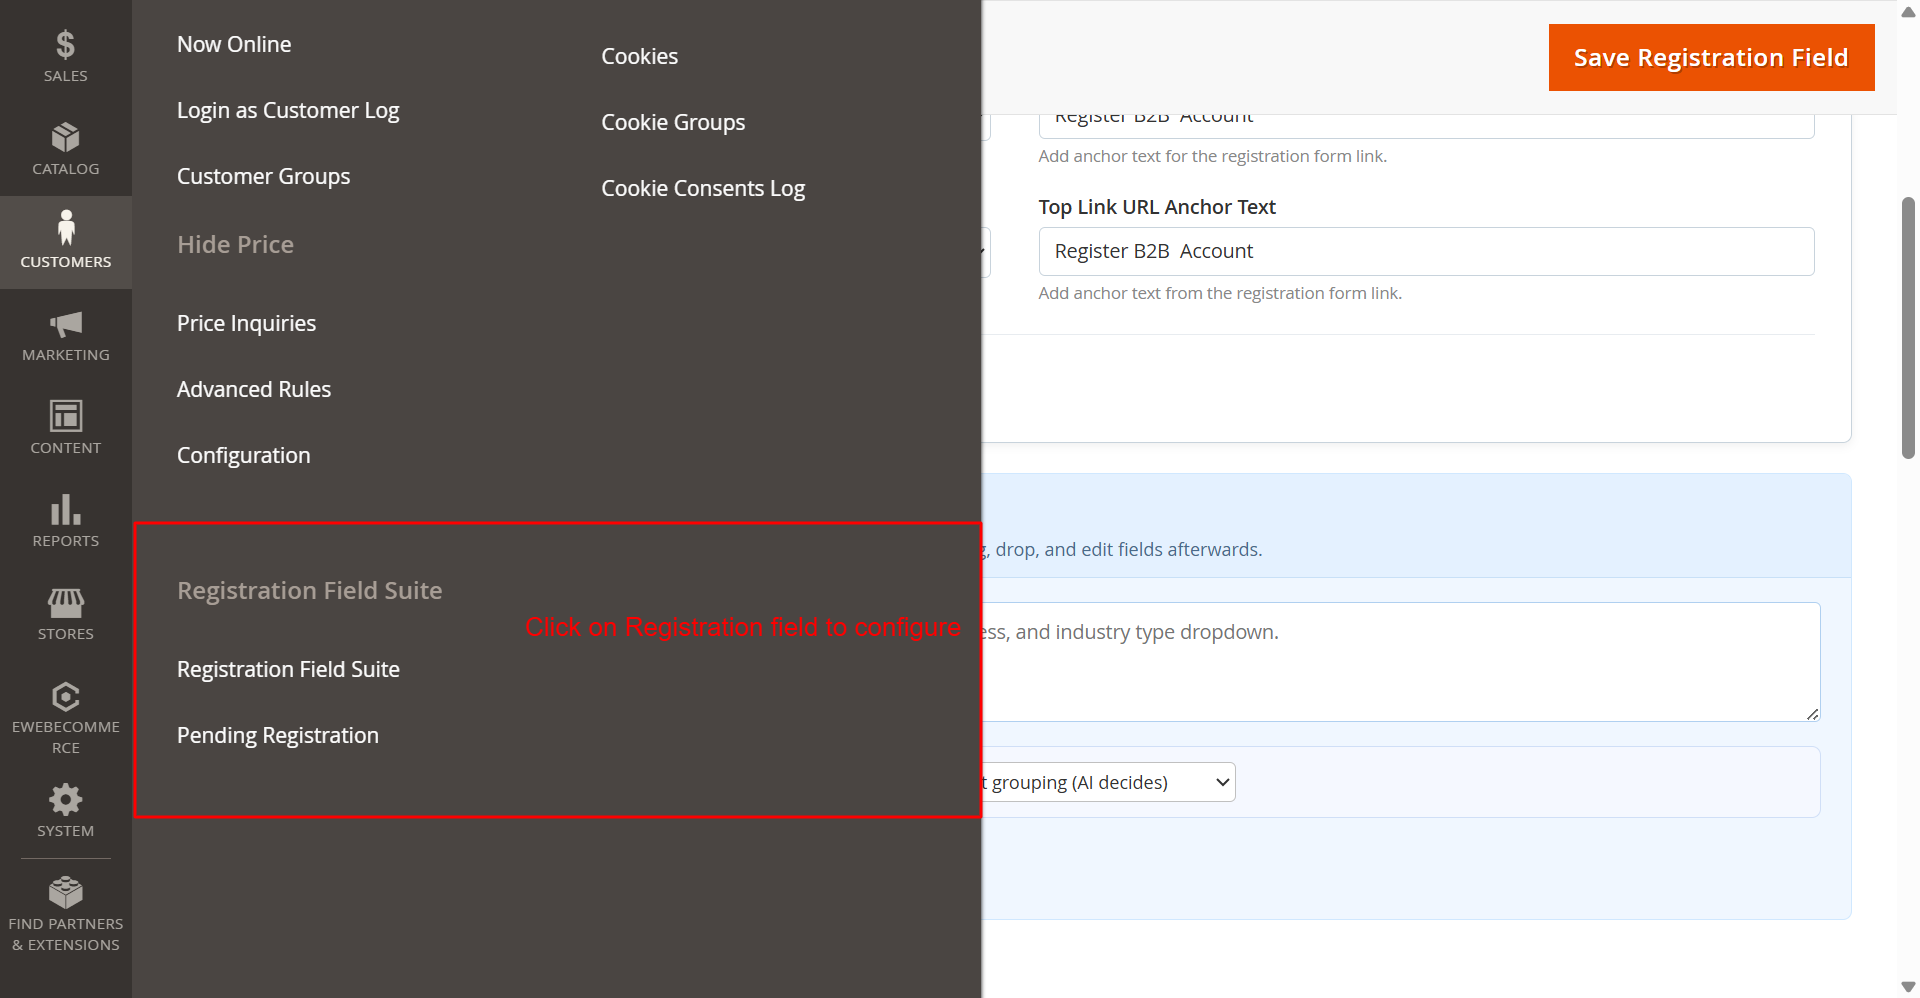
Admin: Customers > Registration Field Suite Settings
What this shows: The side navigation menu with ‘Registration Field Suite’ and ‘Pending Registration’ options under the ‘Customers’ section.
This screen displays the navigation menu where you access the Registration Field Suite options. By selecting ‘Registration Field Suite’, you can configure various registration settings, including custom fields, captcha, and approval processes, crucial for tailoring registration to fit your needs.
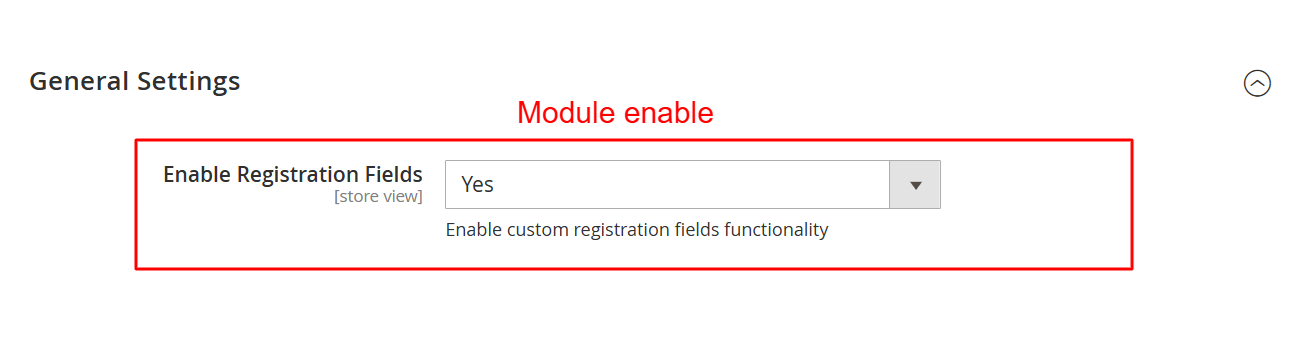
General Settings: Enable Registration Fields Module
What this shows: A dropdown labeled ‘Enable Registration Fields’ with options to enable or disable the registration fields functionality.
In this section, you enable or disable the custom registration fields provided by the Ewebecommerce_RegistrationFieldSuite module. Activating this feature introduces flexible form fields that can enhance the user registration process, allowing for a more customized user experience.
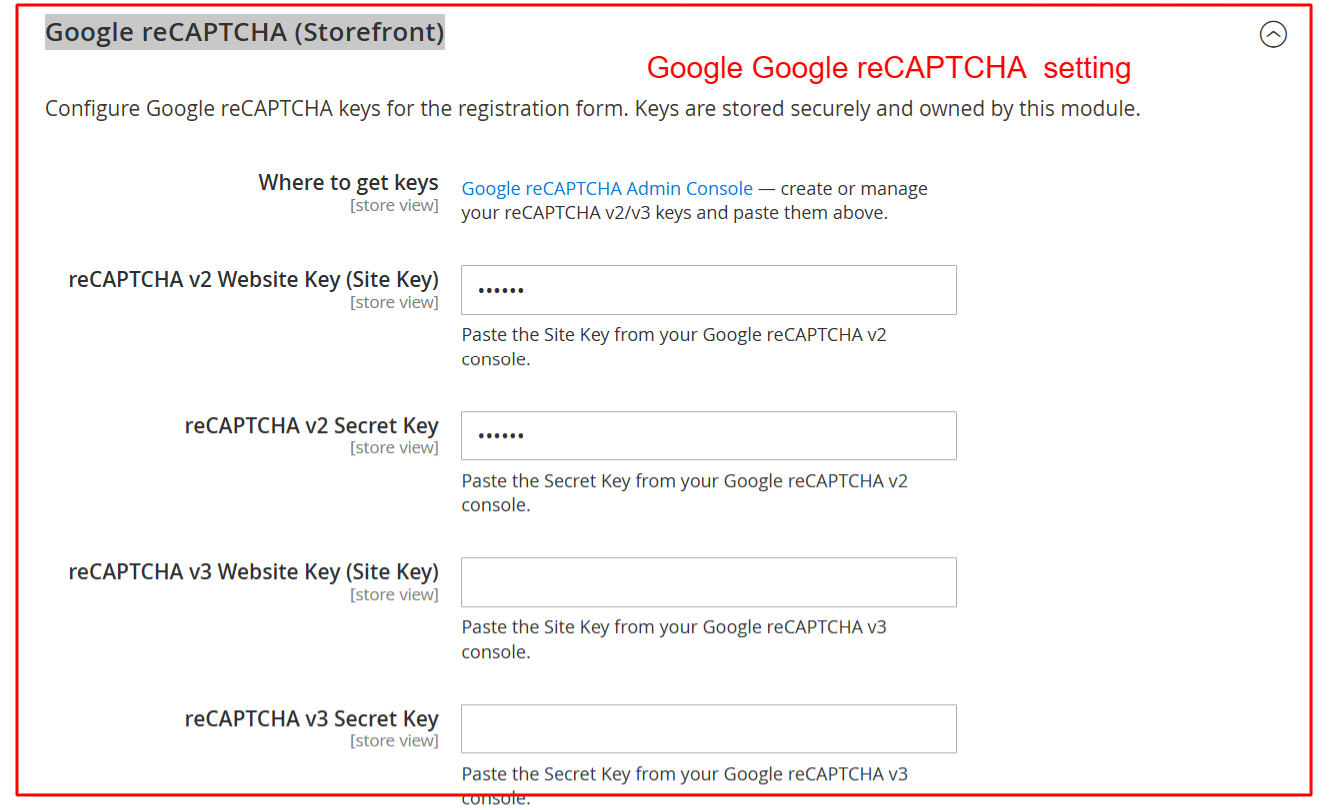
Google reCAPTCHA Configuration for Registration
What this shows: Fields to configure Google reCAPTCHA v2 and v3 keys for the registration form including site and secret keys.
This configuration section allows you to enhance security by adding Google reCAPTCHA to the registration forms. By entering the necessary site and secret keys, you can protect your registration page from automated submissions, ensuring only legitimate user registrations.
AI Form Generator: API Key Configuration
What this shows: Options for setting API keys for AI services like OpenAI, Claude, and Google Gemini, including selecting the specific AI provider and model.
Configure API keys for various AI providers here to leverage AI-driven form generation features. Selecting the appropriate provider and model enables the dynamic generation of registration forms, which can adapt based on AI recommendations, facilitating efficient form setup.

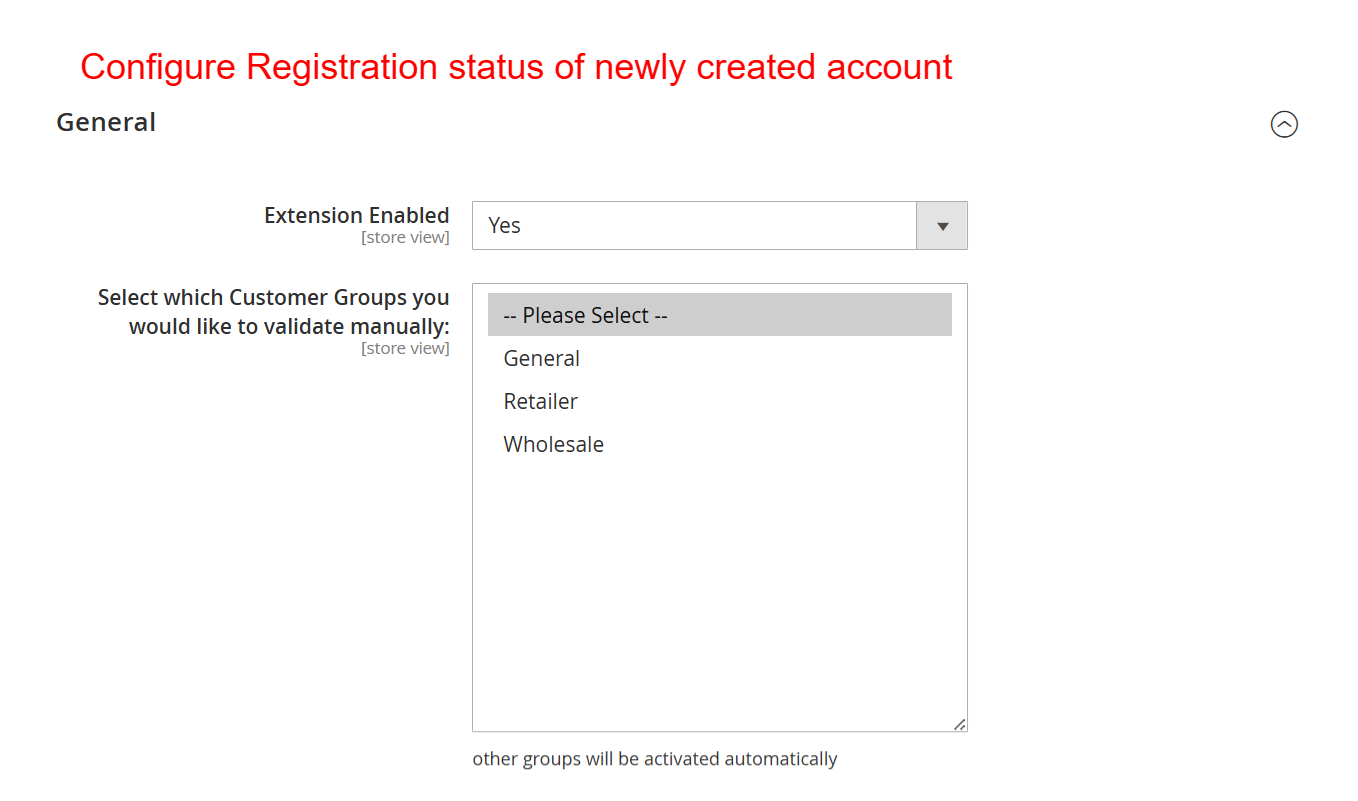
Pending Registration: Enable Extension and Manual Validation
What this shows: A setting to enable the extension and a dropdown to select customer groups for manual validation.
This configuration allows you to activate the Pending Registration feature and select which customer groups require manual validation. By controlling registration status through this setting, you ensure that certain user groups meet predefined criteria before gaining access, enhancing customer management.
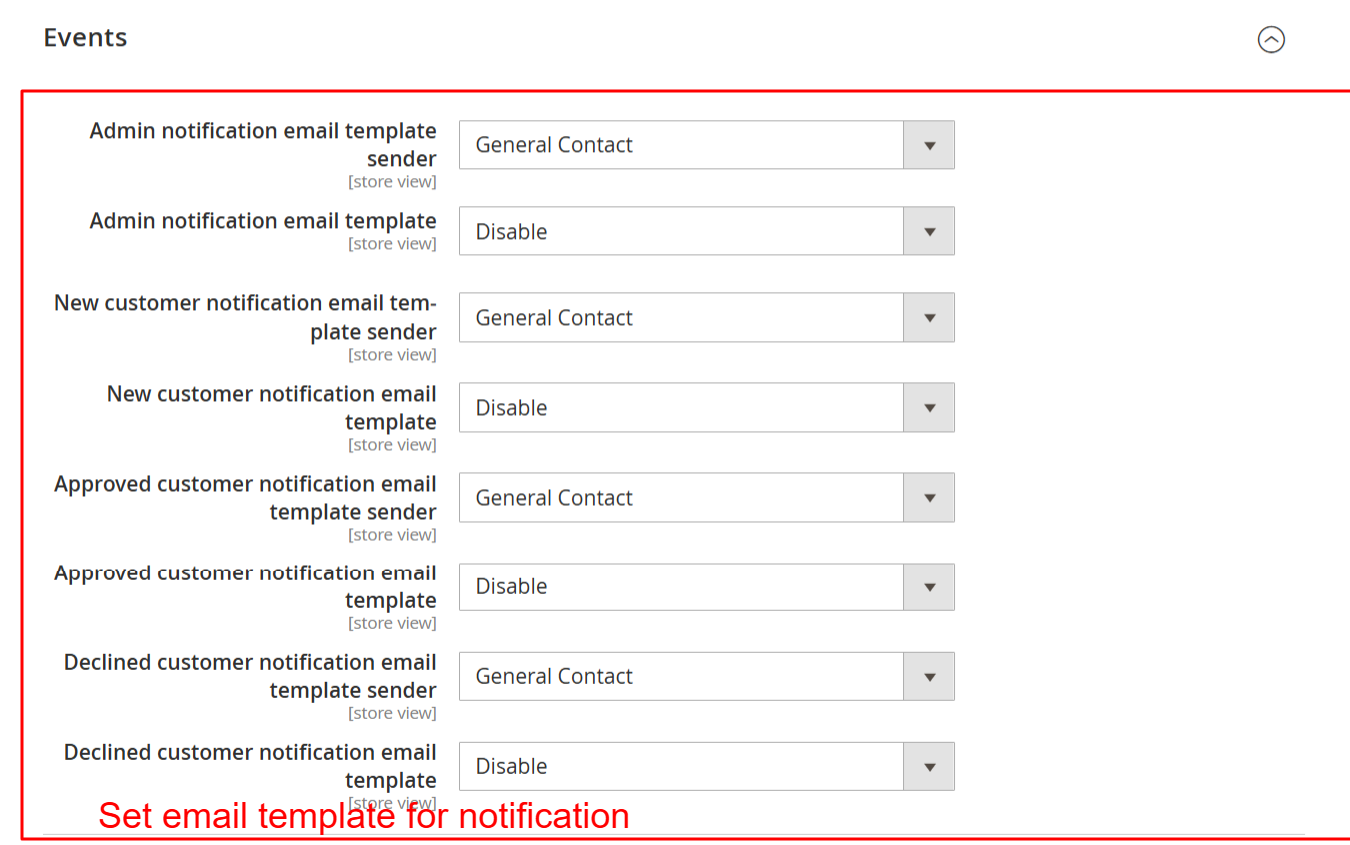
Email Notification Settings for Registration Events
What this shows: Dropdown menus to select email templates and senders for various registration notifications, including admin and customer emails.
Setup automated email notifications for registration events by configuring templates and senders here. This ensures timely communication with both admins and customers regarding registration status updates, helping maintain clear and efficient communication channels.
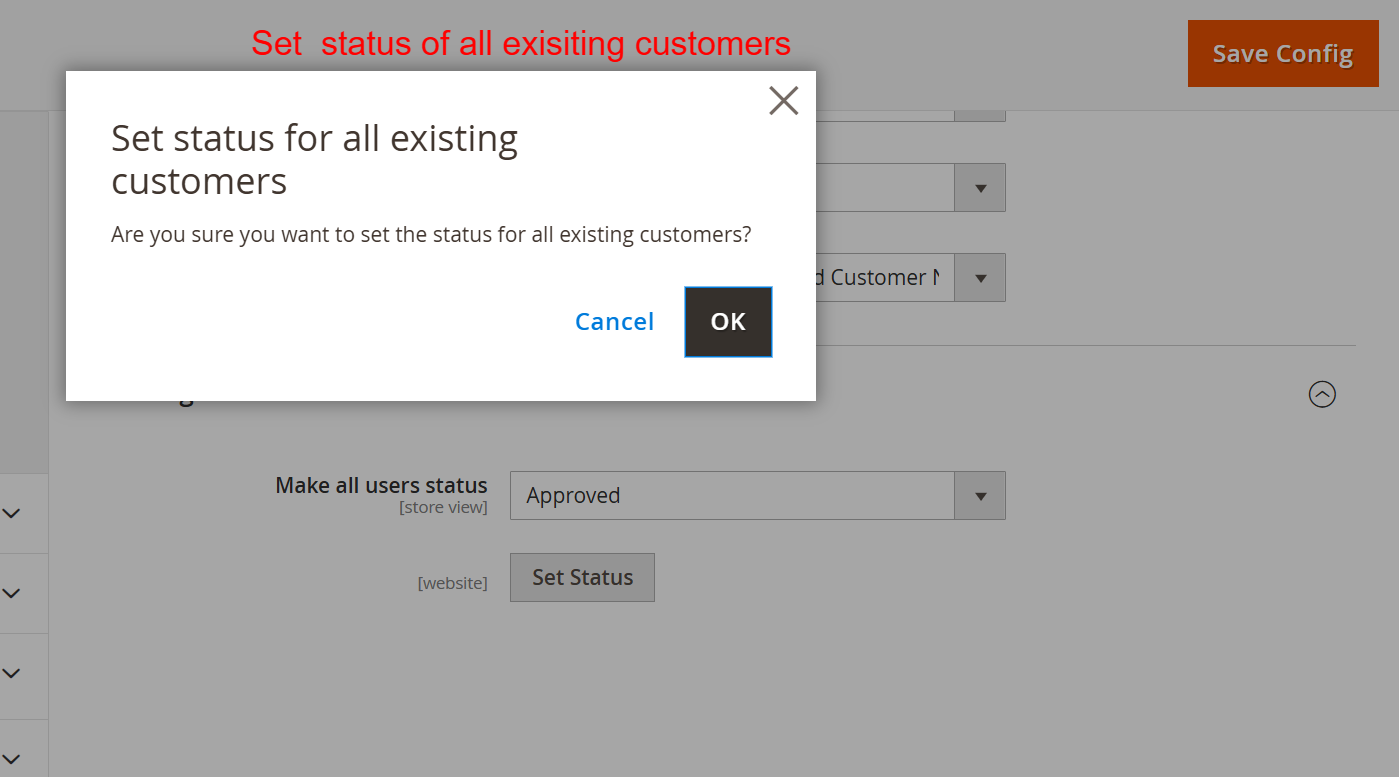
Set Status for All Existing Customers
What this shows: A dialog box confirming the action to set the status for all existing customers, accompanied by buttons for confirmation.
Use this feature to uniformly set the status of all existing customers, which helps maintain consistent registration statuses across your customer base. This is particularly useful during initial setup or when changing default approval flows.
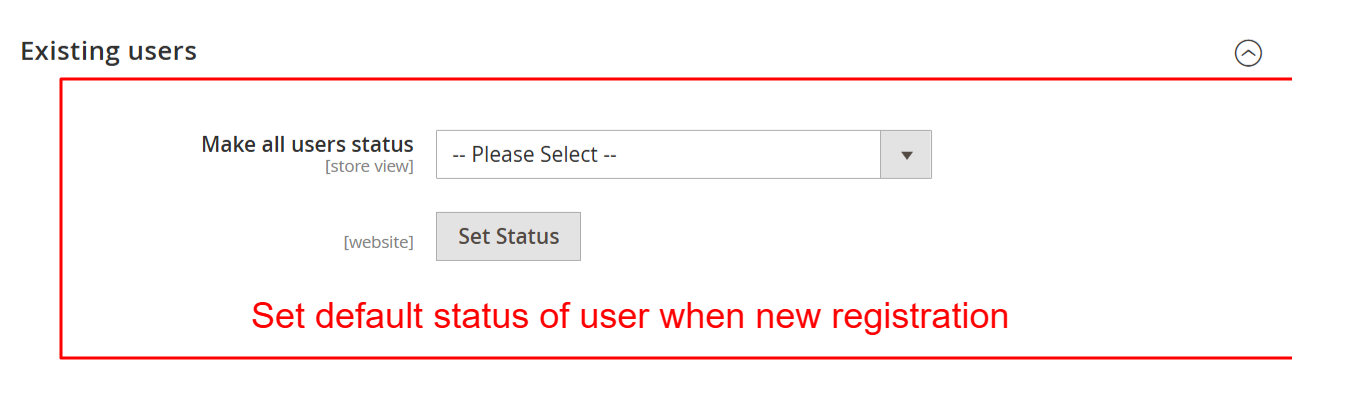
Set Default Status of New Registrations
What this shows: Options to set the default status for all users upon new registration, with a dropdown for selecting the status and a ‘Set Status’ button.
This setting defines the default status assigned to users after registration, allowing admins to control the access level or activation process. By determining this default, you ensure new users start with the appropriate status, facilitating smoother onboarding processes.
Dashboard: Registration Forms Overview
What this shows: The dashboard displays a table listing registration forms, including columns for Form Name, Identifier, Store View, URL, Page Title, Login Button, Header Link, and A…