Configuration Walkthrough
Activate the Plugin
To start using the Registration Field Suite, go to Plugins > Installed Plugins in your WordPress admin panel. Find ‘Registration Field Suite’ and click on Activate to enable the plugin’s functionalities. This action activates both the custom registration features and the pending registration approval system necessary for your site’s registration flows.
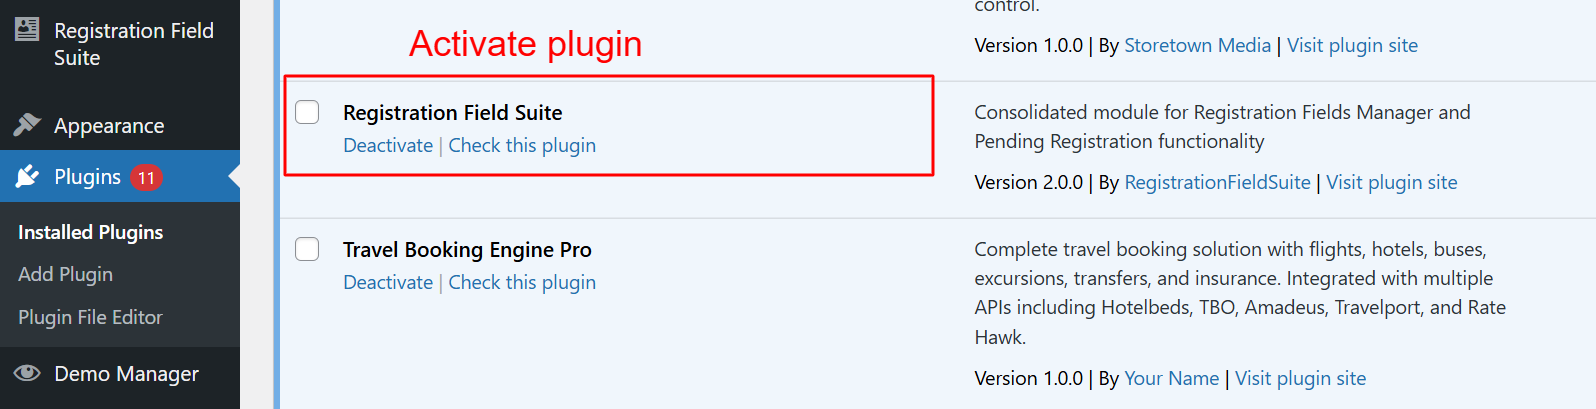
To begin using the features of the Registration Field Suite v2.0.0, administrators must first activate the plugin from the WordPress plugins page. This step is crucial as it enables the consolidated functionalities of custom registration fields and pending registration handling, which can then be configured according to the site’s needs.
Configure General Settings
Access the Registration Field Suite menu and select Settings to open configuration options. Under General, toggle Enable Registration Fields to activate or deactivate custom fields. Customize these settings to fit site-specific data requirements and enhance user registration.
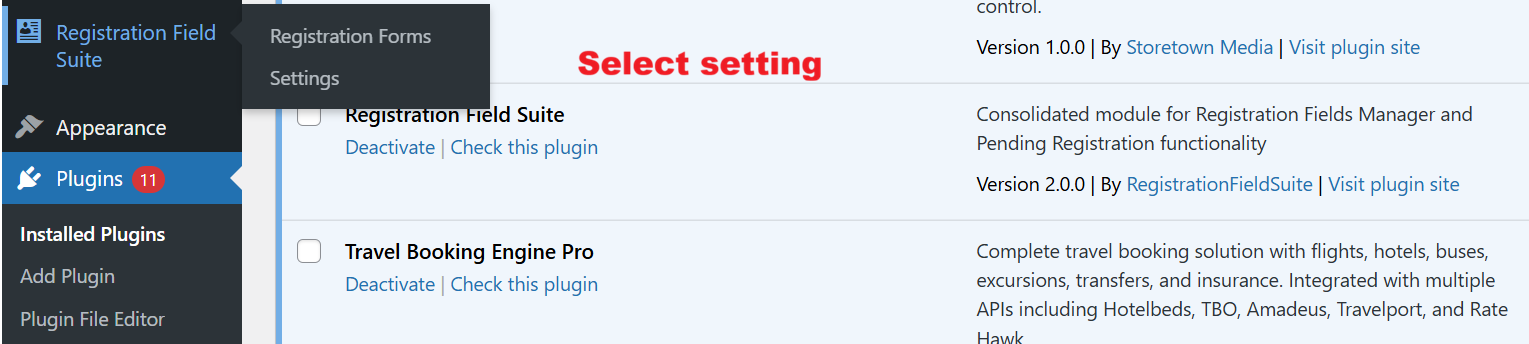
Once the Registration Field Suite is activated, navigate to its settings area to start managing registration forms and configuring general settings. Selecting ‘Settings’ opens up pathways to enable custom registration options, crucial for tailoring user registration experiences.
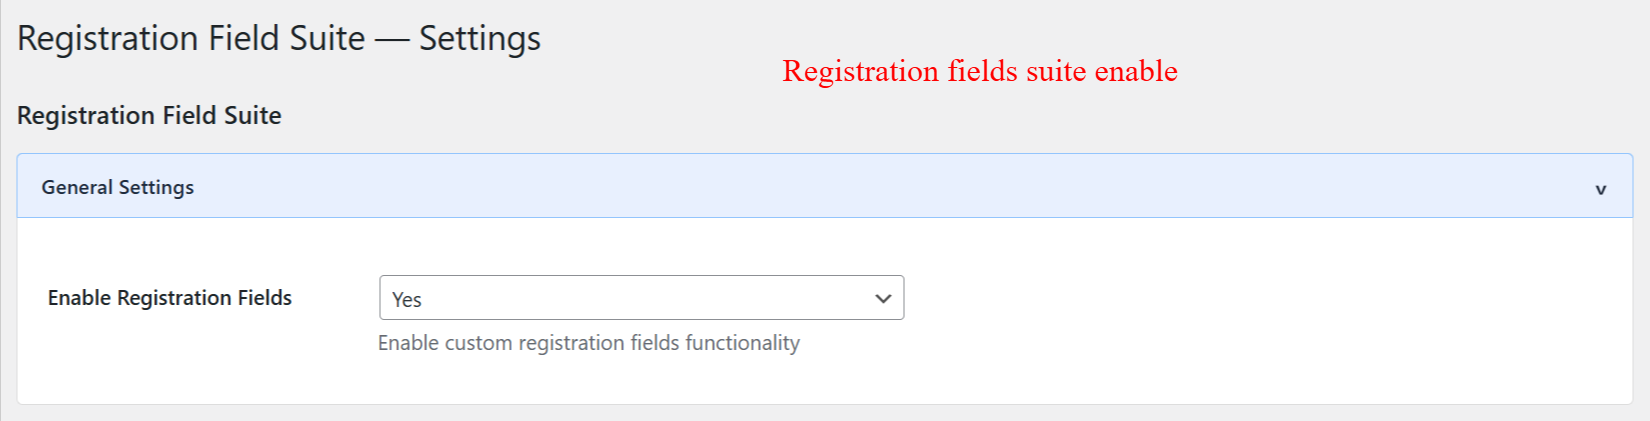
In the General Settings section, administrators can enable or disable the custom registration fields feature. Activating this setting allows customized fields to be included in the user registration process, offering a personalized registration experience tailored to the website’s specific data collection needs.
Set AI Key Configurations
Under the AI Form Generator tab in Settings, input APIs for your chosen AI provider, such as OpenAI or Google. These keys enable AI-driven features for form creation, facilitating faster development and maintenance of professional registration forms.
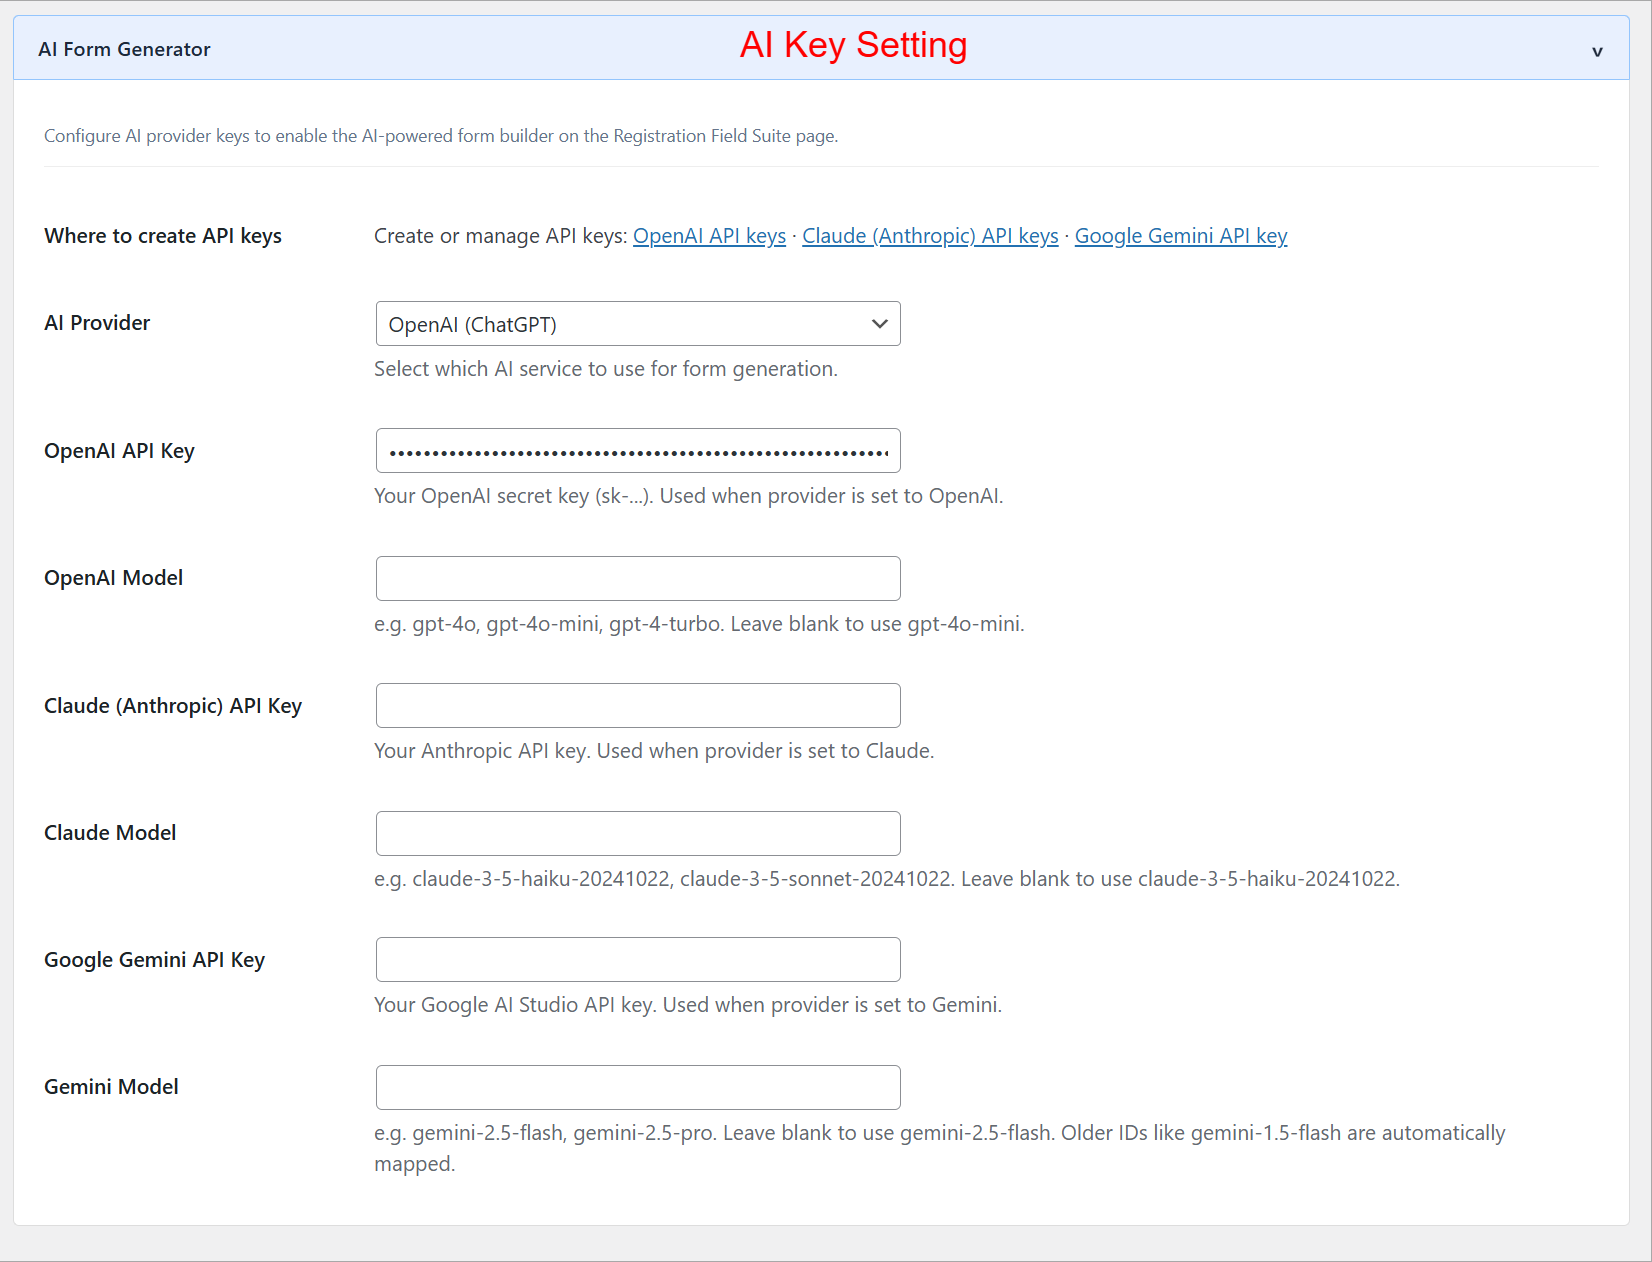
This interface allows administrators to input API keys for AI services to leverage form generation capabilities powered by AI. By configuring these settings, users can utilize advanced AI tools like OpenAI’s ChatGPT, enhancing the functionality and responsiveness of registration forms within the suite.
Enable Pending Registration
Navigate to the Pending Registration settings to require admin approval for new users. Select which customer roles need approval, set status defaults, and configure automated workflows to manage user entries effectively.
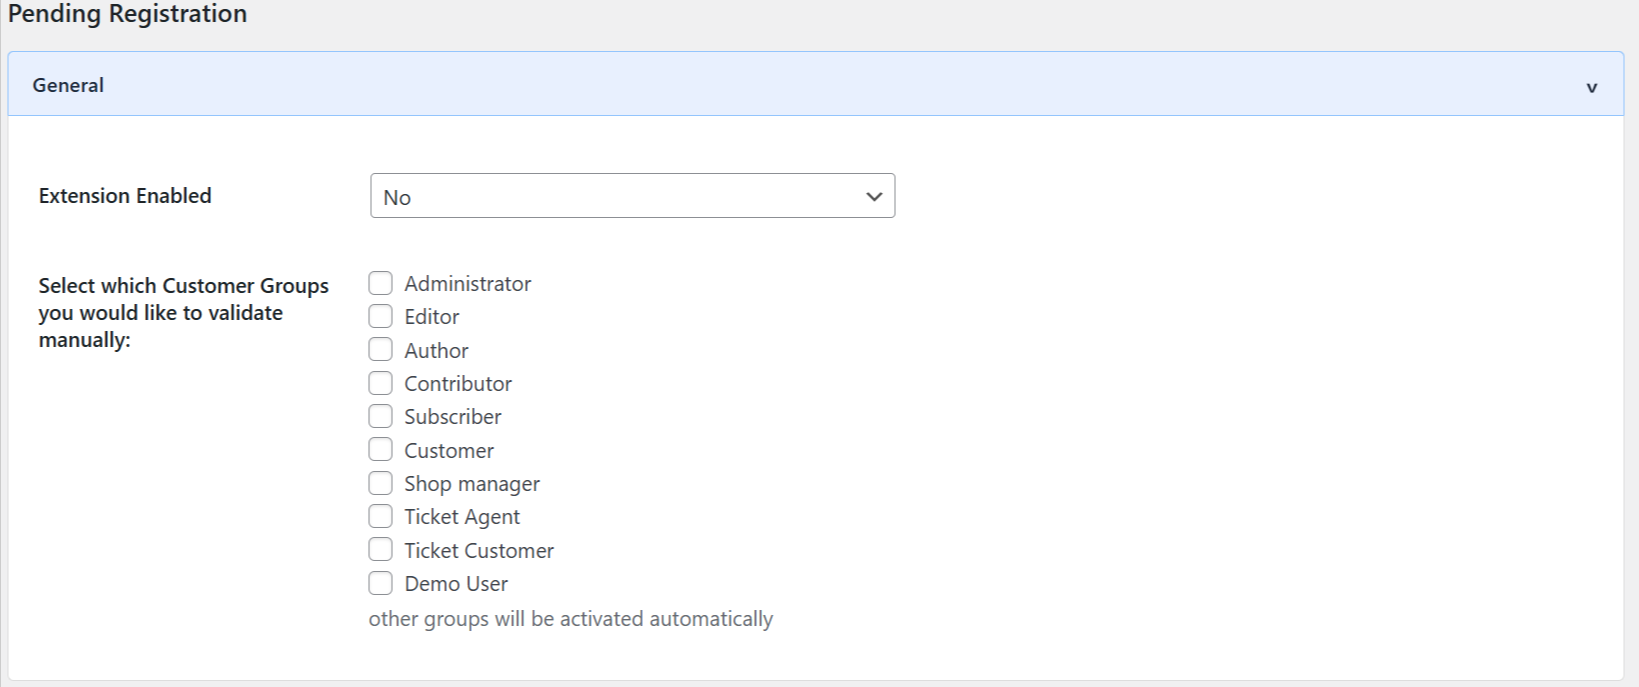
Pending Registration settings are pivotal for managing new user entries that require approval. Administrators can choose which customer groups need manual validation, thus exercising control over who gets immediate access and ensuring that only pre-approved users join the platform.
Setup Email Notifications
Configure Email Notifications to keep parties informed about registration events. Input your email settings, select templates, and adjust sender details to ensure consistent communication for registration processes.
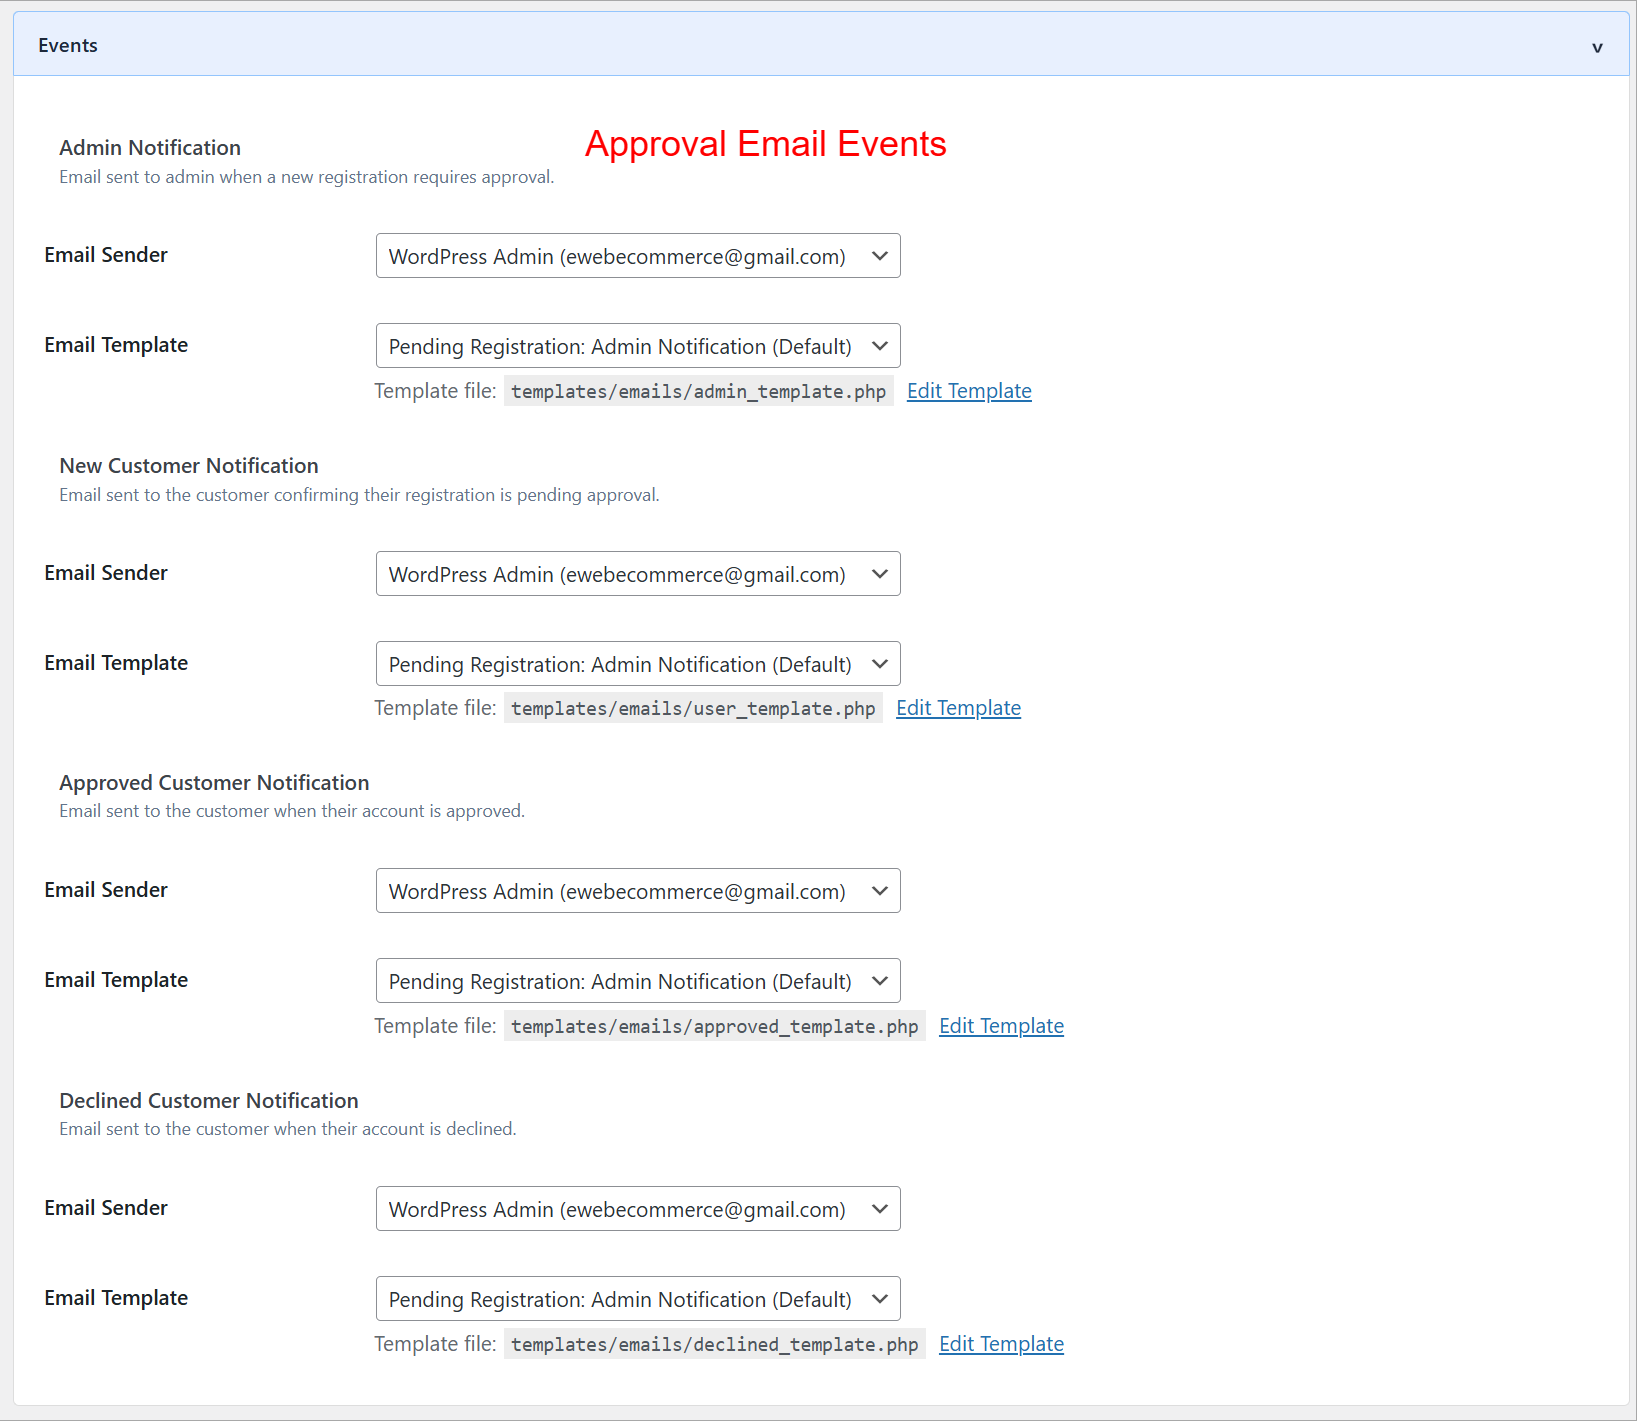
The Email Notifications settings let administrators configure email details for various registration events, ensuring both administrators and users are kept informed about account statuses. Configuring these notifications is essential for maintaining effective communication and efficiency in handling pending registrations.
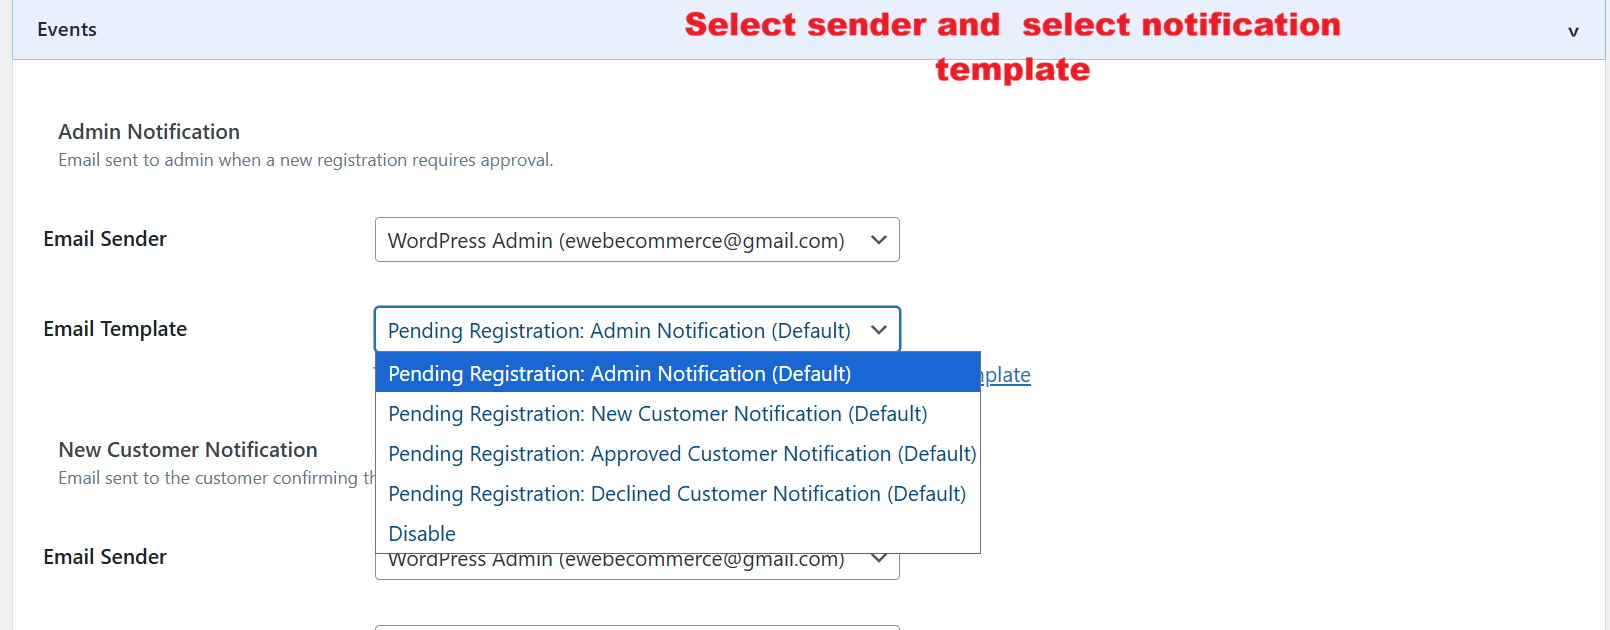
This interface allows administrators to select and customize email templates for notifications triggered by registration events. Customizing these templates, including sender info, helps align communications with the site’s branding, ensuring consistent and professional interaction with users during the registration process.
Customize User Status Settings
In User Approval Settings, specify default user statuses using the dropdown menu. This consistent setup ensures that your users are correctly categorized and processed as per the system’s logic, maintaining structured user management flows.
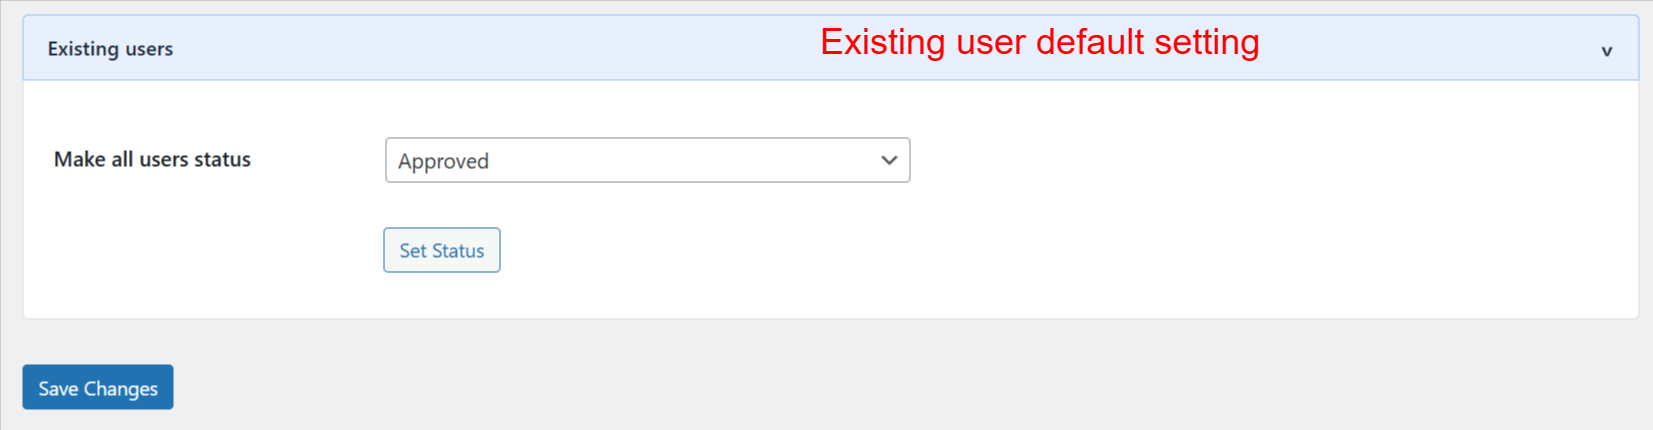
On this configuration screen, administrators can set the default approval status for all existing users. This feature is essential for maintaining standardized user statuses throughout the site. By selecting the desired status from the dropdown and clicking ‘Set Status,’ admins ensure consistency and visibility across user management operations.